Playwright Visual Testing: Screenshot Comparison Setup & CI Guide
Playwright visual testing guide covering setup, baselines, CI stability, diff tuning, and fixing visual failures with screenshots and snapshots.


Imagine you ship a UI change that passes every functional test.
Then a user opens the page, and something looks off: the button shifts, the layout breaks, or a banner covers the screen.
That is what Playwright visual testing is for.
Playwright visual testing compares screenshots against baseline images and fails tests when pixels differ beyond configured tolerances.
In this Playwright visual testing guide, you will set up a minimal visual test, stabilize it in CI, tune the diff settings, and review failures with clear expected, actual, and diff images.
Visual regression testing is essential for UI development to ensure interface consistency and catch visual changes that might otherwise go unnoticed.
Now that you know what happens, here is the smallest possible test you can run.
Quick start with toHaveScreenshot()
1. Install Playwright
If you already have Playwright installed, skip this.
npm init -y
npm install -D @playwright/test
npx playwright install
2. Write your first visual test
Begin with a full-page snapshot to view the complete Playwright visual testing workflow.
Create a new test file where you will write your home page visual test. This test will capture a screenshot of the homepage and compare it to the baseline to ensure visual integrity for Playwright visual testing.
import { test, expect } from '@playwright/test';
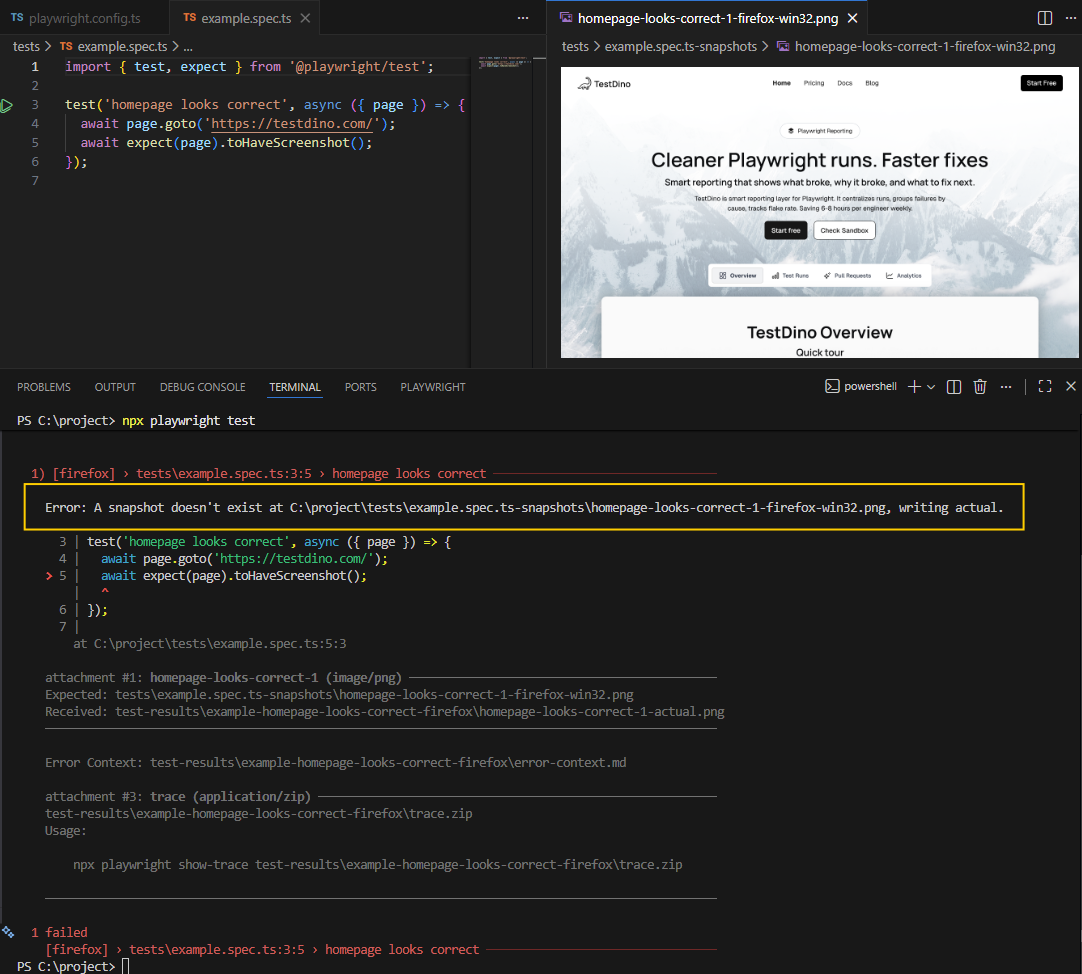
test('homepage looks correct', async ({ page }) => {
await page.goto('https://testdino.com/');
await expect(page).toHaveScreenshot();
});
3. Run once to create a baseline
On the first run, Playwright needs a baseline image to compare against. If no snapshot exists yet, Playwright will save the "actual" screenshot and show an error. This first failure is normal in Playwright visual testing.
Run your tests:
npx playwright test
Output:
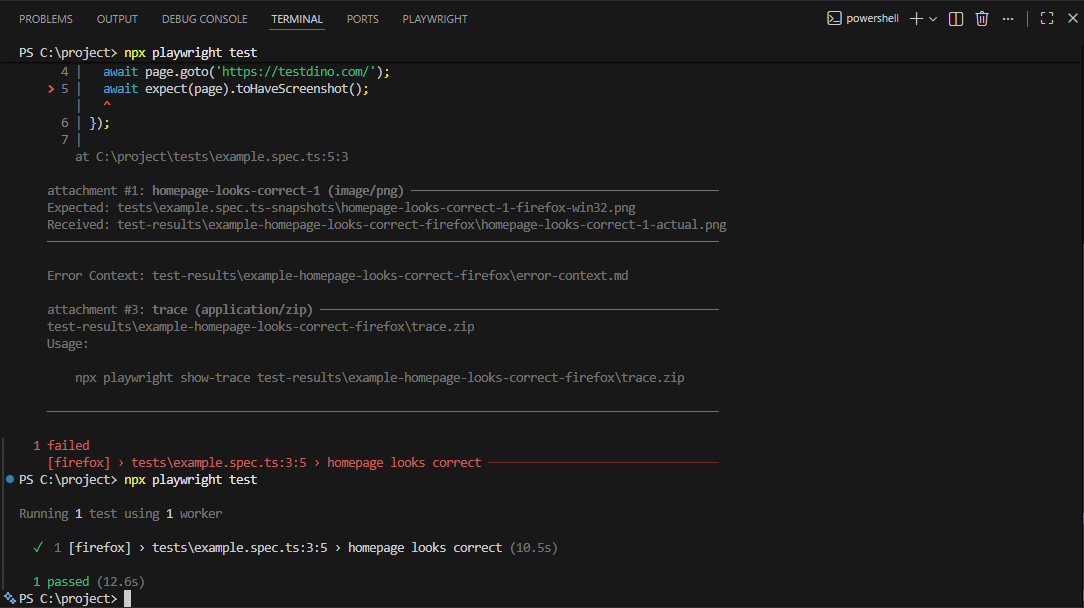
Now run the same command one more time. Playwright will compare the current screenshot against the saved baseline:
npx playwright test
Output:
Best Practice: Use --update-snapshots only when you intentionally changed the UI and want to update the baseline.
Stability checklist for reliable visual tests
Visual diffs are usually caused by timing, rendering, or environment drift. This checklist fixes the most common issues.
Running visual tests in a consistent environment, such as a dedicated test environment or CI, is crucial to avoid false positives caused by device or setup differences. This ensures that screenshots are created and compared under the same conditions, making your Playwright visual testing more reliable.
To ensure reliable Playwright visual testing, follow these steps:
-
Wait for the page to settle
-
Disable animations and transitions
-
Wait for fonts
-
Lock your viewport per project
-
Mask dynamic regions
Wait for the page to settle
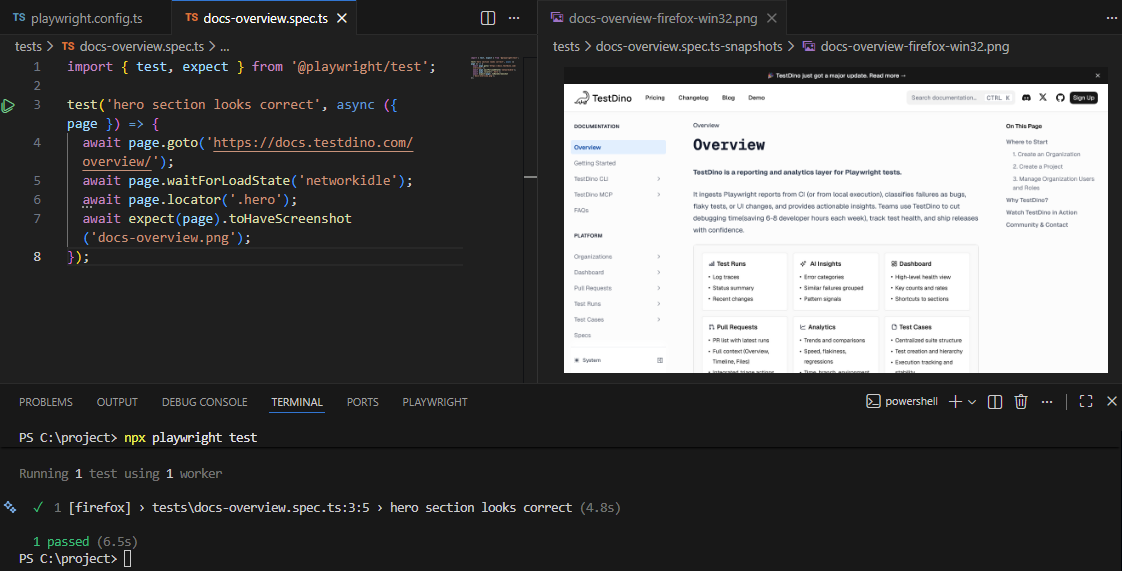
For Playwright visual testing, take screenshots after your UI is actually ready:
import { test, expect } from '@playwright/test';

test('hero section looks correct', async ({ page }) => {
  await page.goto('https://docs.testdino.com/overview/');
  await page.waitForLoadState('networkidle');
  await page.locator('.hero');
  await expect(page).toHaveScreenshot('docs-overview.png');
});
Output:
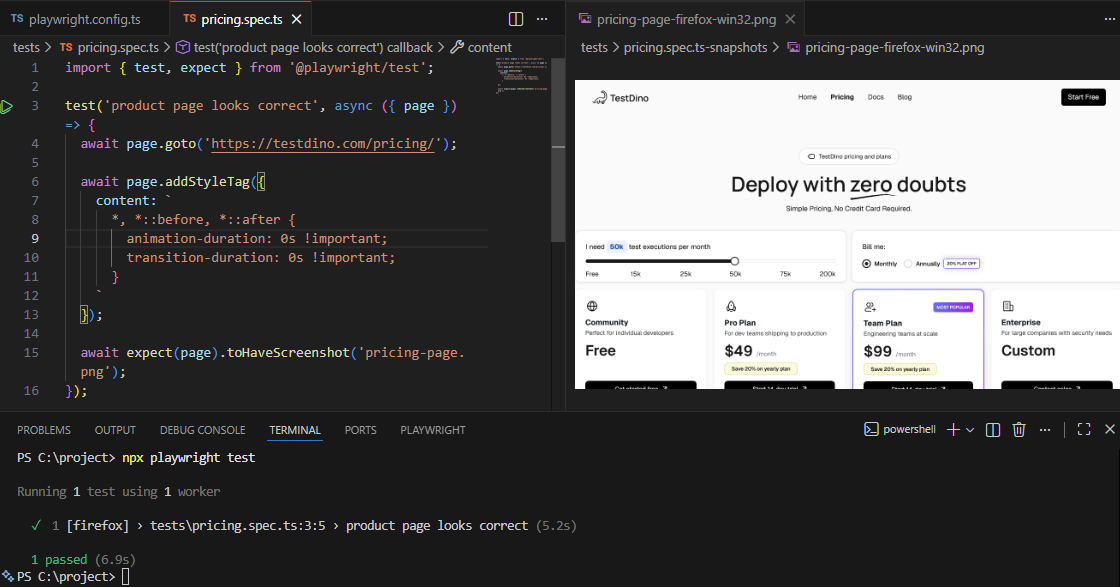
Disable animations and transitions
Animations are one of the fastest ways to create flaky diffs in Playwright visual testing.
import { test, expect } from '@playwright/test';

test('product page looks correct', async ({ page }) => {
  await page.goto('https://testdino.com/pricing/');

  await page.addStyleTag({
    content: `
      *, *::before, *::after {
        animation-duration: 0s !important;
        transition-duration: 0s !important;
      }
    `
  });

  await expect(page).toHaveScreenshot('pricing-page.png');
});
Output:
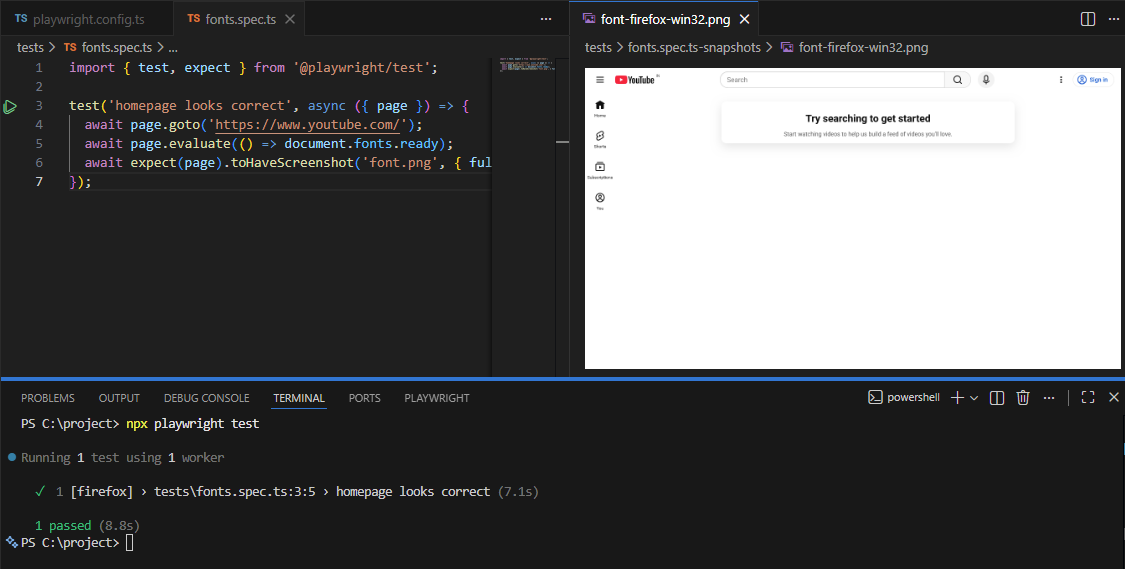
Wait for fonts
In Playwright visual testing, font loading differences appear as layout shifts and changes in text rasterization.
import { test, expect } from '@playwright/test';

test('homepage looks correct', async ({ page }) => {
  await page.goto('https://www.youtube.com/');
  await page.evaluate(() => document.fonts.ready);
  await expect(page).toHaveScreenshot('font.png', { fullPage: true });
});
Output:
Lock your viewport per project
If the viewport changes, the layout changes. Define it once in your config. This is especially important for Playwright visual testing in CI.
For advanced browser testing and reporting, consider using the TestDino Playwright Dashboard.
import { defineConfig } from '@playwright/test';

export default defineConfig({
  projects: [
    { name: 'desktop', use: { viewport: { width: 1280, height: 720 } } },
    { name: 'mobile', use: { viewport: { width: 375, height: 667 } } }
  ]
});
This config sets the browser window size for each Playwright project, ensuring your UI renders consistently on every run.
width and height are the viewport dimensions in pixels, which control responsive breakpoints and layout.
1280 × 720 is a common desktop baseline, and 375 × 667 matches a typical mobile screen size, allowing you to catch desktop and mobile layout changes consistently.
Mask dynamic regions
Mask anything that is expected to change (timestamps, ads, avatars). mask tells Playwright to ignore specific parts of the screenshot during comparison. Masking keeps Playwright visual testing focused on real UI changes, not dynamic content noise.
await expect(page).toHaveScreenshot({
  mask: [
    page.locator('.timestamp'),
    page.locator('.user-avatar'),
    page.locator('.ad-banner')
  ]
});
These page.locator(...) entries point to parts of the UI that change between runs, even when nothing is actually broken. By masking them, Playwright ignores pixel diffs in those regions, so your visual test only fails for meaningful UI changes.
Each page.locator(...) points to a dynamic element, like a timestamp, avatar, or ad, that can change between runs.
-
Timestamps change every run.
-
Avatars can load late or vary by user or environment.
-
Ads and banners are often personalized, A/B tested, or injected by third parties.
Those areas are still visible in the screenshot, but differences inside them will not fail the test.
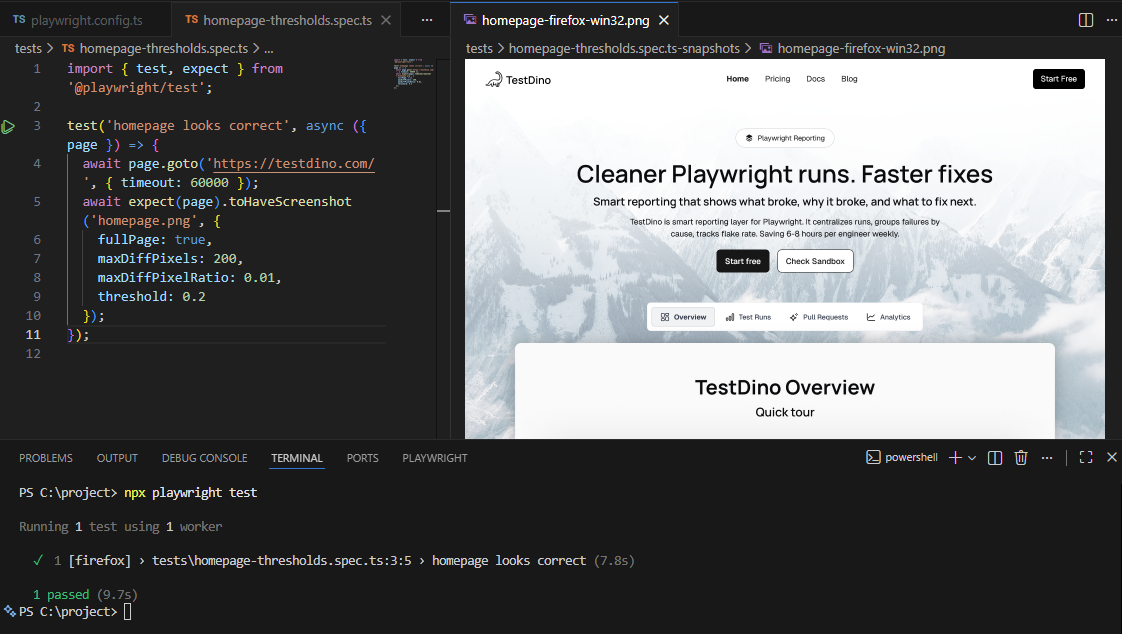
Diff settings that reduce false alarms
Playwright provides configuration options for toHaveScreenshot() for visual testing, that you can adjust to reduce noisy diffs without hiding real UI regressions.
What the common options mean:
| Option | What it controls | Good starting point |
|---|---|---|
| maxDiffPixels | Absolute number of pixels allowed to differ | 50 to 200 |
| maxDiffPixelRatio | Percent of pixels allowed to differ | 0.005 to 0.02 |
| threshold | Per-pixel color difference tolerance | 0.1 to 0.3 |
Here is a practical default you can apply to noisy pages:
import { test, expect } from '@playwright/test';

test('homepage looks correct', async ({ page }) => {
  await page.goto('https://testdino.com/', { timeout: 60000 });
  await expect(page).toHaveScreenshot('homepage.png', {
    fullPage: true,
    maxDiffPixels: 200,
    maxDiffPixelRatio: 0.01,
    threshold: 0.2
  });
});
Output:
If your failures are mostly related to text rendering, start by increasing the tolerance slightly.
If your failures are missing elements or layout shifts, focus on strict tolerance and prioritize fixing stability instead.
Next, you need a baseline strategy that does not fall apart in CI.

Manage baselines safely
Keep baselines in version control
In Playwright visual regression testing, baselines are part of your test suite.
Commit them so every developer and every CI run compares against the same reference.
Update snapshots deliberately
Do not run --update-snapshots as a reflex.
Review the diff images in Git before committing.
Use per-branch snapshot folders when needed
If you maintain long-lived branches with different UI, isolate baselines per branch.
import { defineConfig } from '@playwright/test';

const branch = process.env.BRANCH_NAME || 'main';

export default defineConfig({
  snapshotPathTemplate: `{testDir}/visual-baselines/${branch}/{testFilePath}/{arg}{ext}`
});
Now you can move from local runs to CI with fewer surprises.
Run visual tests in CI
Here is a minimal GitHub Actions pattern:
- name: Run Playwright tests
  run: npx playwright test
To compare test reporting tools, see Compare TestDino to Other Top Test Reporting Tools.
If you send results to a dashboard, uploads must run even when tests fail. Most of the time, you only care about artifacts when the run is red.
# .github/workflows/playwright.yml
- name: Upload to TestDino
  if: always()
  run: npx tdpw upload ./playwright-report --token="${{ secrets.TESTDINO_TOKEN }}" --upload-full-json
Playwright already generates everything you need: expected, actual, and diff images. The problem is where those artifacts live once the test runs in CI.
Here is the flow most teams end up wanting.
Upload and review visual diffs in TestDino
Playwright produces screenshots and diff images locally. TestDino makes them reviewable in one place, tied to your branch and commit context.
Here is the flow most teams end up wanting:
1. A visual test fails in CI
A screenshot assertion fails, and Playwright writes the expected, actual, and diff images into the run artifacts.
At this point, the question is not "did it fail?" The question is:
"Is this a real UI regression or just rendering noise?"
2. Artifacts are uploaded automatically
To make the failure reviewable, you upload the report output from CI.
Before the upload works reliably, your Playwright config needs to produce artifacts in a predictable folder.
import { defineConfig } from '@playwright/test';

export default defineConfig({
  reporter: [
    ['json', { outputFile: './playwright-report/report.json' }],
    ['html', { outputDir: './playwright-report' }]
  ],
  use: {
    screenshot: 'only-on-failure',
    trace: 'on-first-retry'
  }
});
Now, CI has the same output shape every run, so the uploader can be simple.
npx tdpw upload ./playwright-report --token="your-api-key" --upload-full-json
If you only want image artifacts, upload images explicitly:
npx tdpw upload ./playwright-report --token="your-api-key" --upload-images
3. A reviewer opens the run
Instead of hunting through CI artifacts, the reviewer opens the run and clicks into the failed test.
This is where the review becomes fast. The context is already attached to the run: branch, commit, attempt, and browser project.
4. Diff first, then confirm with expected and actual
Start with the diff view. It answers "what moved" in seconds by allowing you to visually compare the expected, actual, and diff images to identify any changes quickly. This is the fastest way to review Playwright visual comparisons.
Then flip to expected and actual to confirm whether it is a real regression or just noise.
In TestDino, the Visual Comparison panel supports:
-
Diff
-
Actual
-
Expected
-
Side by side
-
Slider
5. Use the same quick triage every time
This is the review loop that keeps visual testing from turning into a time sink:
-
Check which browser projects failed (chromium, firefox, webkit)
-
Check attempts and retries to spot flakes versus consistent failures
-
Open diff first, then validate in expected and actual
-
If many tests fail together, suspect a shared CSS or layout change
That is it. You are not trying to "analyze screenshots." You are trying to answer one question quickly: regression or noise.
Now, let's cover the failures you will see in real projects when doing visual regression testing with Playwright.
Troubleshooting common visual failures
Most Playwright visual regression testing failures fall into a few repeatable patterns.
Screenshot does not match baseline
This is the normal failure mode.
-
If the UI change is intentional, update snapshots and commit
-
If the UI change is not intentional, fix the code
-
If it is noise, stabilize timing, fonts, animations, or masking
Baseline not found
This happens on new tests, new browsers, or when snapshots are deleted.
-
Run the test locally once to generate the baseline
-
Commit the snapshot file
-
Ensure CI uses the same snapshot files
Passes locally but fails in CI
This is almost always environment drift.
-
Different OS font rasterization
-
Different browser versions
-
Missing fonts in CI
-
Different viewport or locale
Fix it by locking the viewport, waiting for fonts, disabling animations, and running in Docker when needed.
Conclusion
Playwright visual testing is straightforward to start: add toHaveScreenshot(), run once to create baselines, then compare on every change.
Visual testing ensures the user interface remains consistent and visually appealing, helping teams catch issues early and streamline development.
The real work is:
-
Maintaining stability
-
Establishing a baseline discipline
-
Conducting a clean CI review
Playwright visual regression testing ensures visual integrity by detecting unintended changes in the application's appearance, layout, and design, maintaining a high-quality user experience across devices and updates.
FAQs
Table of content
Flaky tests killing your velocity?
TestDino auto-detects flakiness, categorizes root causes, tracks patterns over time.
Follow Us