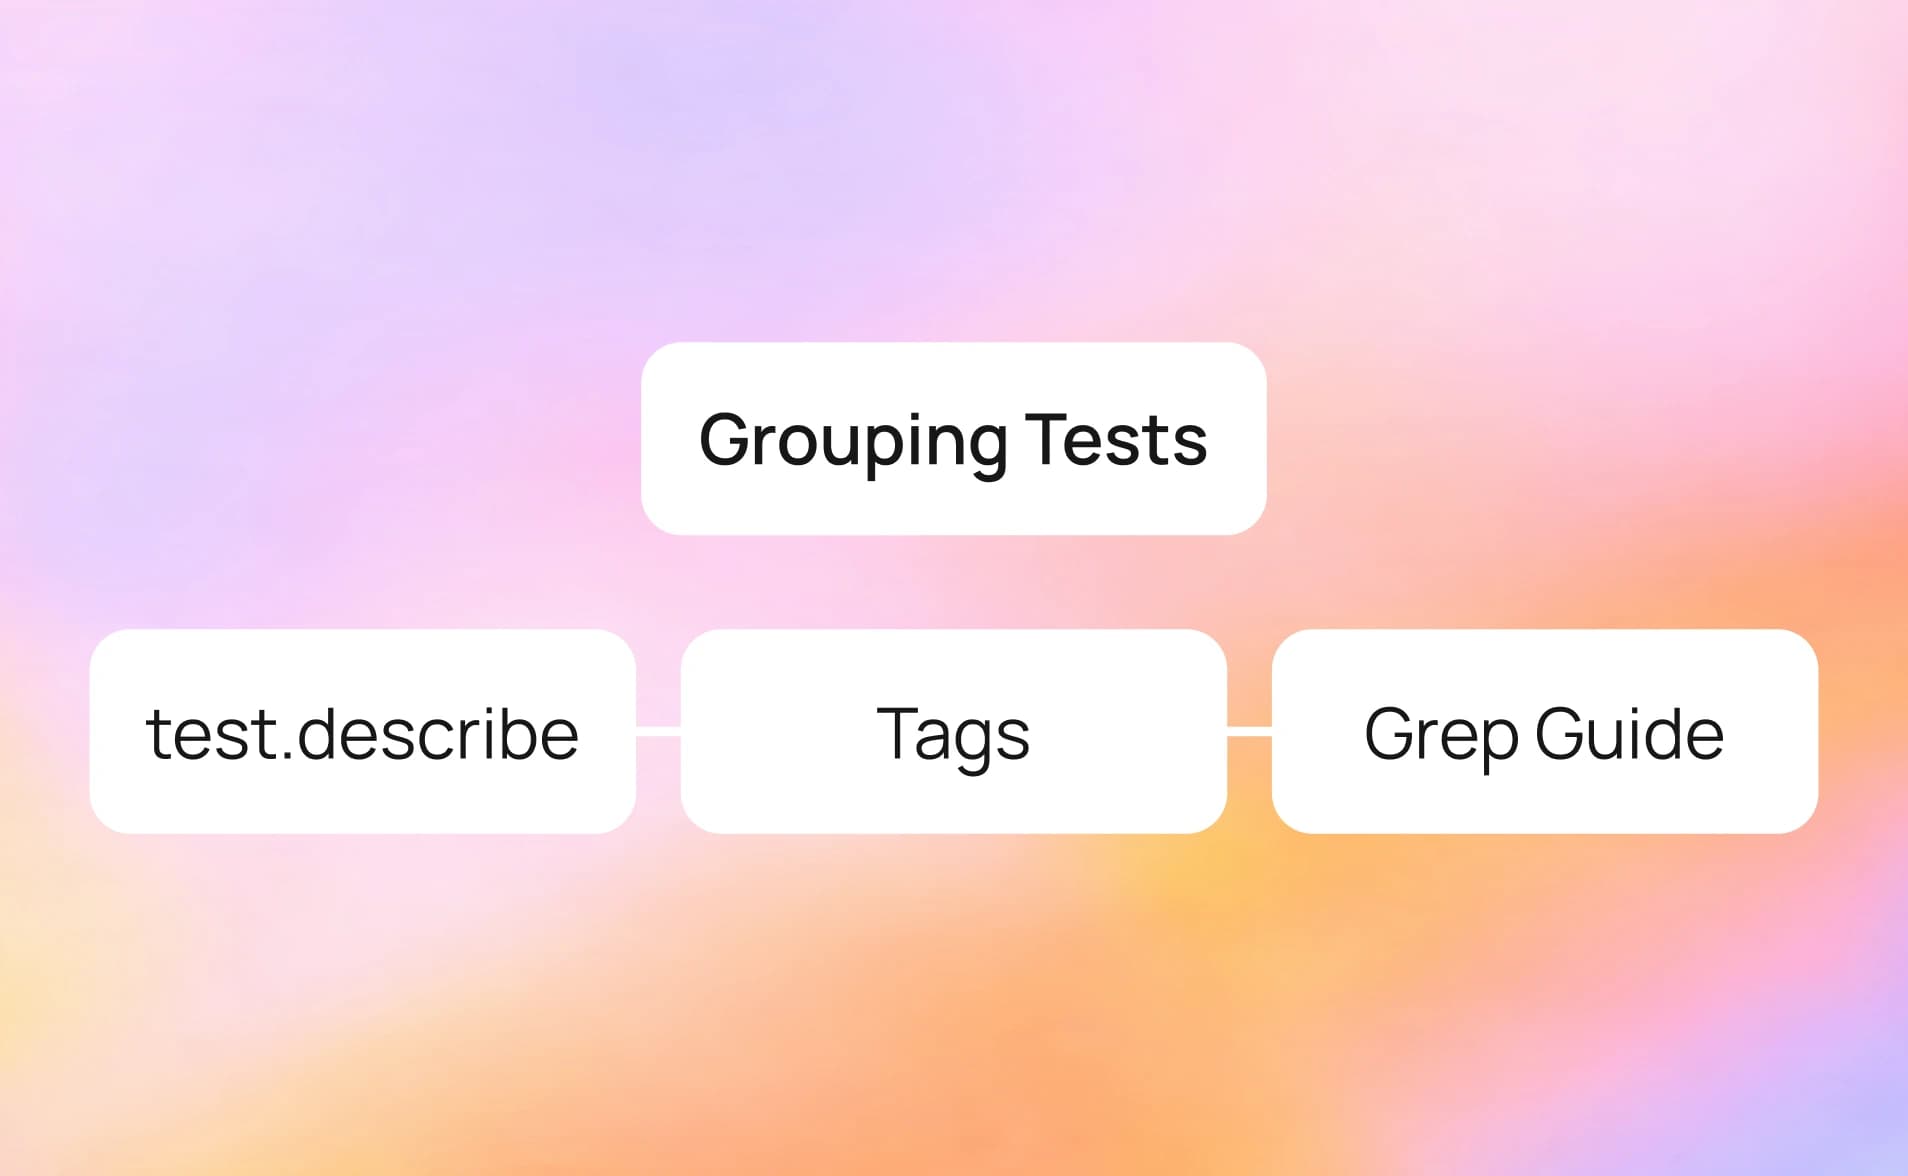
Grouping Playwright Tests: test.describe, Tags & Grep Guide
Group Playwright tests using test.describe, tags, and grep to speed up CI, run focused smoke and regression suites, and keep reports clean and actionable for your team.
Playwright gives you a way to bundle tests together under a name, stick labels on them, and then tell the runner "only run the ones with this label."
The grouping shows up in your test reports, so when something fails, you immediately know which part of the app it belongs to.
The trouble is, most projects skip this step early on. Tests pile up in flat files, every CI run triggers every test, and a single failure in a 200-test report becomes a needle in a haystack. That is the exact point where teams start losing trust in their test suite.
This guide walks through how to group Playwright tests using test.describe, tags, and the --grep flag, with examples you can drop into a real project today.
What is test.describe and How does it group tests?
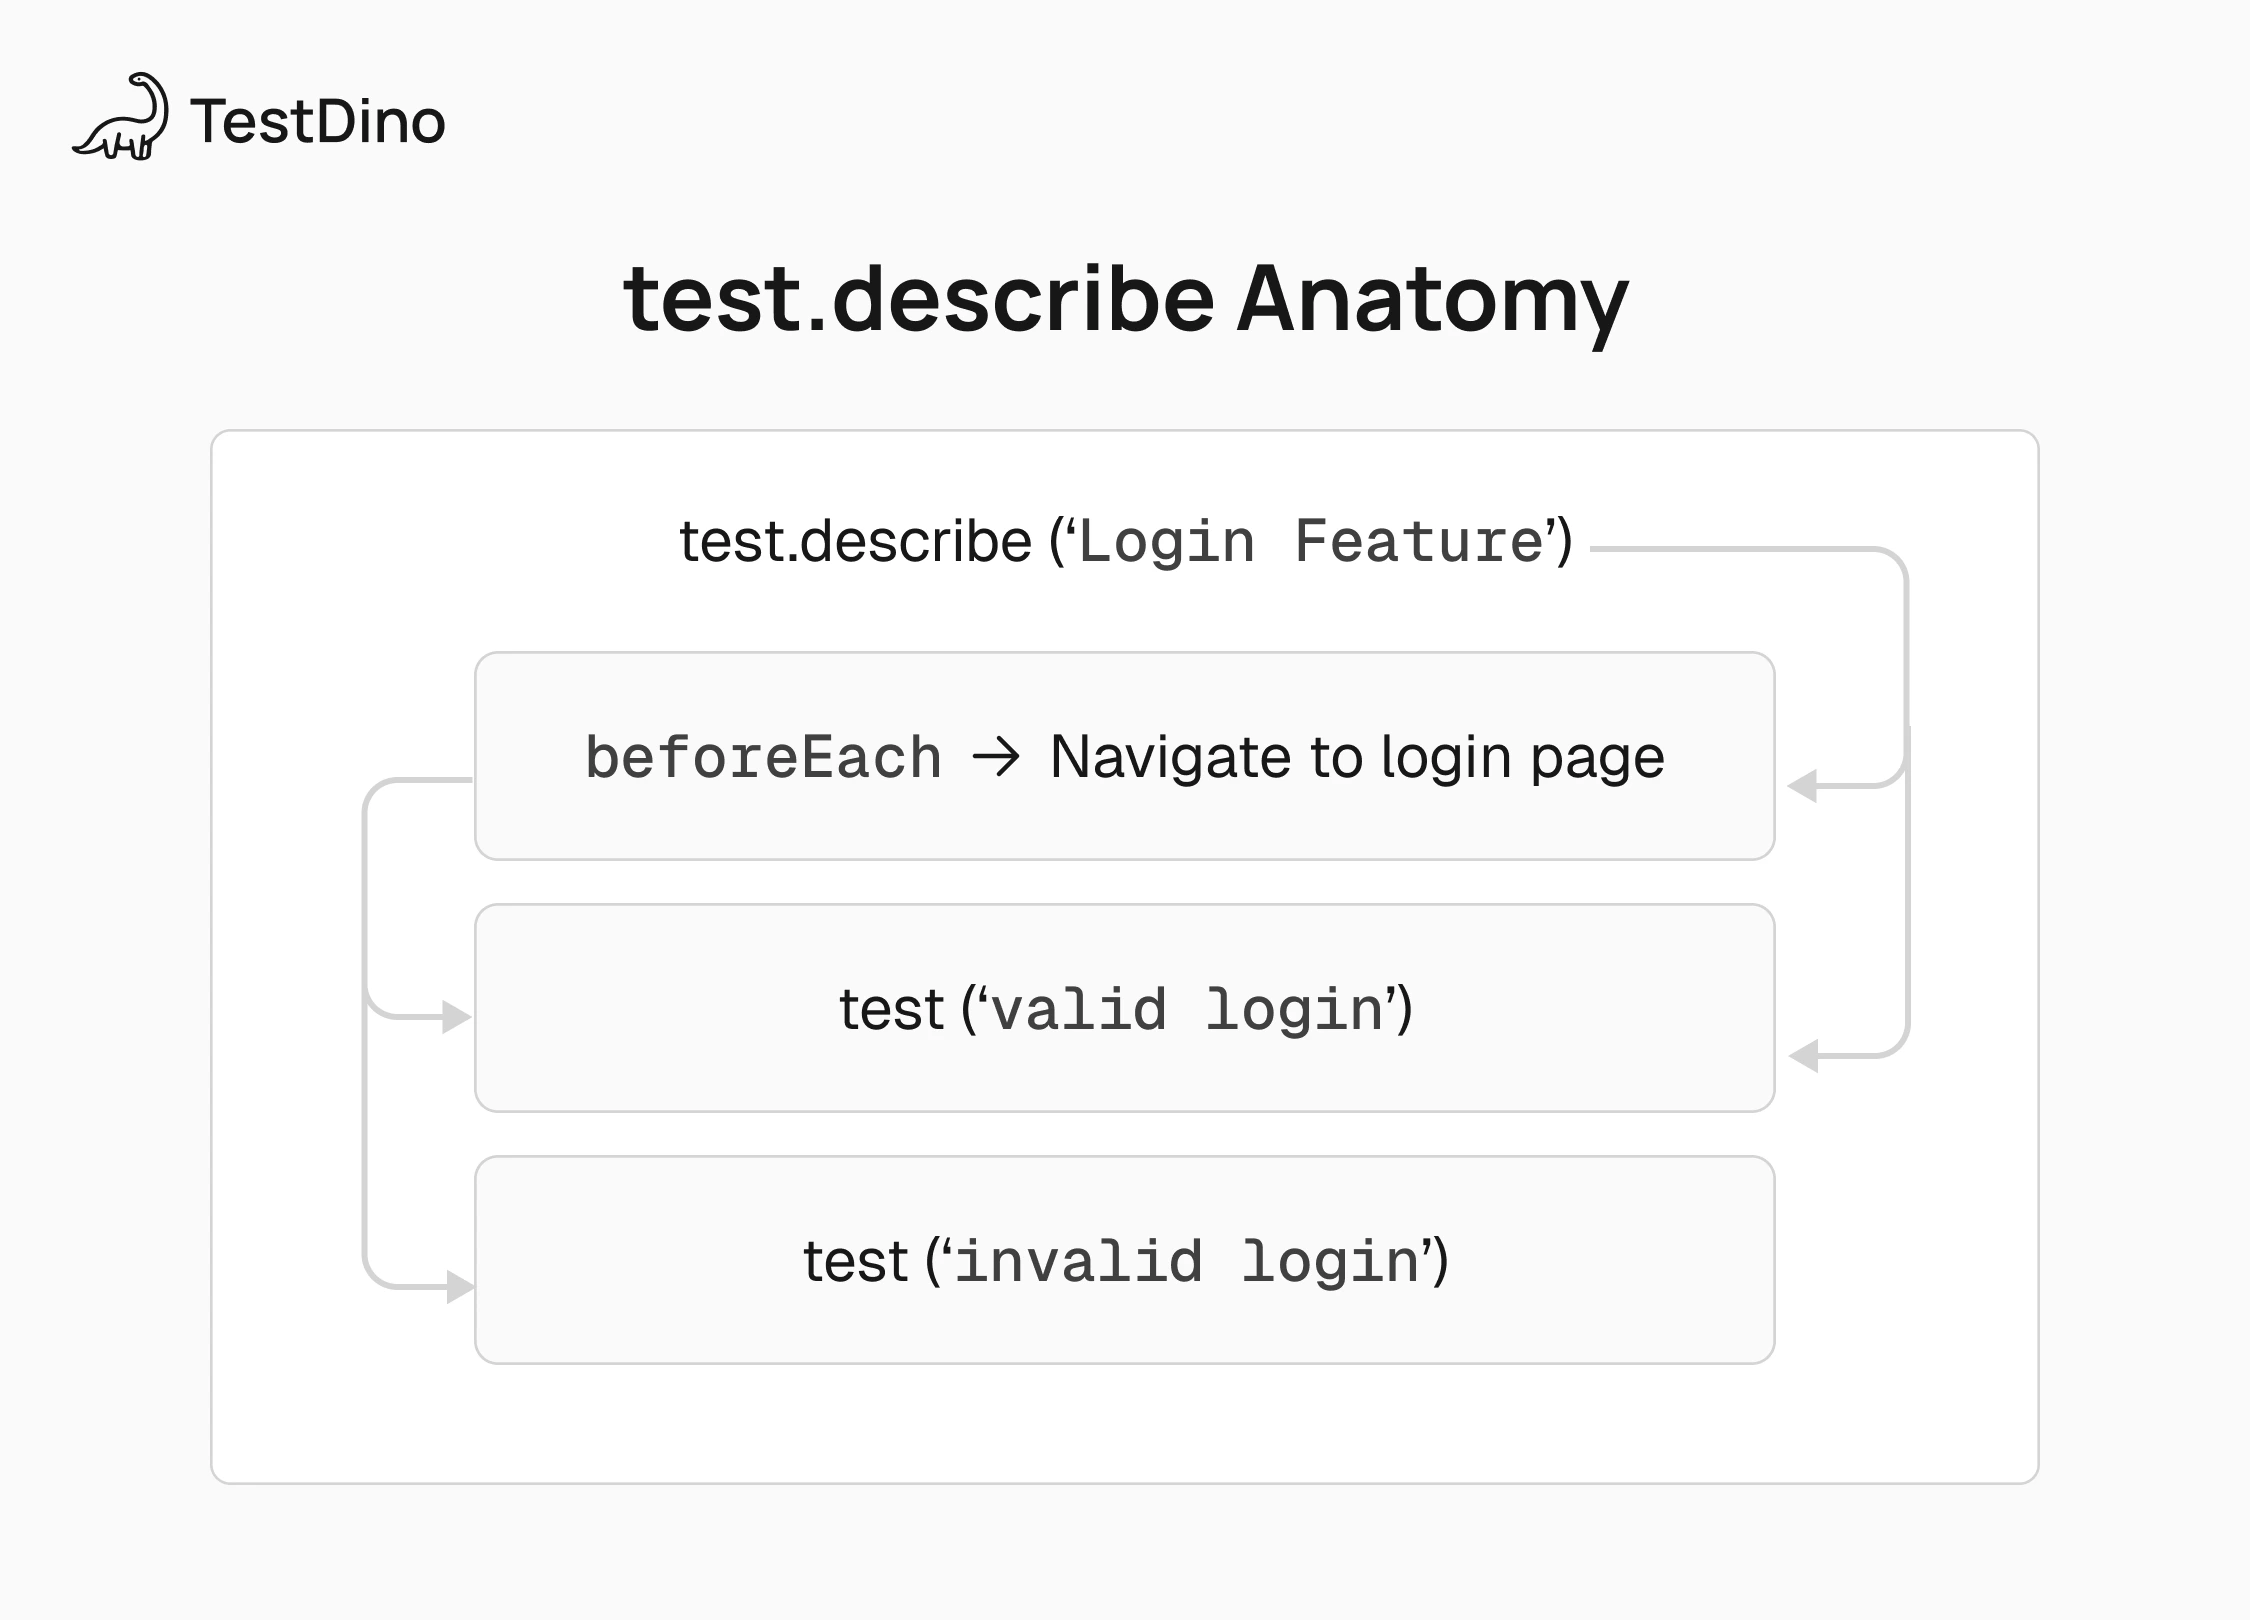
test.describe is Playwright's API for wrapping related tests inside a named block. It takes a title and a callback, and every test declared inside that callback belongs to the group.
When you have hundreds of tests across dozens of files, seeing the group name right next to the test name tells you exactly which part of the app broke, without even opening the file.
The title you give the block becomes a prefix in the test report. So a test called 'should show error' inside test.describe('Login Page', ...) shows up as Login Page › should show error in your results.
But naming is only the beginning. Grouping Playwright tests also unlocks three other capabilities that matter as your project grows:
Scoped hooks. You can attach beforeEach, afterEach, beforeAll, and afterAll hooks to a specific group, so setup logic only runs for the tests that actually need it.
Shared configuration. Using test.use() inside a describe block lets you apply browser settings, viewport sizes, or authentication state to just that group of tests.
Hierarchical structure. Nesting describe blocks inside each other creates a tree that mirrors your application's feature areas, making it obvious where a failure lives.
Basic syntax and usage
import { test, expect } from "@playwright/test";
test.describe("Login Page", () => {
  test("should display the login form", async ({ page }) => {
    await page.goto("/login");
    await expect(page.locator("#login-form")).toBeVisible();
  });
  test("should reject invalid credentials", async ({ page }) => {
    await page.goto("/login");
    await page.fill("#email", "[email protected]");
    await page.fill("#password", "badpass");
    await page.click("#submit");
    await expect(page.locator(".error-message")).toContainText("Invalid");
  });
  test("should redirect on successful login", async ({ page }) => {
    await page.goto("/login");
    await page.fill("#email", "[email protected]");
    await page.fill("#password", "correctpassword");
    await page.click("#submit");
    await expect(page).toHaveURL("/dashboard");
  });
});
This is the foundation of test suite organization in Playwright. If you are already using Playwright assertions with expect() in your tests, wrapping them inside describe blocks is the natural next step. Every test lives under a clear label, and the report reflects that structure automatically.
Playwright also supports an anonymous form where you skip the title entirely. This is handy when you want to apply a shared option (like dark mode or a specific viewport) to a set of tests without adding a label to the report:
test.describe(() => {
  test.use({ colorScheme: "dark" });
  test("homepage in dark mode", async ({ page }) => {
    await page.goto("/");
    await expect(page.locator("body")).toHaveCSS(
      "background-color",
      "rgb(0, 0, 0)",
    );
  });
});
Nested test.describe blocks for complex suites
You can nest test.describe blocks inside each other. An outer block for the feature, inner blocks for specific user scenarios. Each level gets its own hooks and its own prefix in the report.
test.describe('Checkout Flow', () => {
  test.describe('Path Demo', () => {
    test('should load home page', async ({ page }, testInfo) => {
      await openHome(page);
      await page.screenshot({
        path: testInfo.outputPath(screenshotName(testInfo)),
        fullPage: true,
      });
    });
  });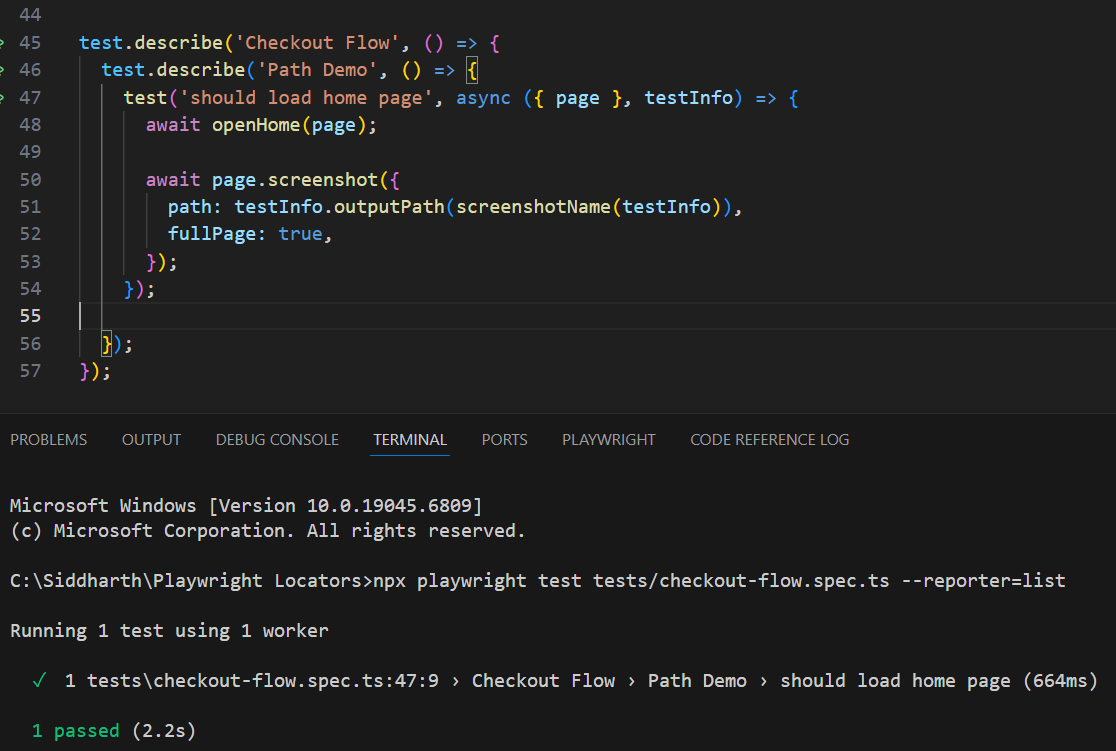
The report tree looks like: Checkout Flow › Path Demo › should load home page.

Tip: Stick to a maximum of three nesting levels. Going deeper usually means the file itself should be split into separate spec files.
One common mistake with nested describe blocks is assuming hooks cascade automatically. They do run in order (outer first, then inner), but each level's beforeEach only applies to its own tests. If a setup step is needed everywhere, put it at the file level.
Applying beforeEach and afterAll hooks inside describe blocks
When you declare beforeEach inside a describe block, it only runs for tests in that block. A beforeEach at the file level runs for every test in the file. This distinction matters because it directly controls what setup each test group gets.
import { test, expect } from "@playwright/test";
// File-level: runs before EVERY test in this file
test.beforeEach(async ({ page }) => {
  await page.goto("/");
});
test.describe("Dashboard", () => {
  // Describe-level: runs only before Dashboard tests
  test.beforeEach(async ({ page }) => {
    await page.click("#nav-dashboard");
  });
  test("should show stats", async ({ page }) => {
    await expect(page.locator("#stats")).toBeVisible();
  });
  test.afterAll(async () => {
    console.log("Dashboard tests done");
  });
});
The execution order for a Dashboard test goes like this:
File-level beforeEach (navigates to /)
Describe-level beforeEach (clicks dashboard nav)
The test itself
Describe-level afterAll (runs once after all Dashboard tests finish)
Note: You can use test.describe.configure({{ mode: 'serial' }}) to force tests inside a block to run one after another instead of in parallel. This is useful for multi-step flows (like onboarding wizards) where each test depends on the previous one completing. Use it sparingly though, because parallel execution is faster and catches more isolation bugs.
Grouping tests with modifiers: test.describe.only vs test.describe.skip
Sometimes you need to temporarily change which groups run. Playwright gives you two modifiers for this.
test.describe.only() tells Playwright to run only this group and skip everything else. It is the go-to for local debugging when you want to isolate a failing group without touching any other code. Pair it with the Playwright Trace Viewer to get a full visual timeline of what happened during the test run.
test.describe.only("Payment Processing", () => {
  test("should process valid card", async ({ page }) => {
    // This WILL run
  });
});
test.describe("User Profile", () => {
  test("should update name", async ({ page }) => {
    // This will NOT run
  });
});
test.describe.skip() does the opposite. It marks the entire group as skipped. Tests show up in the report as "skipped" but never execute. Use this for features that are blocked or under active development.
test.describe.skip("Experimental Feature", () => {
  test("should render new widget", async ({ page }) => {
    // Skipped
  });
});
There is also test.describe.fixme() which works like skip but carries a stronger signal: "these are broken and need fixing."
| Modifier | What it Does | When to Use |
|---|---|---|
| test.describe.only() | Runs only this group, skips all others | Local debugging, isolating failures |
| test.describe.skip() | Skips the group, runs everything else | Blocked features, WIP code |
| test.describe.fixme() | Marks group as broken, does not run | Known failures needing attention |
Tip: Never commit .only() to your main branch. Use npx playwright test --forbid-only in CI to make the pipeline fail if a stray .only() slips through. This one flag has saved more teams from silent test coverage loss than any linter rule.
Using tags and grep to filter tests
test.describe groups tests inside a file. Tags and grep work across your entire project. They let you label tests by purpose and then run exactly the subset you need from the command line.
This is the mechanism behind any serious smoke and regression testing strategy. It also helps isolate the root causes when Playwright tests fail in CI.
How to add tags to your tests
There are two ways. The recommended approach (available since Playwright v1.42) uses the tag option in a details object. The older way embeds the tag directly in the test title.
Tags are string labels prefixed with @ that categorize tests by purpose (like @smoke, @regression, @flaky). Unlike describe blocks, tags create cross-cutting categories across multiple files.
// Method 1: tag option (recommended, available since v1.42)
test(
  "should load homepage",
  {
    tag: "@smoke",
  },
  async ({ page }) => {
    await page.goto("/");
    await expect(page).toHaveTitle(/Home/);
  },
);
// Method 2: inline in the title
test("should load homepage @smoke", async ({ page }) => {
  // works, but the tag is now part of the test name in reports
});
You can also tag a whole describe block. Every test inside inherits the tag:
test.describe(
  "Critical Paths",
  {
    tag: ["@smoke", "@critical"],
  },
  () => {
    test("login works", async ({ page }) => {
      /* inherits @smoke, @critical */
    });
    test(
      "checkout works",
      {
        tag: "@e2e",
      },
      async ({ page }) => {
        /* has @smoke, @critical, AND @e2e */
      },
    );
  },
);
A common gotcha: forgetting the @ prefix. Tags without it will not be picked up by --grep the way you expect. Always start with @.
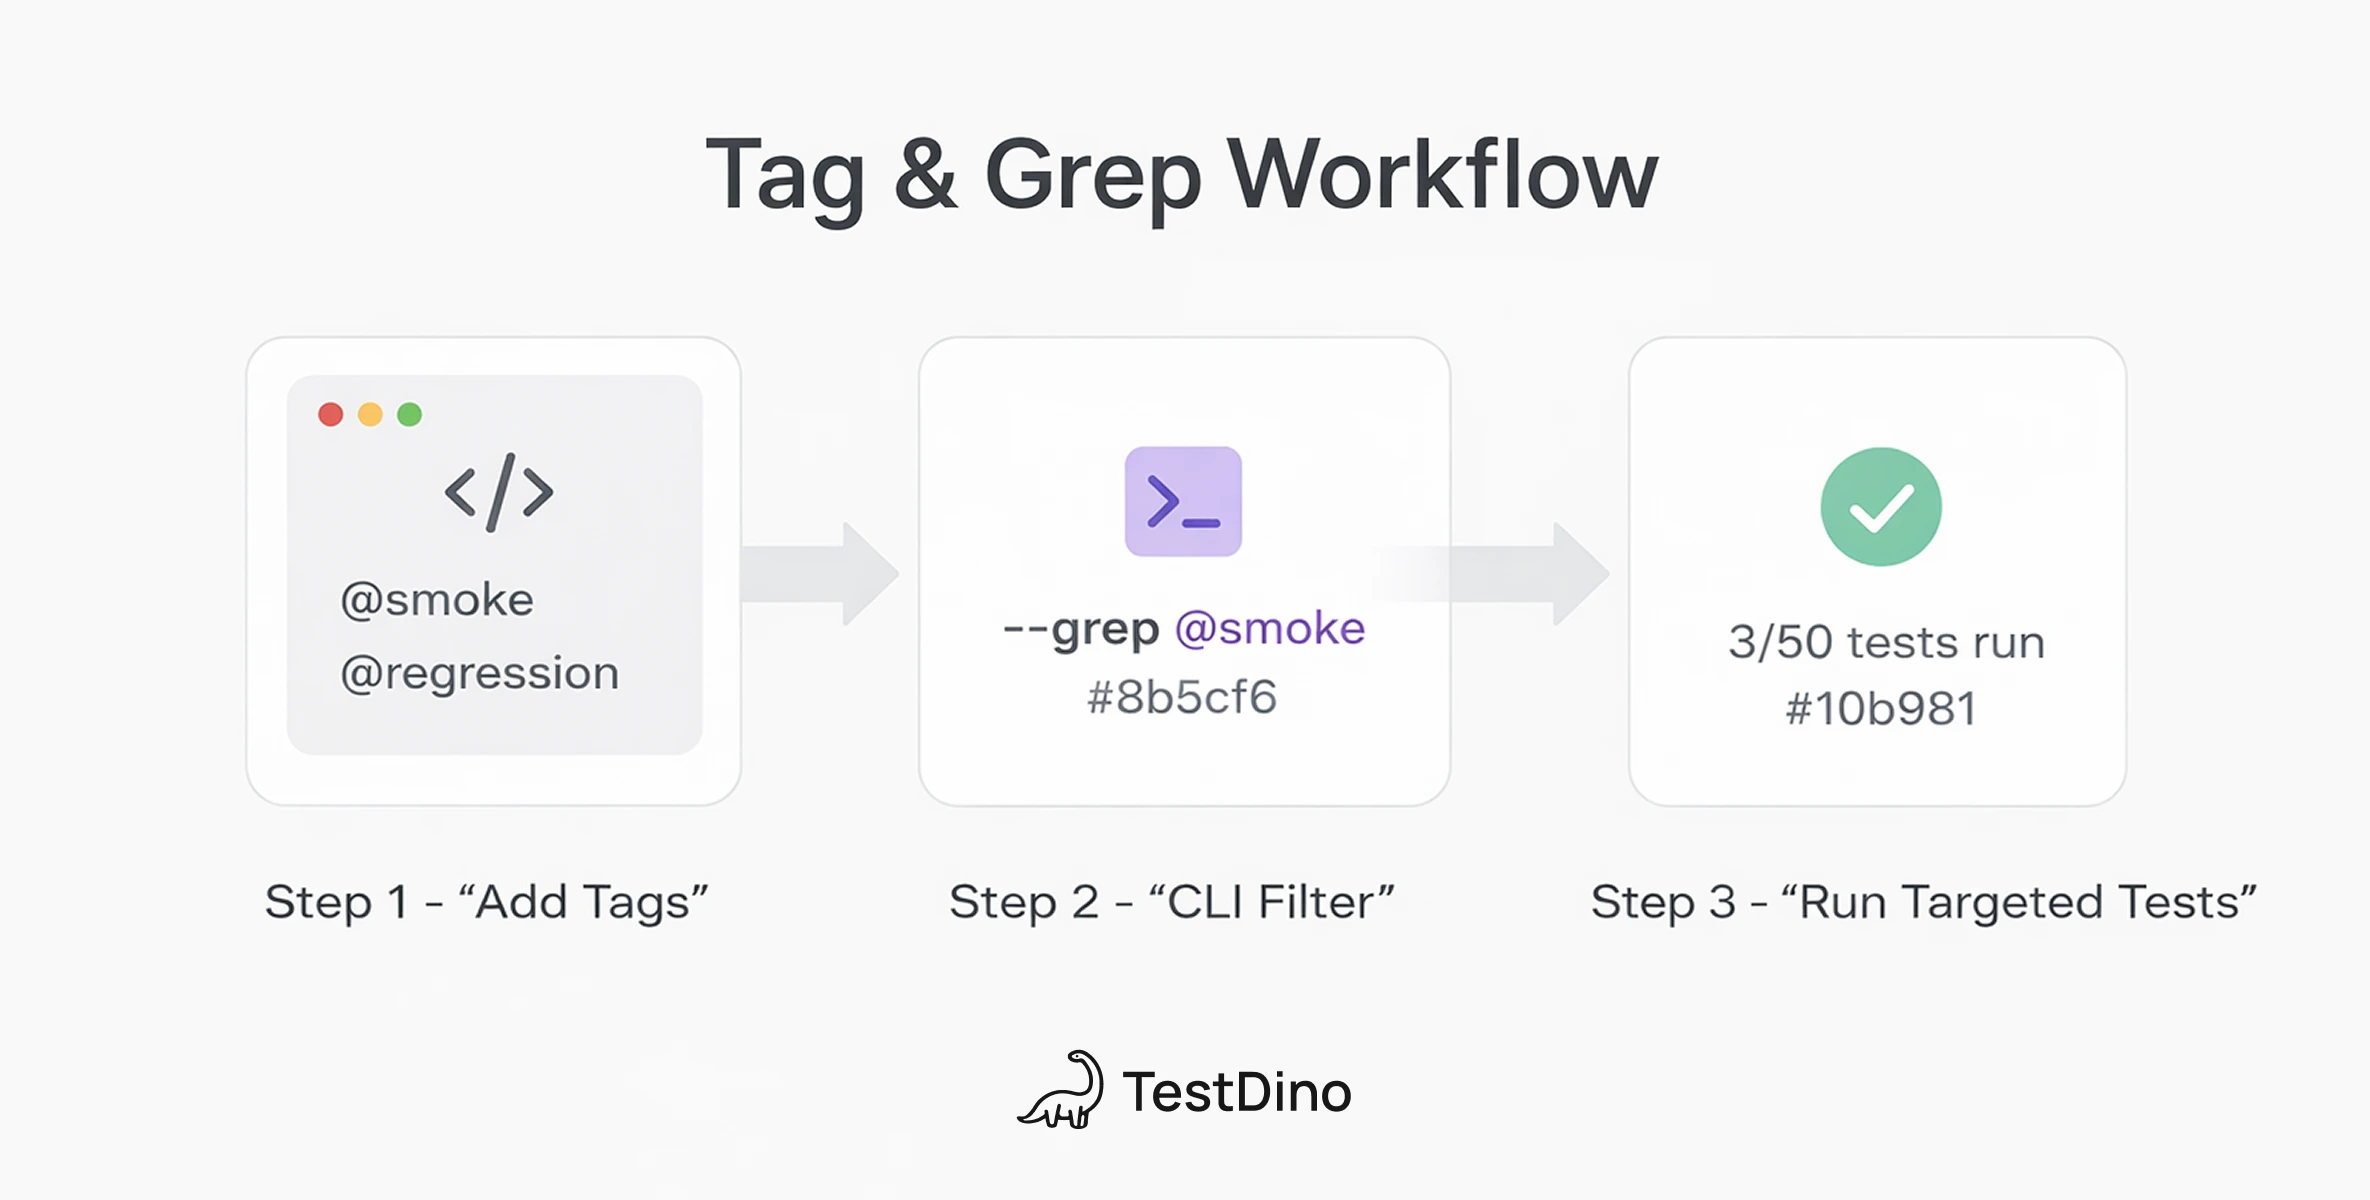
Running tests by tag using the --grep flag
Once tests are tagged, --grep filters what runs:
# Only smoke tests
npx playwright test --grep "@smoke"
# Tests with either tag (OR)
npx playwright test --grep "@smoke|@regression"
# Tests with BOTH tags (AND, using regex lookaheads)
npx playwright test --grep "(?=.*@smoke)(?=.*@critical)"
# Target a specific describe group by name
npx playwright test --grep "Login Page"
That last one is worth noting. --grep matches against the full test title, which includes the describe block name. So you can filter by group name, tag, or even part of a test name.
Using --grep-invert to exclude specific test groups
--grep-invert is the opposite of --grep. It skips everything that matches and runs the rest.
# Run everything except slow tests
npx playwright test --grep-invert "@slow"
# Combine both for precision
npx playwright test --grep "@smoke" --grep-invert "@flaky"
That last command runs all smoke tests except the flaky ones. In CI, this is how you get fast, reliable feedback without being blocked by known intermittent failures.
You can also bake these filters directly into playwright.config.ts so you do not have to type long CLI flags every time:
import { defineConfig } from "@playwright/test";
export default defineConfig({
  projects: [
    {
      name: "smoke",
      grep: /@smoke/,
      retries: 0,
    },
    {
      name: "regression",
      grep: /@regression/,
      retries: 2,
    },
    {
      name: "all-except-flaky",
      grepInvert: /@flaky/,
    },
  ],
});
Now running npx playwright test --project=smoke does exactly what you'd expect. Clean, no extra flags, and the strategy is self-documented in your config.
You can also use testMatch and testIgnore in project config to filter by file path patterns instead of tags. For example, testMatch: /.*smoke.spec.ts/ runs only files with "smoke" in the name. This pairs well with tag-based grep when you want both file-level and test-level filtering.
Note: The grep property in the config uses regex literals (/@smoke/), not strings. On the CLI, --grep accepts a string that Playwright internally converts to regex.
Best practices for large projects
Once your project grows past a few dozen spec files, conventions become critical. Good Playwright test management starts with folder structure and naming rules that the entire team follows. Here is what consistently works at scale.
Folder structure that mirrors your app:
tests/
├── auth/
│   ├── login.spec.ts
│   ├── signup.spec.ts
│   └── password-reset.spec.ts
├── dashboard/
│   ├── widgets.spec.ts
│   └── analytics.spec.ts
├── checkout/
│   ├── cart.spec.ts
│   └── payment.spec.ts
└── playwright.config.ts
Naming conventions the team agrees on:
| Convention | Example | Why |
|---|---|---|
| Describe titles = feature names | 'Checkout Flow' | Maps tests to product areas in reports |
| Tags = lowercase with @ | @smoke, @regression | Predictable grep patterns |
| Test names start with "should" | 'should reject expired card' | Makes intent immediately clear |
| One spec file per feature | payment.spec.ts | Better parallelization and ownership |
Tip: Create a TAGS.md or a constants file at the root of your test directory that documents every tag, its meaning, and when to apply it. Without this, teams inevitably end up with duplicate tags like @smoke, @Smoke, and @critical-smoke all meaning the same thing.
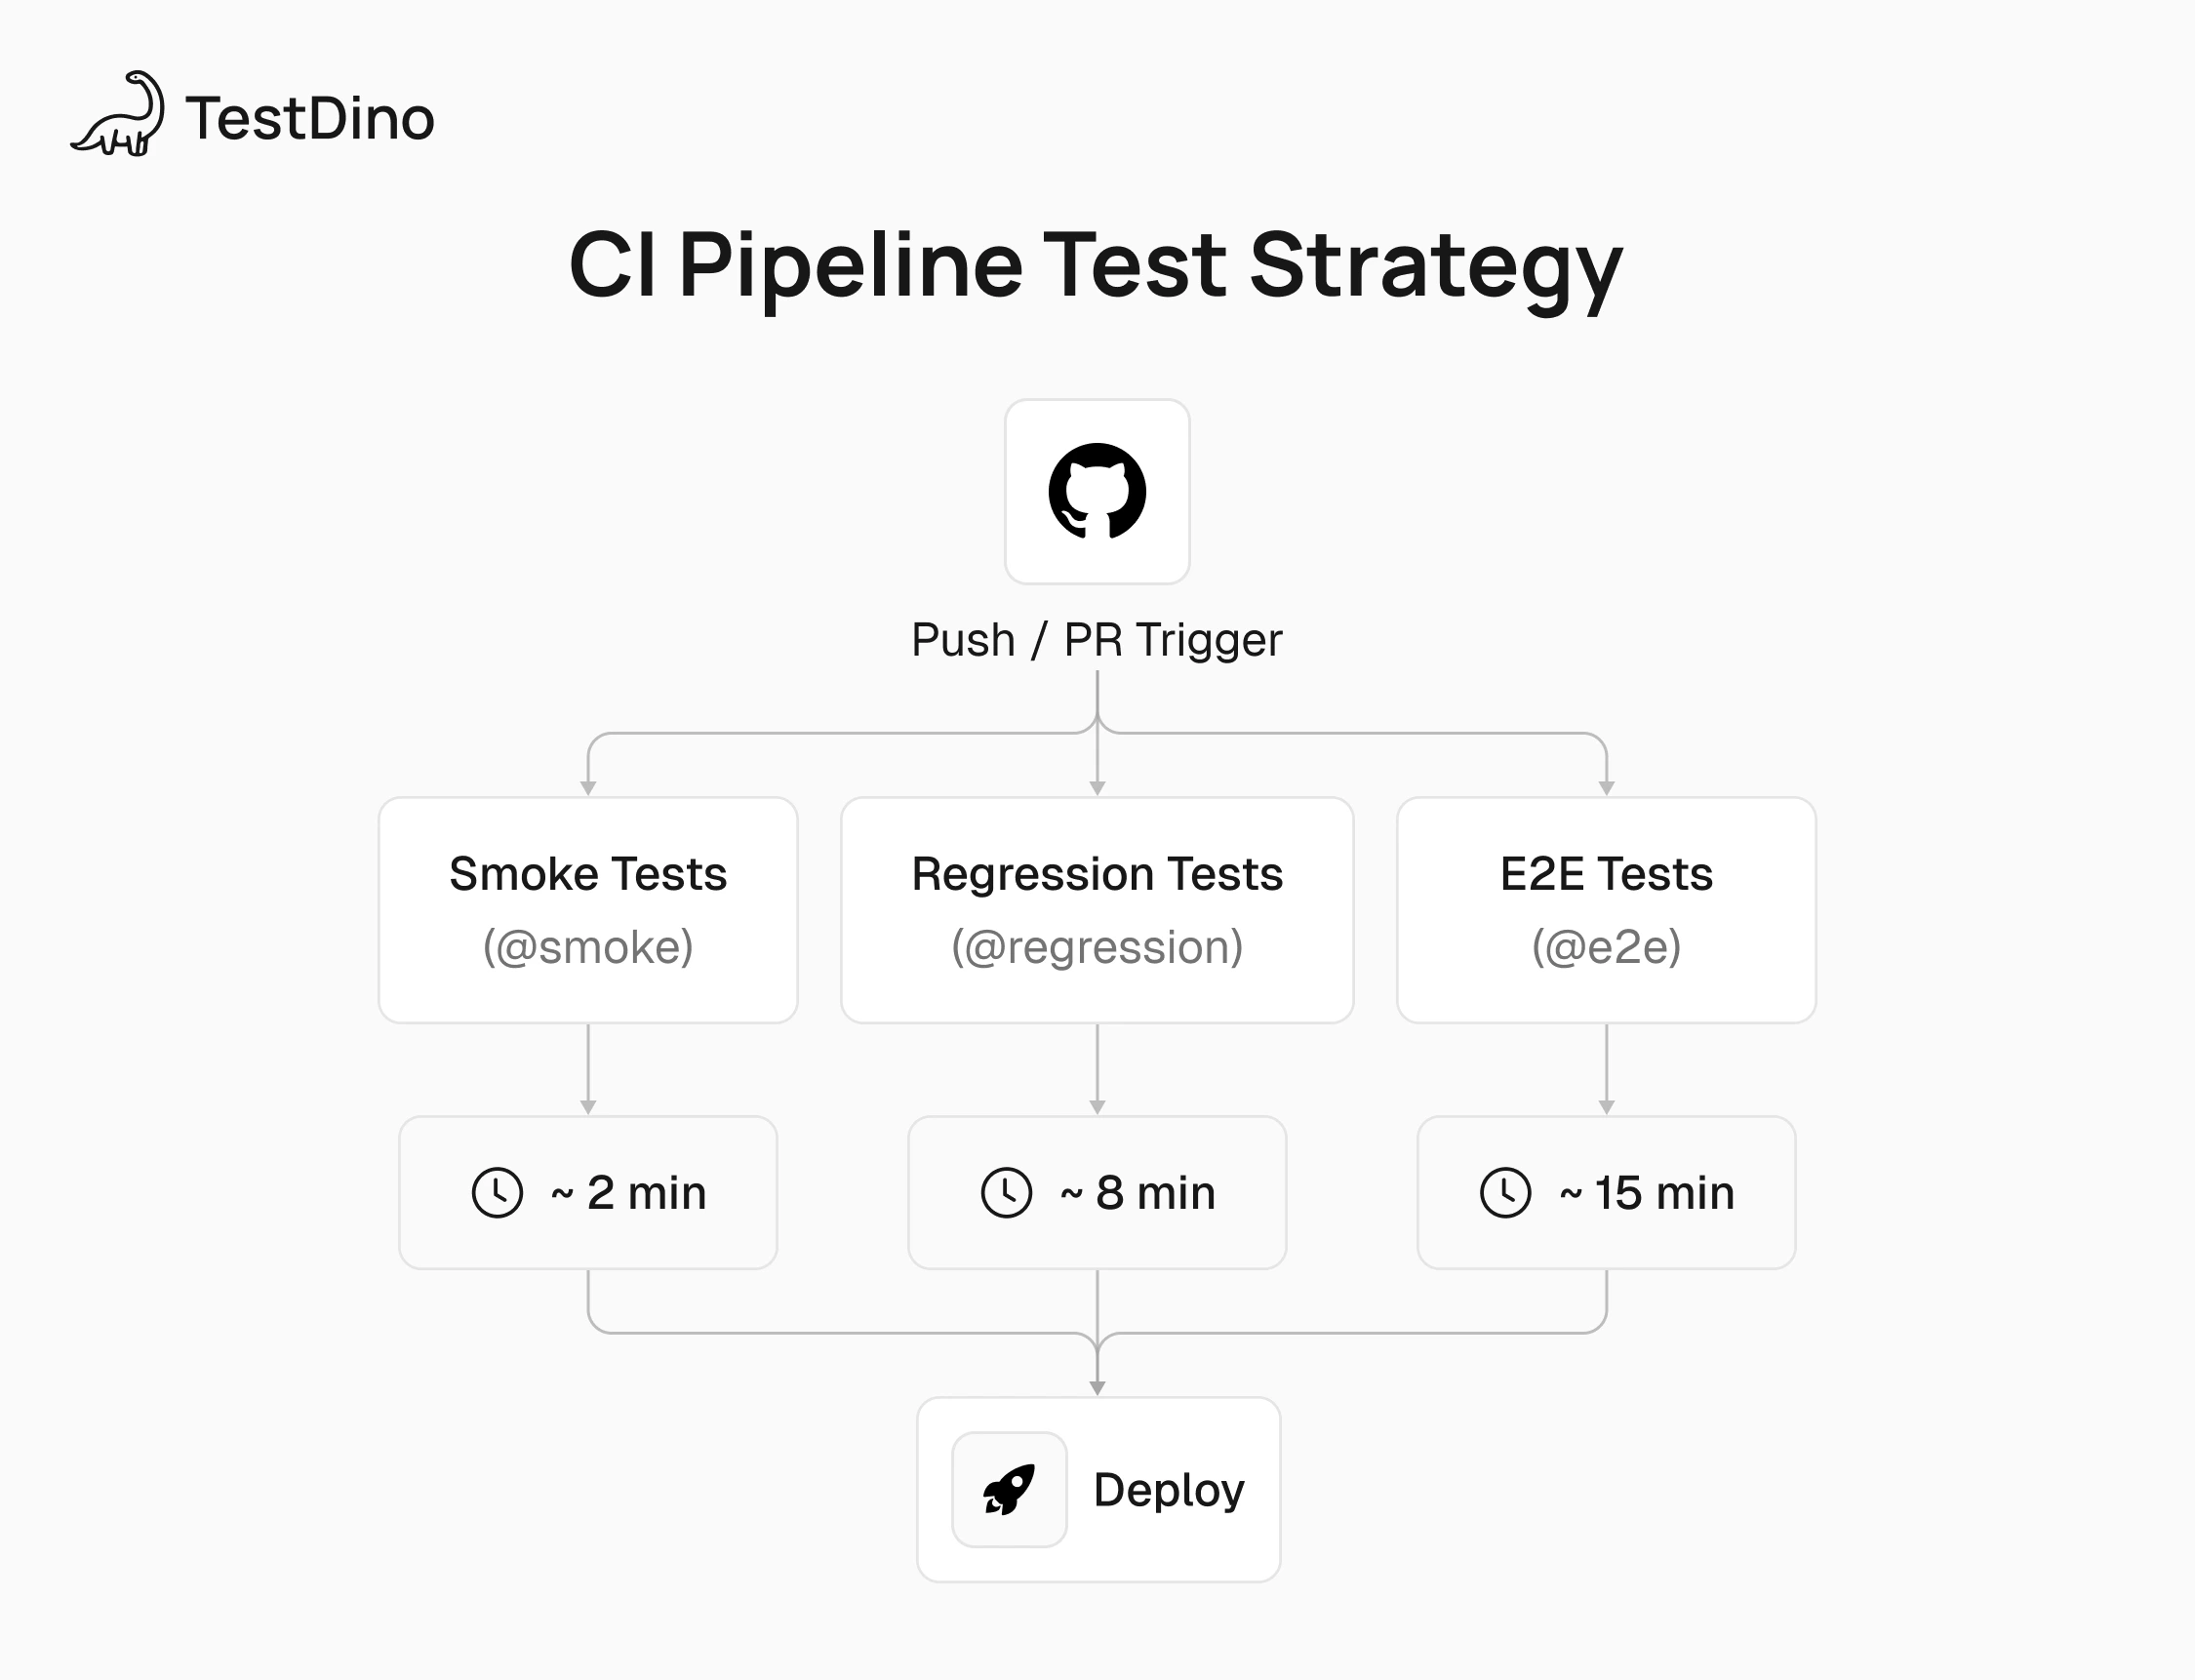
CI/CD integration
This is where grouping Playwright tests actually pays off. Instead of running everything on every push, you run different groups at different stages. Quick smoke tests on PRs. Full regression on merge. Slow E2E on a nightly schedule.
GitHub actions example
name: Playwright Tests
on:
  pull_request:
    branches: [main]
  push:
    branches: [main]
  schedule:
    - cron: "0 2 * * *"
jobs:
  smoke-tests:
    name: Smoke Tests
    runs-on: ubuntu-latest
    if: github.event_name == 'pull_request'
    steps:
      - uses: actions/checkout@v4
      - uses: actions/setup-node@v4
        with:
          node-version: 20
          cache: "npm"
      - run: npm ci
      - run: npx playwright install --with-deps chromium
      - run: npx playwright test --grep "@smoke" --project=chromium
      - uses: actions/upload-artifact@v4
        if: failure()
        with:
          name: smoke-report
          path: playwright-report/
  regression-tests:
    name: Full Regression
    runs-on: ubuntu-latest
    if: github.event_name == 'push' && github.ref == 'refs/heads/main'
    strategy:
      matrix:
        shard: [1/3, 2/3, 3/3]
    steps:
      - uses: actions/checkout@v4
      - uses: actions/setup-node@v4
        with:
          node-version: 20
          cache: "npm"
      - run: npm ci
      - run: npx playwright install --with-deps
      - run: npx playwright test --grep "@regression" --shard=${{ matrix.shard }} --forbid-only
A few things to notice:
Smoke tests install only Chromium to keep the step fast
Regression uses Playwright sharding to split across 3 parallel jobs
--forbid-only prevents accidental .only() calls from limiting coverage in CI
This setup can bring PR feedback from 15+ minutes down to under 3. You can also add --last-failed in a follow-up job to re-run only the tests that failed, which is useful for catching flaky tests without re-running the entire suite.
TestDino takes this further by providing a cloud execution environment where grouped and tagged Playwright tests run with parallel workers out of the box. It integrates with the best Playwright CI/CD pipelines and gives you dashboards that visualize results by tag and group.
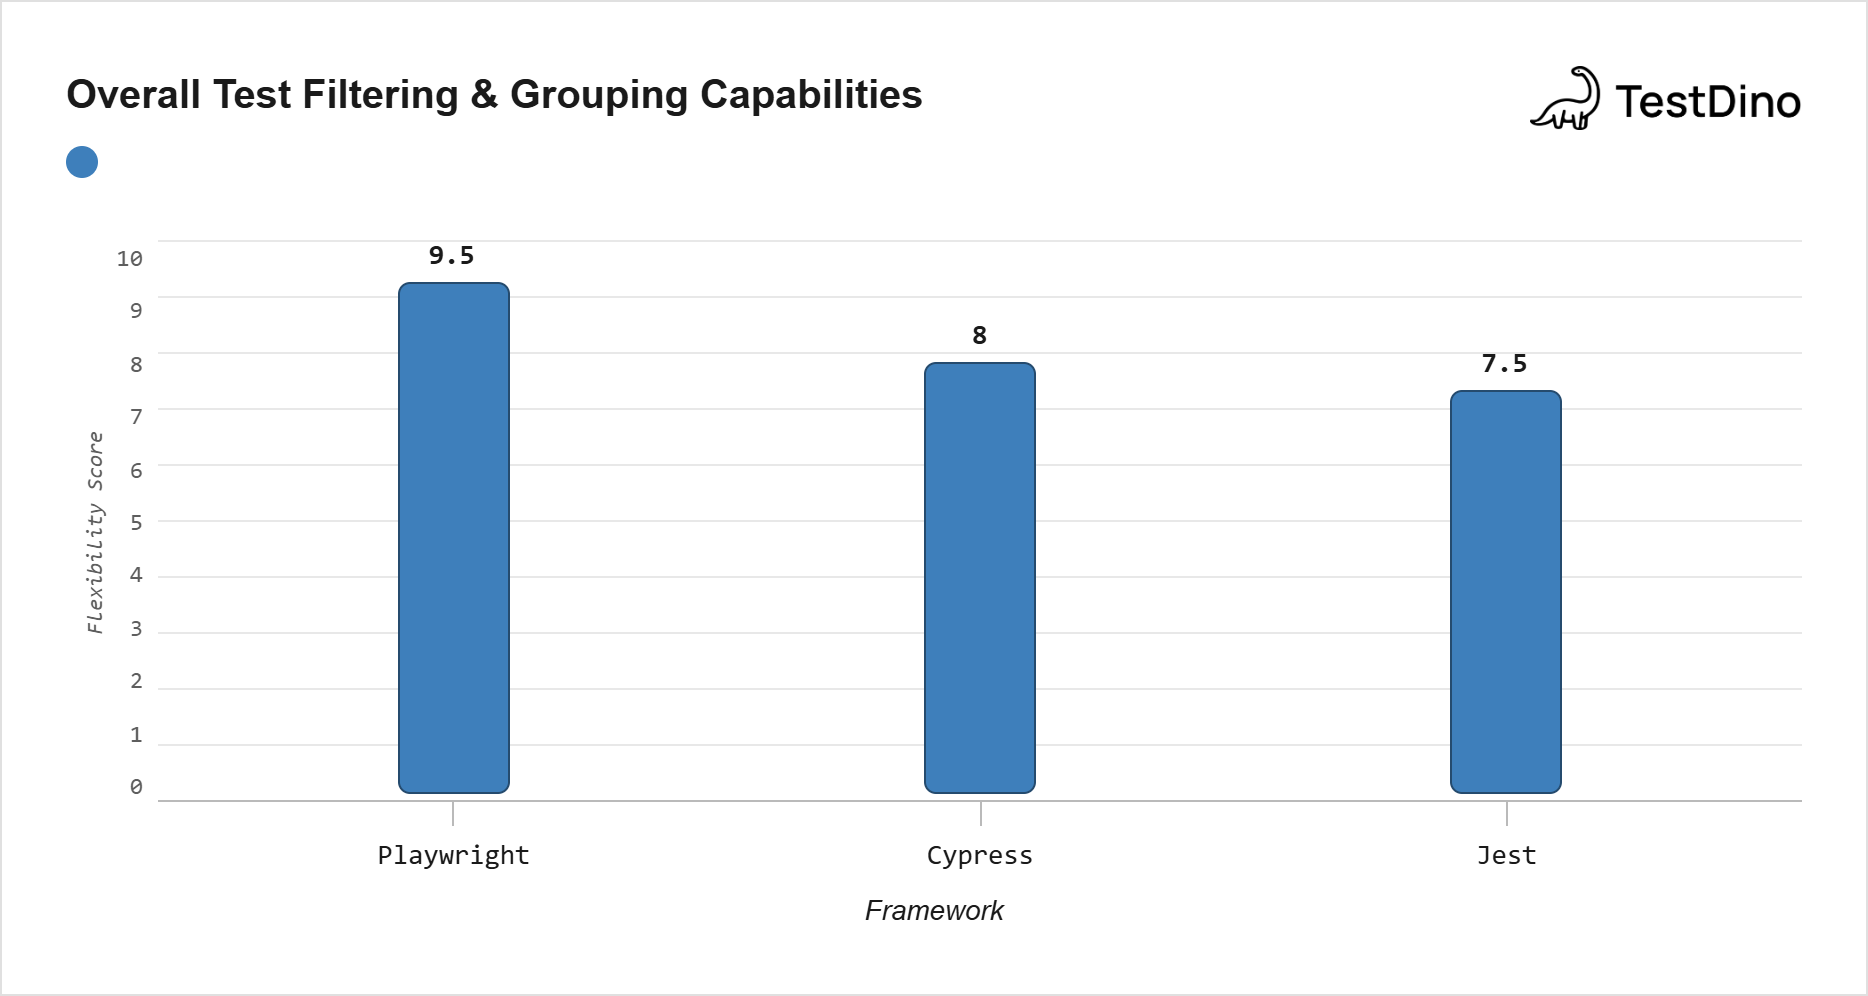
Playwright vs Jest vs Cypress
If you are coming from Jest or Cypress, the describe pattern will feel familiar. The real differences are in tagging, filtering, and parallel execution.
| Feature | Playwright | Jest | Cypress |
|---|---|---|---|
| Describe syntax | test.describe() | describe() | describe() |
| Native tagging | Built-in tag option (v1.42+) | Needs plugins | Limited |
| CLI grep + invert | --grep + --grep-invert | -t (title only) | --spec (file only) |
| Config-level grep | testConfig.grep | Not Available | Not Available |
| Free parallel execution | Workers + sharding | By file | Paid (Cypress Cloud) |
| Serial mode control | describe.configure() | Always sequential in file | Always sequential |
Coming from Jest? Replace describe() with test.describe() and it() with test(). The big upgrade is native tagging and --grep-invert.
Coming from Cypress? The biggest wins are free parallel execution and the ability to run "all smoke tests across all files" from the CLI, which Cypress cannot do without workarounds or paid cloud features.
Conclusion
Grouping Playwright tests is the foundation that makes everything else work: fast CI pipelines, clean reports, targeted debugging, and team-wide clarity on what tests cover which features.
Here is the sequence that works:
Start with test.describe to give tests a logical structure and scope your hooks to the groups that need them.
Add tags like @smoke, @regression, and @flaky to create cross-cutting categories that span across files.
Wire --grep and --grep-invert into your CI workflow so PRs get fast smoke feedback and merges trigger full regression coverage.
Set up config-level projects with grep/grepInvert to make the strategy permanent and self-documenting.
Each layer builds on the previous one. Skip any of them and the suite eventually becomes the slow, unreliable bottleneck that nobody trusts.
FAQs

Dhruv Rai
Product & Growth Engineer