Write Playwright Tests with Kiro: Setup, Generate & Run with Example
Struggling with AI-generated Playwright tests that break in CI? This guide walks you through setting up Kiro IDE with Playwright MCP, creating steering rules for spec-driven test generation, and running them with TestDino for real reporting and failure analysis.

Writing a Playwright test with Kiro changes the way you think about AI-generated test automation. Instead of getting a code dump that breaks in CI, you get structured specs, real browser context, and tests that actually follow your project's patterns.
But most teams still struggle with the gap between "AI generated a test" and "that test passes in CI." Tests break because the AI lacks project context, uses wrong locators, or ignores existing fixtures.
This guide walks you through setting up Kiro IDE for Playwright testing, connecting the Playwright MCP server, creating steering rules, and running everything through TestDino for reporting. Every step includes the exact config files and commands you need.
What is Kiro and why use it for Playwright testing?
Kiro is an AI-powered IDE built by AWS on top of Code OSS (the same open-source base as VS Code). It uses spec-driven development, meaning it converts natural language prompts into structured requirements, technical designs, and implementation plans before writing any code.
Kiro stands apart from other AI test generation tools because it does not just accept a prompt and spit out code. It first creates a requirements document, then a design spec, and finally a sequenced task list. Only after that does it start writing.
For Playwright testing, this matters because:
- Tests get planned against actual page behavior, not guesswork
- The AI references your existing test files and fixtures
- Generated code follows your project's patterns, not generic tutorials
Kiro also ships with Agent Hooks, which are automated triggers that run on file events. Save a new page object file, and Kiro can automatically generate a corresponding test spec. That is not something you get with a standard chat-based AI.
The other thing worth knowing is that Kiro supports MCP (Model Context Protocol) natively. This means it can connect to a real browser through the Playwright MCP server and generate tests based on the live DOM, not cached assumptions.
How to set up Kiro for Playwright testing
Setting up Kiro for Playwright involves three pieces: installing the IDE, connecting the Playwright MCP server, and creating steering rules. Here is each step.
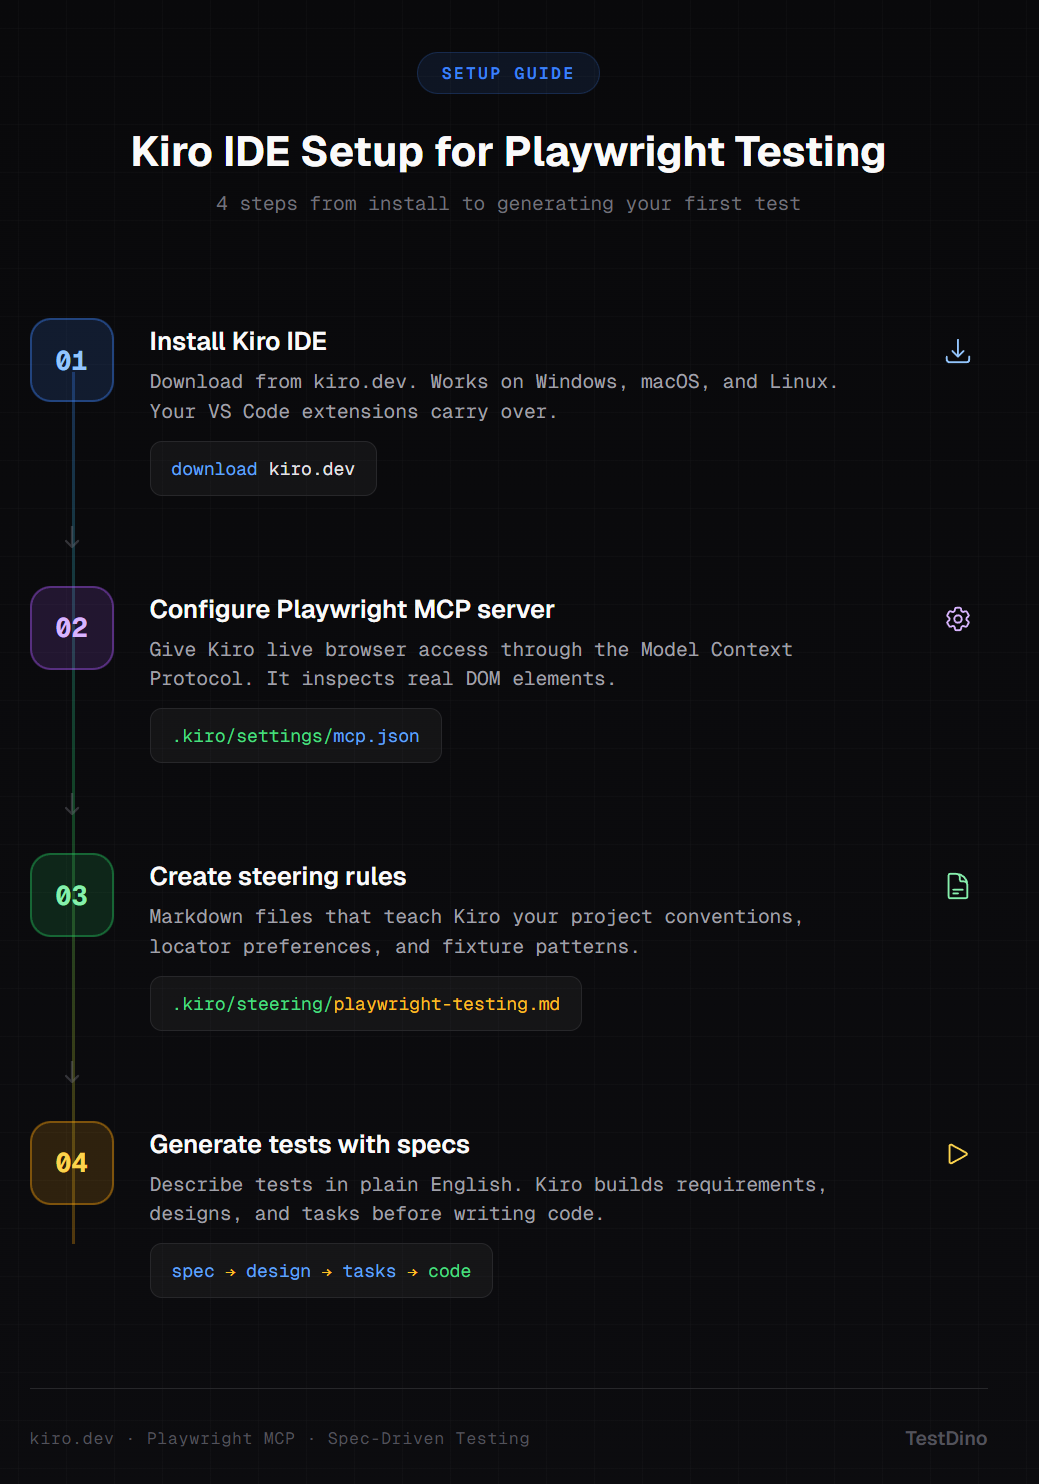
Step 1: install Kiro IDE
Download Kiro from kiro.dev. It is available for Windows, macOS, and Linux. Since it is built on Code OSS, your existing VS Code themes, keybindings, and Open VSX-compatible extensions carry over.
Note: Kiro is currently in preview and free to use. It runs on Anthropic's Claude Sonnet models. After the preview period, free and paid tiers will be available.
Step 2: install Playwright in your project
If your project does not already have Playwright set up, initialize it. You need Node.js 18 or later and Playwright 1.40 or later:
npm init playwright@latestThis creates the playwright.config.ts, tests/ directory, and installs browser binaries.
Step 3: connect the Playwright MCP server
This is the critical step. The MCP server gives Kiro live access to a browser, so it can inspect real DOM elements instead of guessing locators.
Open the MCP configuration file. You can access it through the Kiro command palette (Ctrl+Shift+P) and search for "MCP", or manually create the file:
{
  "mcpServers": {
    "playwright": {
      "command": "npx",
      "args": ["@playwright/mcp@latest"]
    }
  }
}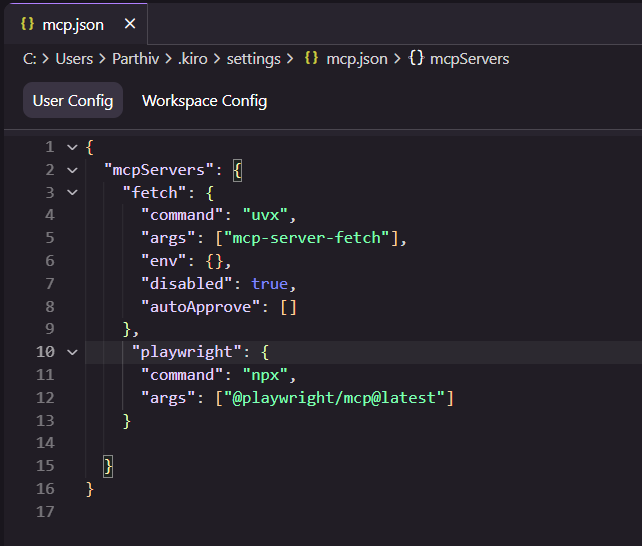
Once saved, Kiro detects the server and shows it in the MCP Servers panel under the ghost tab.

Tip: If you want to run the MCP browser in headed mode for debugging, add "--headed" to the args array. This lets you watch the browser as Kiro explores your app.
Step 4: create steering rules
Steering rules are markdown files that give Kiro persistent context about your project. Without them, Kiro generates generic Playwright tests. With them, it respects your naming conventions, fixture structure, and locator strategies.
Create a file at .kiro/steering/playwright-testing.md:
# Playwright Testing Guidelines

## Test structure
- All test files go in `tests/` directory
- Use `test.describe` for grouping related tests
- Name files as `<feature>.spec.ts`

## Locators
- Prefer `getByRole`, `getByLabel`, `getByText` over CSS selectors
- Never use XPath unless absolutely necessary
- Use `data-testid` attributes only as a fallback

## Assertions
- Use web-first assertions (`toBeVisible`, `toHaveText`)
- Avoid `waitForTimeout`. Use `waitForLoadState` or auto-waiting instead

## Fixtures
- Import shared fixtures from `tests/fixtures/`
- Use `test.extend` for custom page objects

## Reporting
- All tests should include meaningful annotations for TestDino
Kiro reads these rules on every interaction and applies them to all generated code.
How to generate Playwright tests with Kiro
Kiro's spec-driven approach to test generation works differently from just typing a prompt into a chat window. Here is the actual workflow.
Using spec-driven development for tests
Open the Kiro Specs panel and describe what you want to test:
Create end-to-end tests for the login flow of: https://storedemo.cms.testdino.com/login
- Test successful login with valid credentials
- Test login with invalid password shows error message
- Test login form validation for empty fields
- Test "Remember me" checkbox persists session
Kiro processes this through three stages:
- Requirements: Breaks your prompt into structured acceptance criteria using EARS notation
- Design: Maps each requirement to specific page elements and actions
- Tasks: Creates a sequenced implementation plan with test file names and structure
You can review and edit each stage before Kiro writes a single line of test code. This is the key difference from other AI code editors where you just get code dumped into a file.
Generating tests from the live DOM
With the Playwright MCP server connected, tell Kiro to explore your app:
Navigate to https://storedemo.cms.testdino.com/login and create a Playwright test
for the login form based on the actual page elements.
Kiro launches a browser session, captures an accessibility snapshot of the page, and uses the real element roles and labels to build locators. The result looks like this:
import { test, expect } from '@playwright/test';

test.describe('Login Page', () => {
  test.beforeEach(async ({ page }) => {
    await page.goto('https://storedemo.cms.testdino.com/login');
  });

  test('displays login form elements', async ({ page }) => {
    // TestDino: Verify all login form elements are visible on page load
    await expect(page.getByRole('heading', { name: 'Sign In' })).toBeVisible();
    await expect(page.getByRole('textbox', { name: 'Email Address *' })).toBeVisible();
    await expect(page.getByRole('textbox', { name: 'Password *' })).toBeVisible();
    await expect(page.getByRole('button', { name: 'Sign in' })).toBeVisible();
    await expect(page.getByText("Don't have an account? Sign up")).toBeVisible();
  });

  test('shows validation errors on empty submit', async ({ page }) => {
    // TestDino: Verify form prevents submission with empty fields
    await page.getByRole('button', { name: 'Sign in' }).click();
    await expect(page.getByRole('textbox', { name: 'Email Address *' })).toBeFocused();
  });

  test('toggles password visibility', async ({ page }) => {
    // TestDino: Verify password show/hide toggle works
    const passwordInput = page.getByRole('textbox', { name: 'Password *' });
    const toggleBtn = page.getByRole('button', { name: 'eye' });

    await passwordInput.fill('mypassword');
    await expect(passwordInput).toHaveAttribute('type', 'password');

    await toggleBtn.click();
    await expect(passwordInput).toHaveAttribute('type', 'text');

    await toggleBtn.click();
    await expect(passwordInput).toHaveAttribute('type', 'password');
  });

  test('fills and submits login form', async ({ page }) => {
    // TestDino: Verify login form accepts credentials and submits
    await page.getByRole('textbox', { name: 'Email Address *' }).fill('[email protected]');
    await page.getByRole('textbox', { name: 'Password *' }).fill('password123');
    await page.getByRole('button', { name: 'Sign in' }).click();
    await page.waitForLoadState('networkidle');
    // Assert we either navigated away or got an error response
const url = page.url();
expect(url).toBeTruthy();
  });
});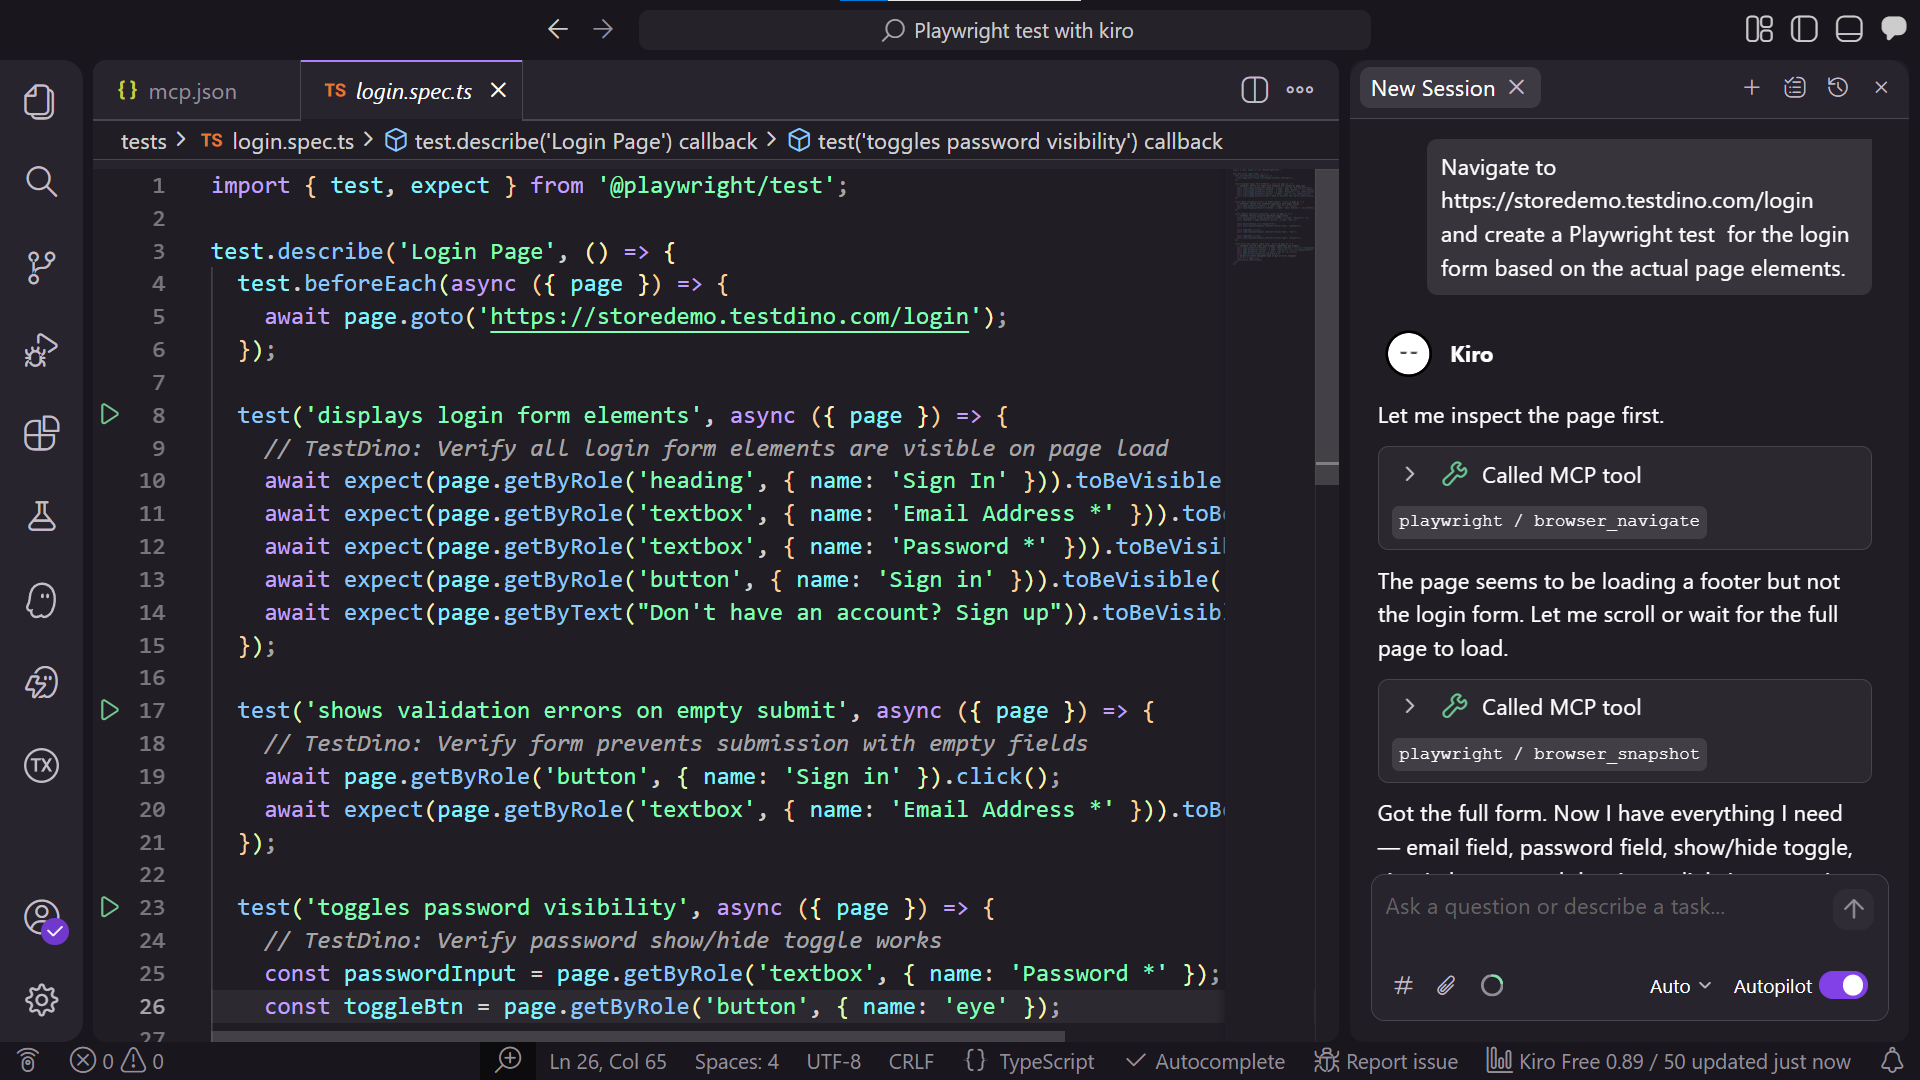
Notice the locators. Because Kiro read the actual DOM through MCP, it used getByLabel and getByRole instead of fragile CSS selectors. This is exactly what Playwright best practices recommend.
Using Agent Hooks for auto-generated tests
Kiro lets you set up Agent Hooks that trigger on file events. For Playwright, this is useful for automatically generating tests when new page components are created.
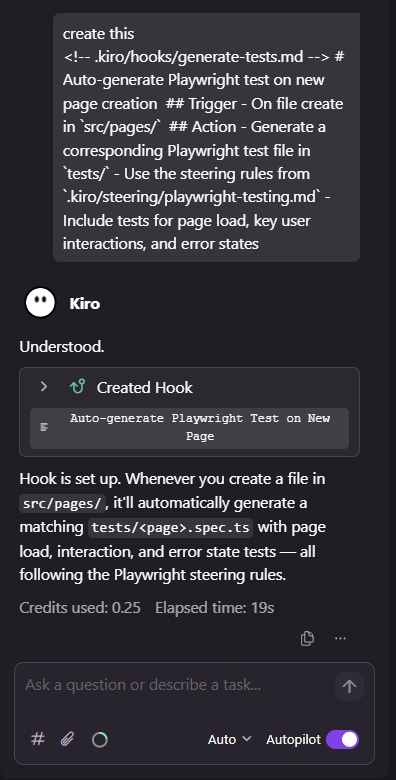
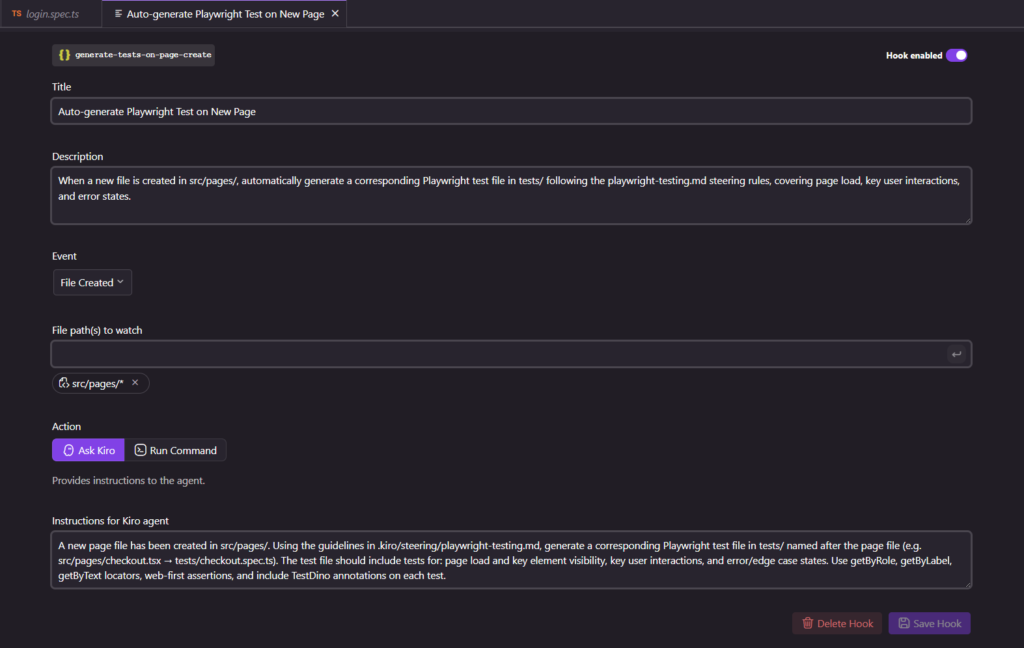
Create a hook in .kiro/hooks/:
# Auto-generate Playwright test on new page creation

## Trigger
- On file create in `src/pages/`

## Action
- Generate a corresponding Playwright test file in `tests/`
- Use the steering rules from `.kiro/steering/playwright-testing.md`
- Include tests for page load, key user interactions, and error states
Every time you add a new page file, Kiro creates a matching test spec. This keeps your test maintenance overhead low from day one.
Tip: Agent Hooks also work for updating documentation. Set up a hook to auto-update your test plan document whenever a new test file is added. This keeps your test coverage docs in sync without manual effort.
Running and debugging Playwright tests in Kiro
Running tests from the terminal
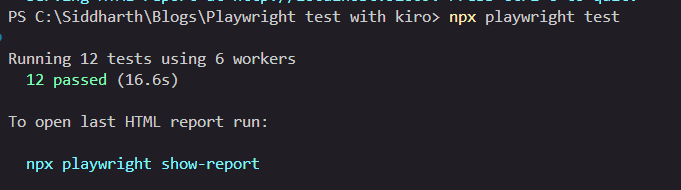
Run tests the standard way using Playwright CLI:
npx playwright test
Or target specific test files:
npx playwright test tests/login.spec.tsKiro's integrated terminal works like VS Code's terminal. You see full output, traces, and can click through to failing lines.
Debugging with Kiro's AI
When a test fails, share the error with Kiro's chat:
Solve the error: [paste your error from the terminal here or you can use the #terminal directly to let it access it]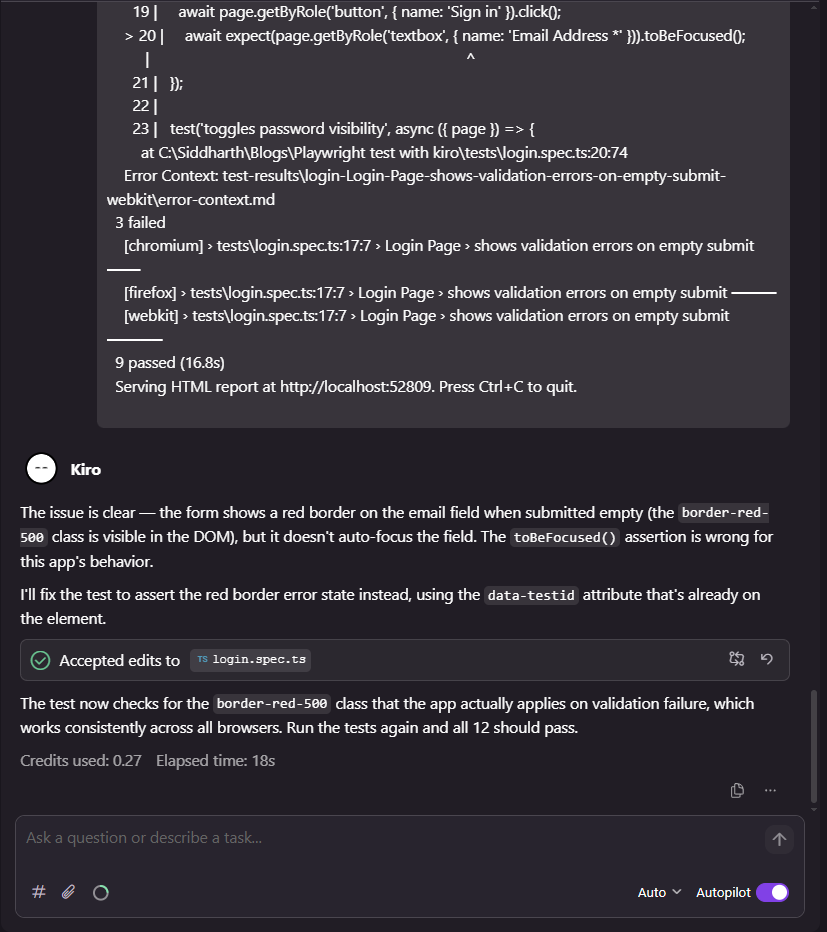
Kiro uses the MCP server to open the page, capture the current state, and compare it against what the test expects. It can identify issues like:
- The button text changed from "Sign in" to "Log in"
- A loading spinner blocks the button during page hydration
- The element exists but is not yet actionable
This is the same concept behind Playwright's Healer agent, which replays failing steps and inspects the UI for equivalent elements. Kiro extends this with full codebase context.
The Playwright Healer agent is a built-in test agent that automatically repairs failing tests. It replays failing steps, inspects the UI for equivalent elements, suggests patches like locator updates or wait adjustments, and re-runs the test until it passes or guardrails stop the loop.
How to run Playwright tests with TestDino
Once your Kiro-generated tests are working locally, you need a proper reporting and analytics layer for CI/CD runs. This is where TestDino comes in.
Setting up TestDino with your Playwright project
Install the TestDino Playwright wrapper:
npm install @testdino/playwright --save-devConfigure TestDino in your playwright.config.ts:
import { defineConfig } from '@playwright/test';

export default defineConfig({
  reporter: [
    ['list'],
    ['@testdino/playwright']
  ],
  use: {
    trace: 'on-first-retry',
  },
});
Running tests with TestDino reporting
Run your tests with the tdpw wrapper:
npx tdpw testBefore this command works, you need a TestDino API token and a config file.
- Sign up at app.cms.testdino.com and grab your API token from the dashboard
- Create a testdino.config.ts file in your project root:
export default {
  token: 'your-testdino-api-token',
};
That is it. Run npx tdpw test and your results stream to TestDino in real time. You get:
- Run history with pass/fail trends over time
- AI-powered failure grouping that clusters similar errors
- Flaky test detection that flags inconsistent results
- Trace and screenshot attachments for every failure
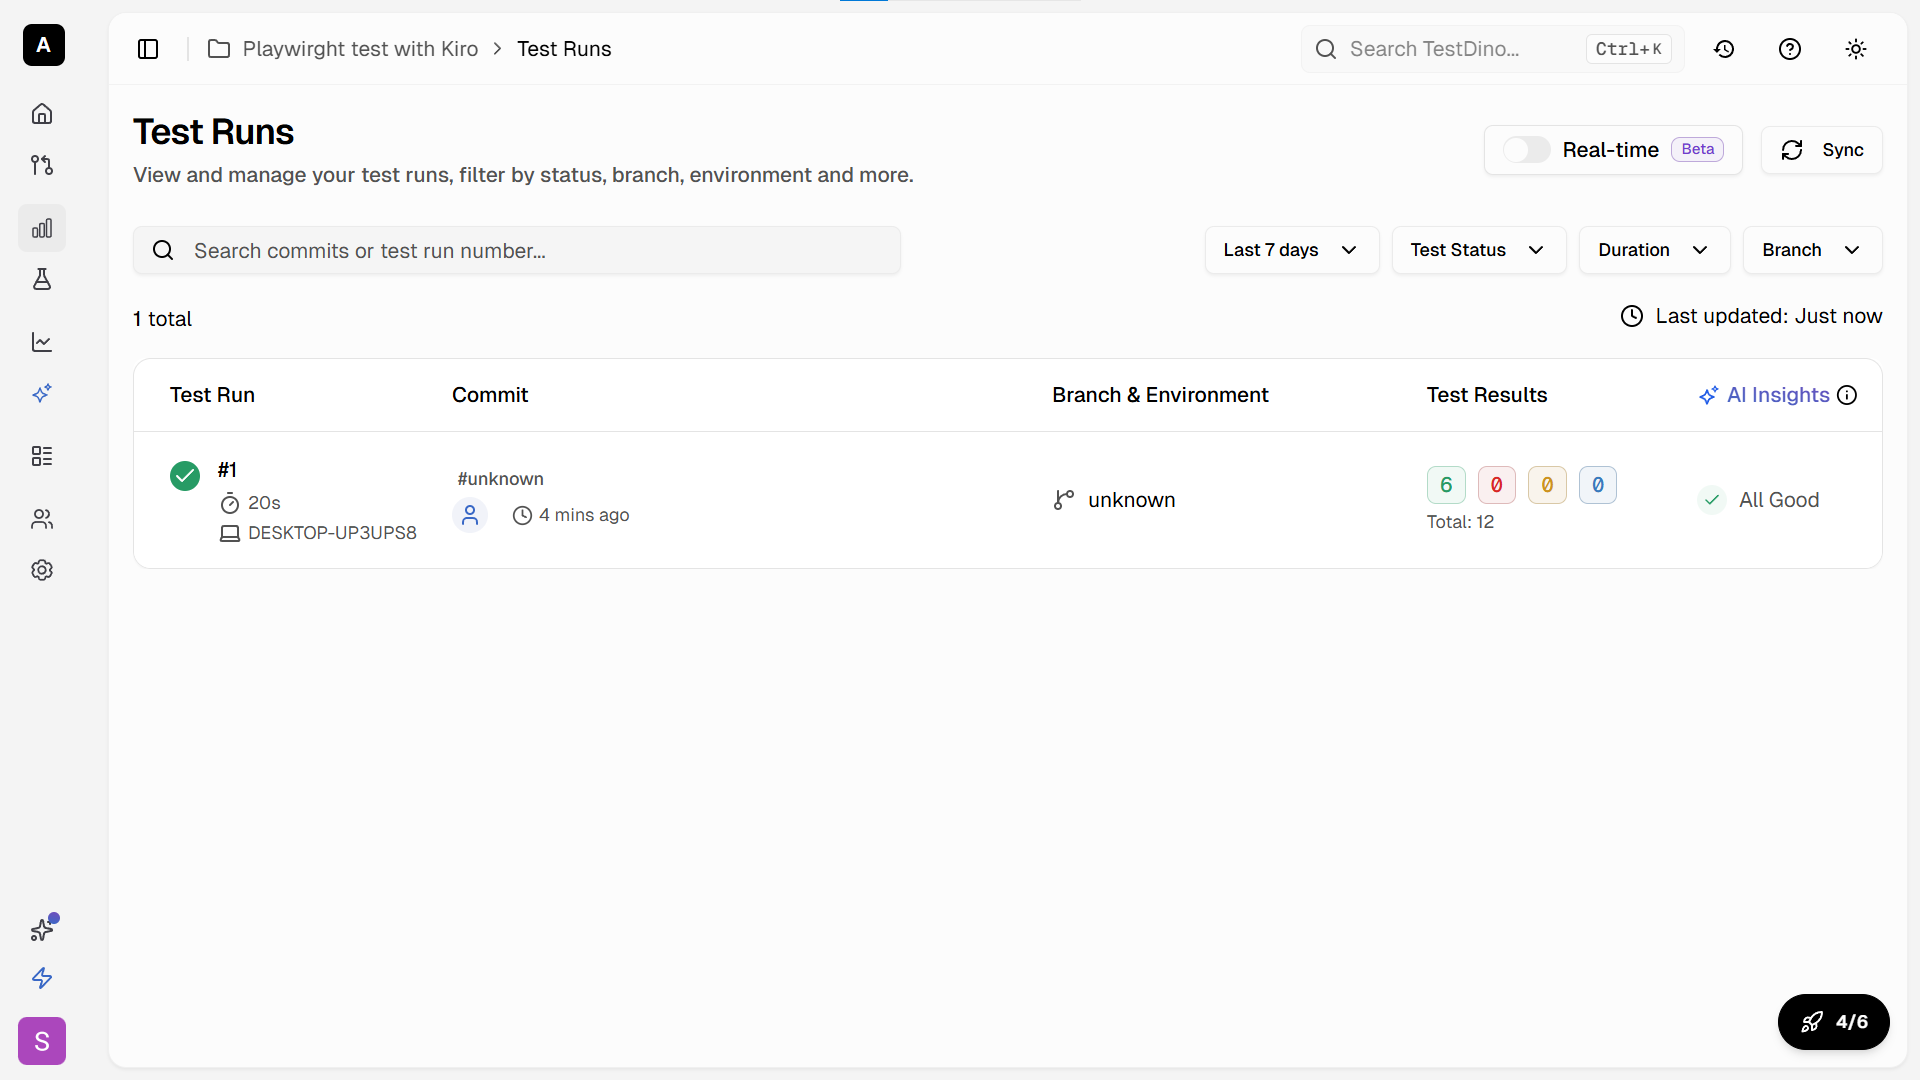
For your Kiro-generated tests, this is especially valuable. AI-generated tests often have subtle issues that only surface across multiple CI runs. TestDino tracks flaky patterns and shows you which tests need attention before they become a problem.
Using TestDino MCP for in-IDE failure analysis
TestDino also provides an MCP server you can add to Kiro. This gives the AI direct access to your test run history, failure patterns, and analytics.
{
  "mcpServers": {
    "playwright": {
      "command": "npx",
      "args": ["-y", "@playwright/mcp@latest"]
    },
    "testdino": {
      "command": "npx",
      "args": ["-y", "@testdino/mcp-server"],
      "env": {
        "TESTDINO_API_KEY": "${TESTDINO_API_KEY}"
      }
    }
  }
}
Add your token to a .env file in the project root so it stays out of version control:
TESTDINO_API_KEY=your-testdino-api-tokenWith both MCP servers connected, Kiro can pull failure context from TestDino and use the Playwright MCP to verify fixes against the live app. Ask Kiro something like:
Check the TestDino dashboard for the latest failures in the login test suite
and fix any broken locators using the Playwright MCP browser.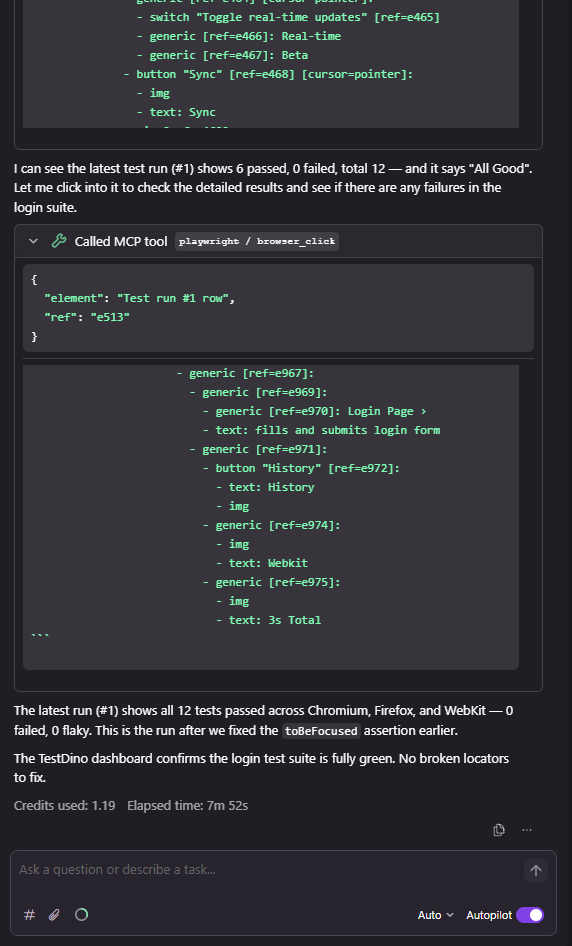

How Kiro compares to Cursor for Playwright testing
If you have been using Cursor for Playwright testing, you are probably wondering what Kiro does differently. Both are AI-powered IDEs based on VS Code, and both support MCP. But the workflow is quite different.
| Feature | Kiro | Cursor |
|---|---|---|
| Development approach | Spec-driven: requirements > design > tasks > code | Prompt-driven: describe what you want, get code immediately |
| Project context | Steering rules (.kiro/steering/ markdown files) | .cursorrules file |
| Automated triggers | Agent Hooks (file events auto-trigger AI actions) | No built-in automation triggers |
| MCP support | Native, built-in configuration UI | Supported through extensions |
| AI model | Claude Sonnet (Anthropic) | Multiple models (GPT-4, Claude, etc.) |
| Context retention | Persistent across sessions via steering + specs | Within active session; may reset between sessions |
| Test planning | Structured requirements and design docs before code | Can be guided to plan, but defaults to code-first |
| Best for | Structured teams, large projects, production-grade suites | Solo developers, rapid prototyping, quick test scaffolds |
The biggest difference is Kiro's spec-driven workflow. When you ask Kiro to generate Playwright tests, it first creates a requirements document you can review. This catches missing edge cases before any code is written.
Cursor is faster for quick one-off tests. Kiro is more thorough for building maintainable test suites at scale.
Note: Some teams use both. Cursor for rapid prototyping and exploring test ideas, then Kiro for building the production test suite with proper structure and documentation. The steering rules in Kiro can even reference patterns established during Cursor explorations.
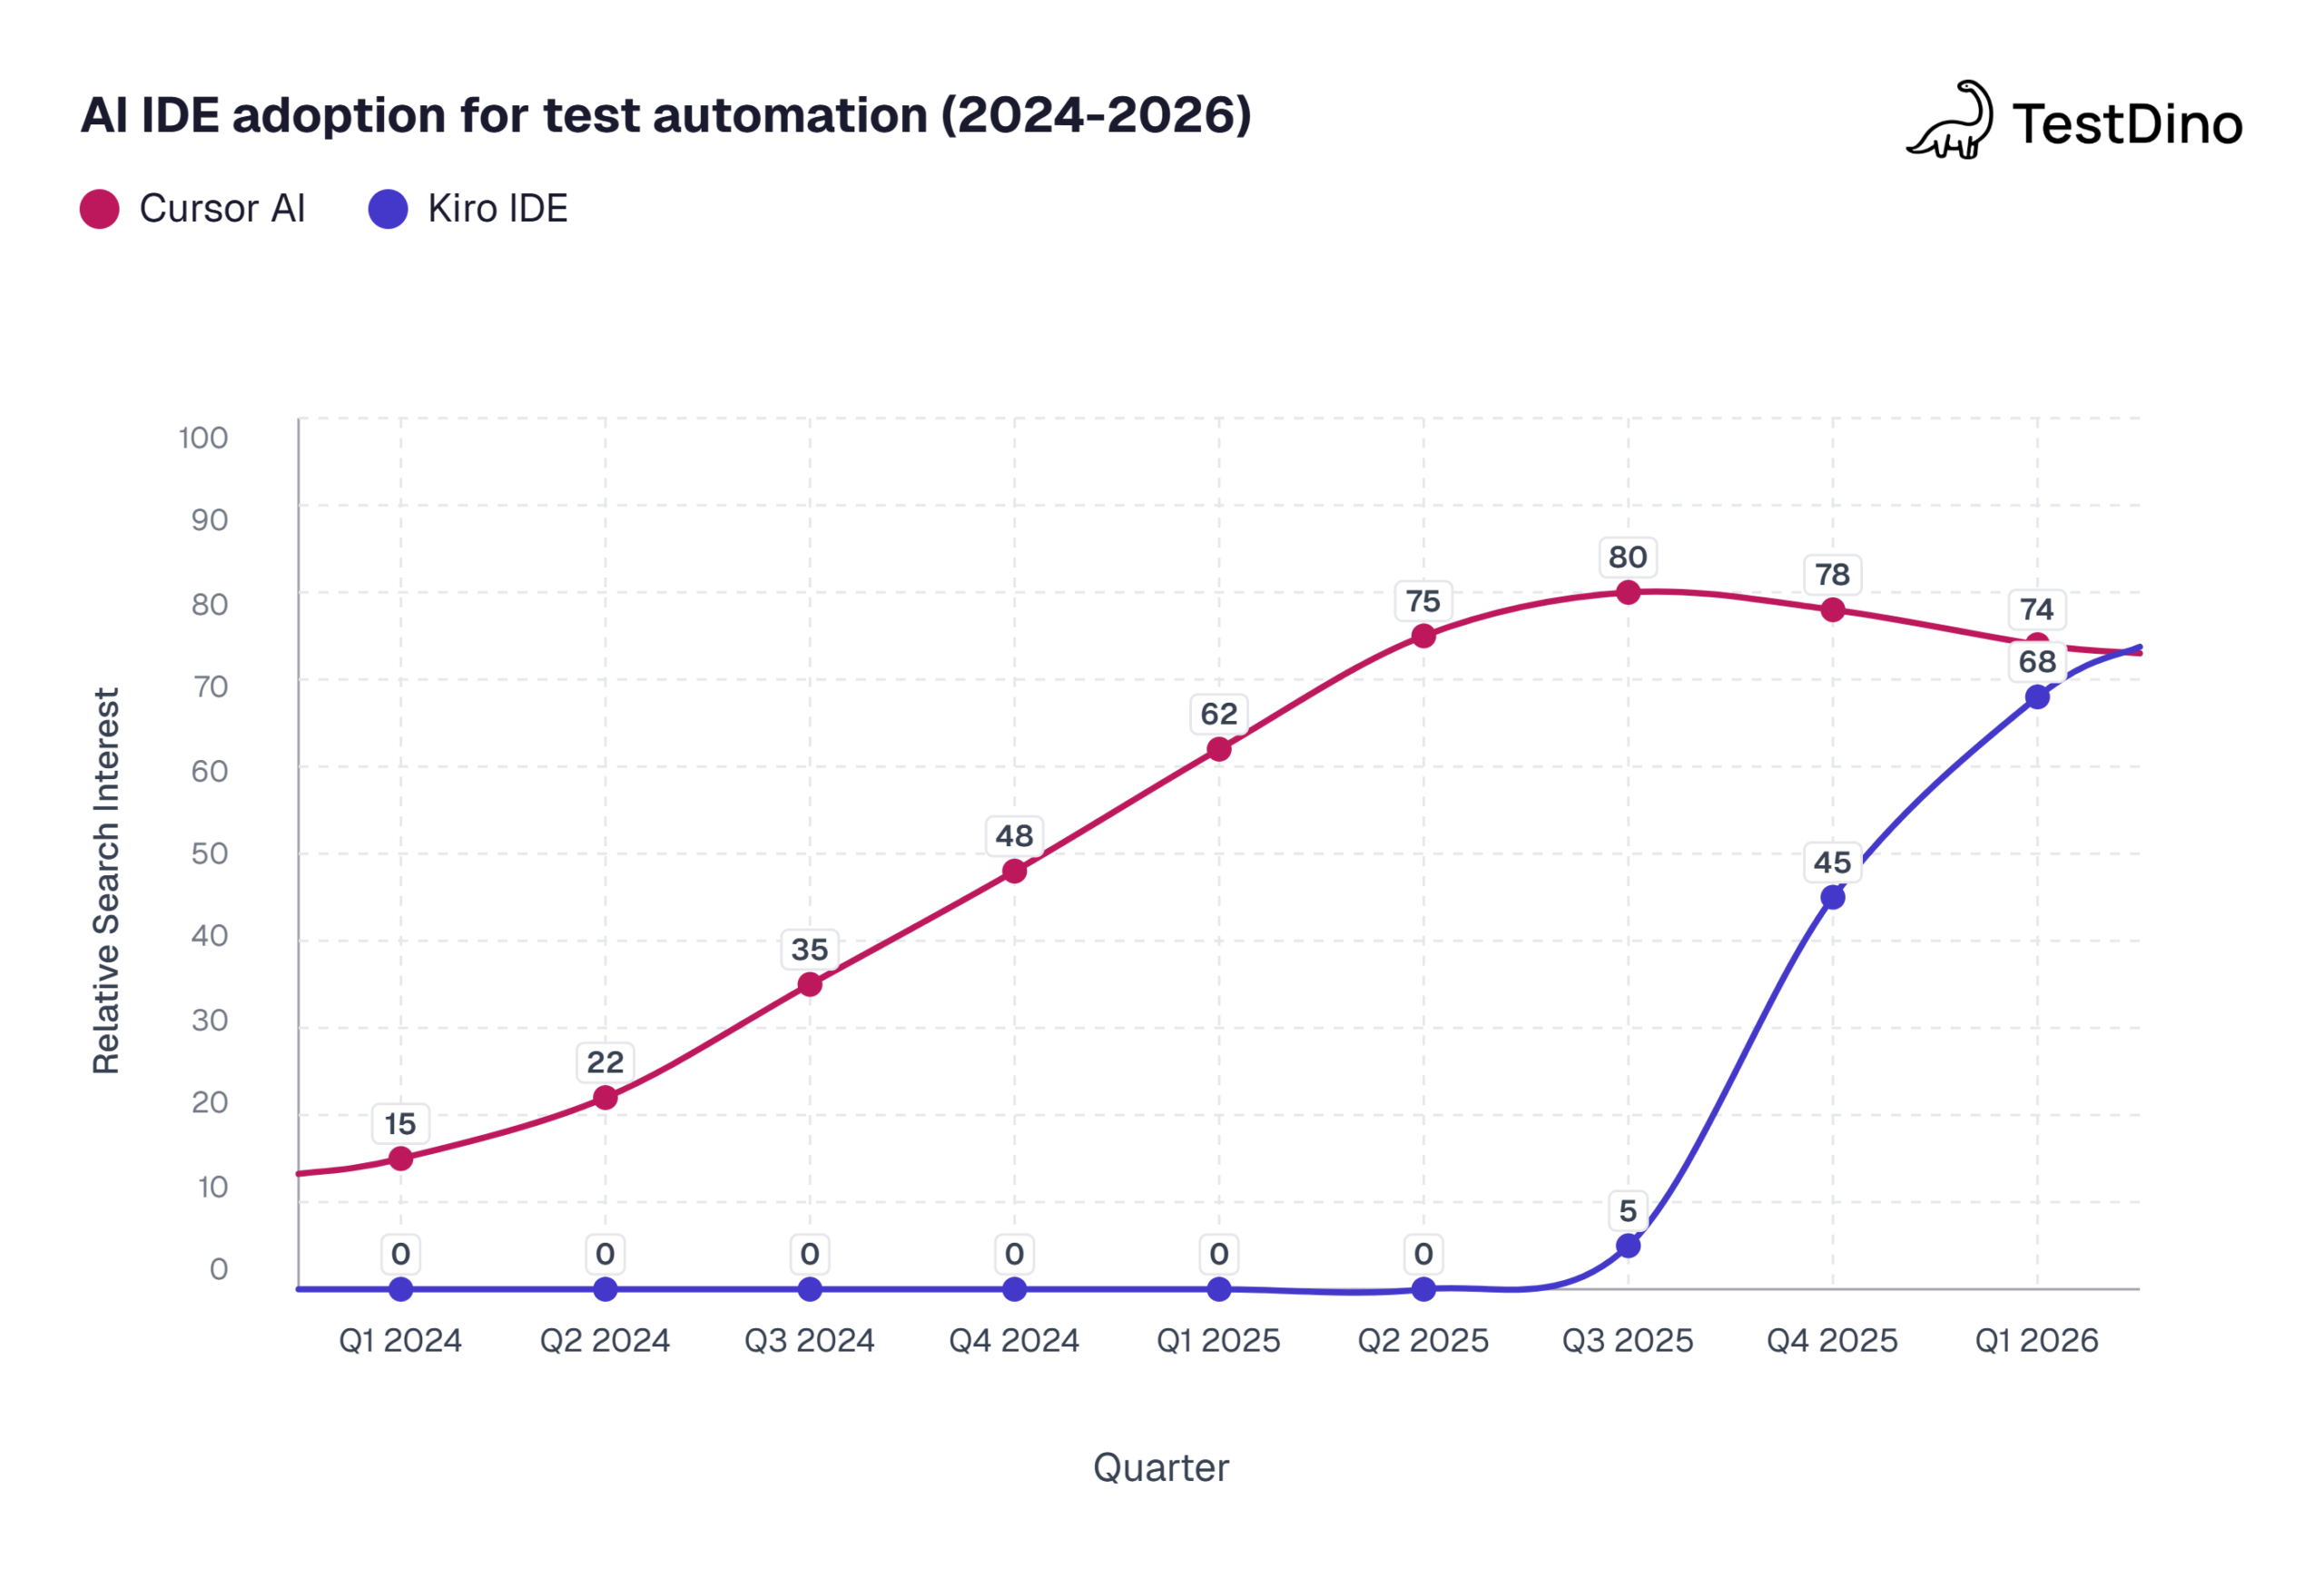
Source: Google Trends, normalized relative search interest data, March 2026.
Tips for writing stable Kiro-generated Playwright tests
AI-generated tests require specific guardrails to stay stable in CI. Here are patterns we found effective after running Kiro-generated suites across multiple projects.
Always review the spec before accepting code
Kiro's spec-driven flow gives you a review checkpoint. Use it. Check that:
- The requirements match what the feature actually does
- The design references correct page URLs and element labels
- The task list includes both happy path and error scenarios
Skipping this review is the fastest way to end up with flaky tests that pass locally but fail in CI.
Keep steering rules updated
Your steering rules should evolve with your project. When you add a new shared fixture, update the steering doc. When you change naming conventions, update the steering doc.
Stale steering rules lead to AI-generated code that conflicts with your current patterns. We learned this the hard way when a renamed fixture caused 14 tests to import a file that no longer existed. Updating the steering doc fixed all of them in one regeneration cycle.
Use Playwright annotations for TestDino
Add annotations to your tests so TestDino can categorize and track them properly:
import { test, expect } from '@playwright/test';

test('should complete checkout flow', {
  annotation: [
    { type: 'feature', description: 'checkout' },
    { type: 'priority', description: 'P0' },
    { type: 'owner', description: 'qa-team' }
  ]
}, async ({ page }) => {
  await page.goto('https://storedemo.cms.testdino.com/checkout');
  // test implementation
});
These annotations show up in the TestDino dashboard and help with test automation reporting across your entire suite.
Leverage parallel execution
Kiro-generated tests are independent by default (which is good). Make sure your playwright.config.ts enables parallel execution to keep CI run times fast:
export default defineConfig({
  fullyParallel: true,
  workers: process.env.CI ? 4 : undefined,
});
Validate locators against Playwright architecture
Kiro with MCP generates locators from real DOM snapshots. But DOM-based locators can still break when the app changes. Run npx playwright codegen periodically to compare Kiro's locators against what Playwright's architecture actually sees in the browser.
Conclusion
Kiro brings a structured, spec-driven approach to Playwright test generation that goes beyond the prompt-and-pray pattern of most AI coding tools. Steering rules give it project context, MCP gives it live browser access, and Agent Hooks automate the repetitive parts.
The setup takes about 15 minutes: install Kiro, add the Playwright MCP config, write your steering rules. From there, you can generate entire test suites from natural language specs.
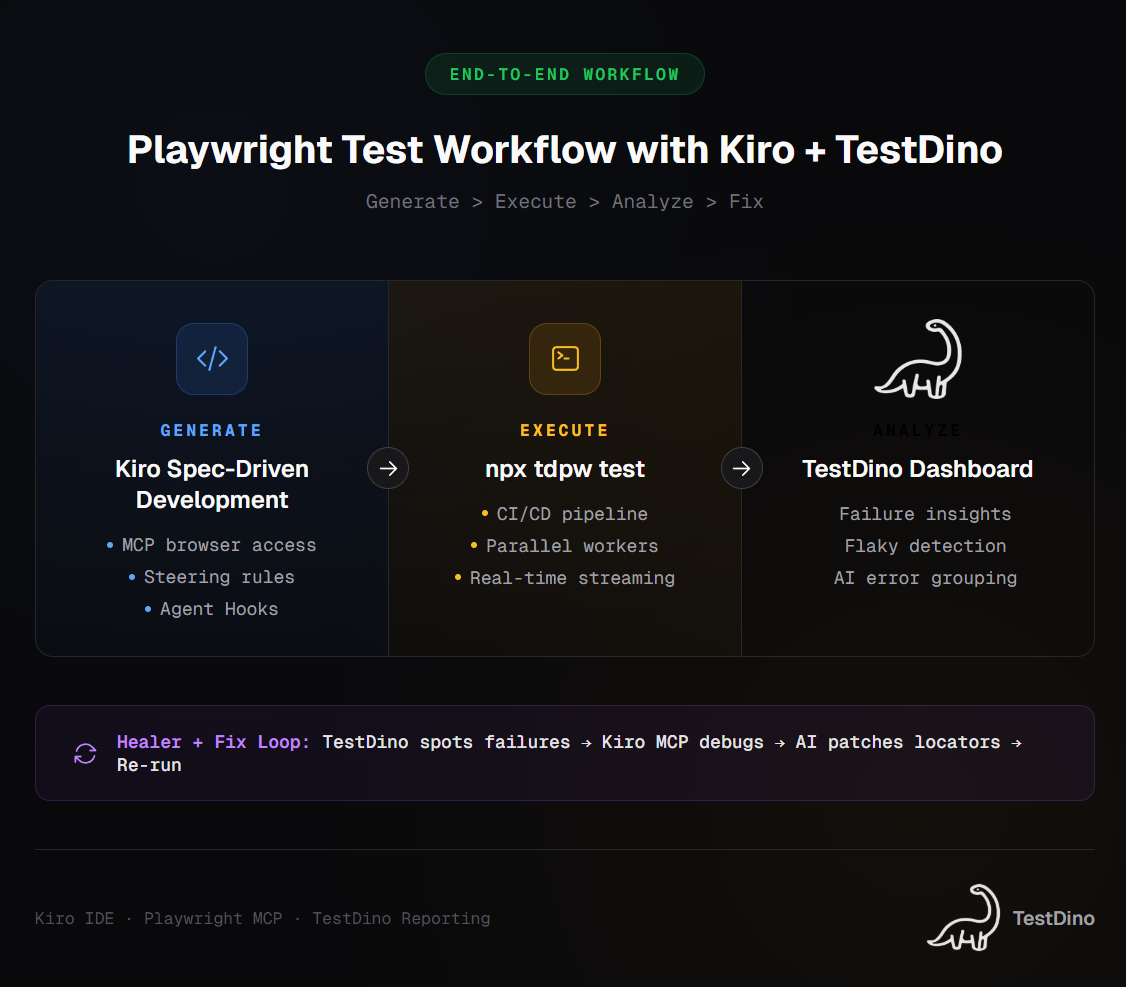
Pair that with TestDino for real-time reporting and failure analysis, and you have a pipeline where tests get generated with context, run with proper tracking, and get fixed with AI-powered insights when they break.
Whether you switch from Cursor or start fresh, Kiro is worth exploring for any team that needs Playwright tests that hold up in production, not just in a demo.
Frequently asked questions
Kiro tackles flakiness with MCP-based locators that reference real DOM elements instead of brittle selectors. You can also share failures with Kiro's chat, and it uses MCP to inspect the page and suggest fixes. Combined with TestDino's flaky test detection, you get a loop where TestDino spots the pattern and Kiro fixes the root cause.

Jashn Jain
Developer Advocate