How to Migrate From TestRail to TestDino (4-Step Guide)
Migrate from TestRail to TestDino in 4 steps: auto-mapped CSV import, suite hierarchy intact, duplicates skipped, no scripts needed.

Moving off TestRail does not have to be a quarter-long, risky project.
To make this process worry-free, TestDino has a dedicated TestRail import option that reads a standard TestRail CSV export and auto-maps the columns for you. A typical project migrates in under an hour: export, upload, review the mapping, and import.
This guide covers the full path: why teams move, what to prepare before exporting, 2 ways to import your test cases (the built-in CSV wizard and the TestDino MCP for AI-assisted imports), and how to validate everything after.
This guide covers the full path: why teams move, what to prepare before exporting, 2 ways to import your test cases, and how to validate everything after. That second import method is one you won't find in other TestRail migration guides: an AI-assisted path through the TestDino MCP, where your AI assistant does the import (and cleanup) for you.
Why do teams migrate from TestRail?
TestRail was one of the most established test management tools, and for years it has been considered the default choice. The reasons teams move are consistent:
-
Per-seat pricing. TestRail Professional is $38 per seat per month; Enterprise is $76 per seat per month. A 10-person team pays $4,560+ per year on Professional before add-ons. As teams grow, per-seat pricing becomes the line item QA leads get asked about.
-
Manual and automated testing live in separate worlds. TestRail manages manual test cases well, but automation results have to be pushed in through the API or third-party bindings. Most teams end up with test cases in TestRail and automation truth in CI logs.
-
No native automation reporting. There is no built-in view of Playwright (or any framework) runs, traces, retries, or flakiness. You maintain the glue code yourself.
-
Administrative weight. Suites, sections, templates, and milestone hierarchies were designed for a different era of QA. Day-to-day work involves more clicking than testing.
What TestDino offers instead
TestDino is a test intelligence platform: test case management and automation reporting in 1 place, built around Test management and AI-assisted workflows.
What you get on the test management side:
-
Nested test suites with drag-and-drop reordering, so your TestRail section hierarchy has a direct home.
-
Version history on every test case. Every edit is tracked; compare versions side by side and restore any previous one.
-
Classification fields for priority, severity, type, layer, behavior, and status, plus automation status, all customizable per project so cases stay easy to filter and triage. See the classification fields reference.
-
Custom fields to extend your cases beyond the standard ones and tailor them to each project, with text, textarea, number, dropdown, and checkbox types. This is exactly where your extra TestRail columns land during import.
-
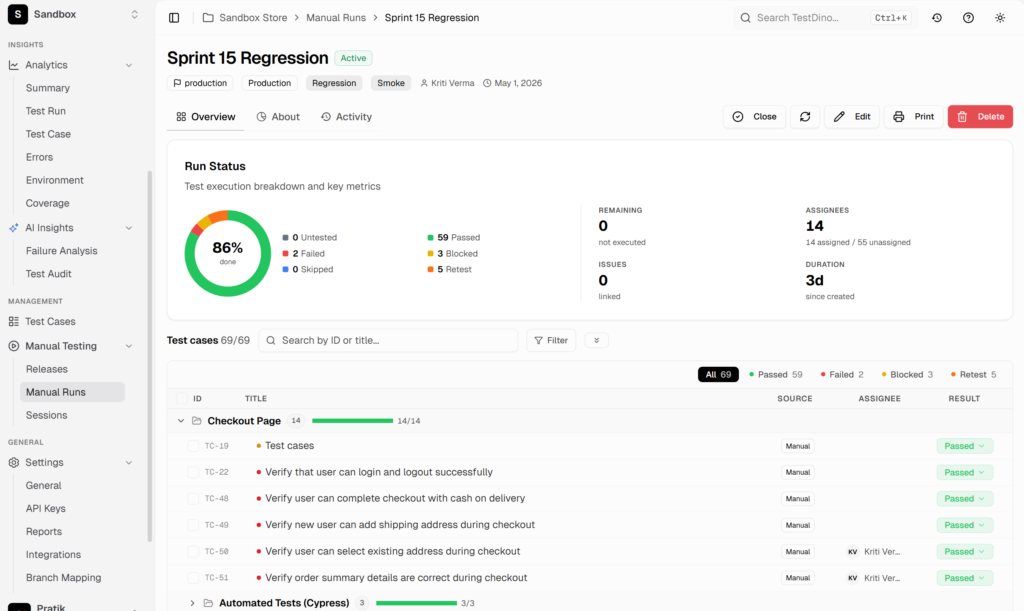
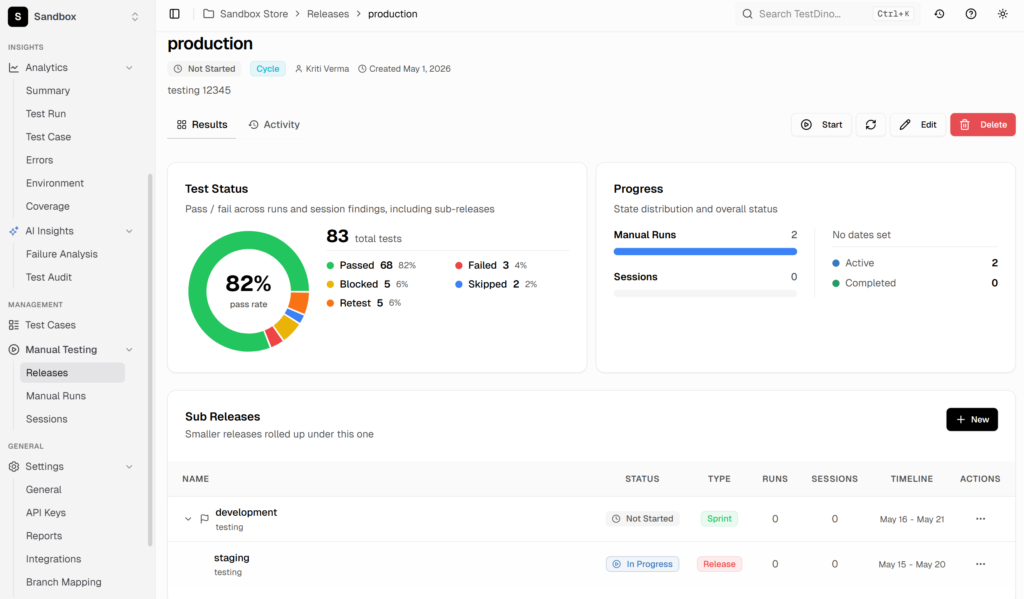
Manual testing built in: Releases to group work by sprint or milestone, Manual Runs for scripted execution, and Sessions for exploratory testing.
-
Automation linking. Auto-Match connects manual cases to existing automated tests; Auto-Generate drafts automation from manual cases. Coverage becomes something you can see at a glance, live and per suite.
-
Native Playwright reporting: runs, traces, PR-level results, flaky test detection, and AI failure analysis, all sitting right next to your test cases in the same place.
-
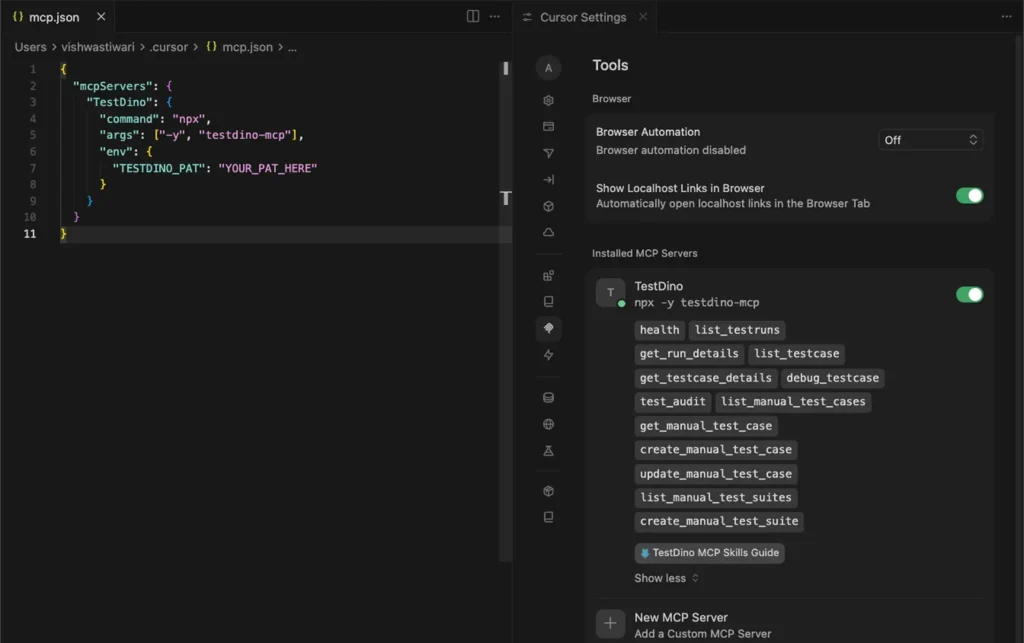
An MCP server, so AI assistants like Claude and Cursor can create, search, and update test cases directly. This also gives you a second migration path (covered below).

Before migrating: Prepare your TestRail project
A clean export beats a big export. 30 minutes of prep here saves hours of cleanup later.
1. Audit what you actually use
List your TestRail projects and suites, then be honest about which ones a person has opened in the last 6 months. Most TestRail instances carry years of accumulated cases nobody runs. Migrate what your team executes, not everything that exists.
2. Clean up obsolete and duplicate cases
In TestRail, before exporting:
-
Delete or skip cases for retired features.
-
Merge obvious duplicates (the import can also skip same-title duplicates for you; more on that below).
-
Fill in missing priorities and types where it is quick to do, since those fields map automatically.
3. Export from TestRail as CSV
In TestRail, open the suite, choose Export to CSV, and include the columns you care about: Title, Preconditions, Steps, Expected Result, Priority, Type, Section, Suite, Labels, and Automation Type if you use it. TestRail exports 1 suite at a time, so larger projects produce several CSV files.
That works smoothly with TestDino, since imports are safe to run repeatedly, one file at a time.
4. What carries over (and what doesn't)
Be clear about scope before you start. The CSV import moves your test cases from TestRail into TestDino. That is by design on both ends: TestRail's CSV export only includes test cases, and TestDino's CSV import reads test cases, so the two line up cleanly for exactly this job.
The table below shows what makes the jump and what stays behind in TestRail.
| Carries over from TestRail to TestDino | Stays behind in TestRail (does not import) |
|---|---|
|
|
Historical run results are the thing teams ask about most. The reason is simple: run history is tied to the tool that recorded it, so your past TestRail results are best kept in TestRail as an archive, where they stay intact and easy to reference.
Keep TestRail in read-only mode until its subscription lapses, and let fresh run metrics build up in TestDino from your first run there. Most teams find they stop opening the old archive within a month.
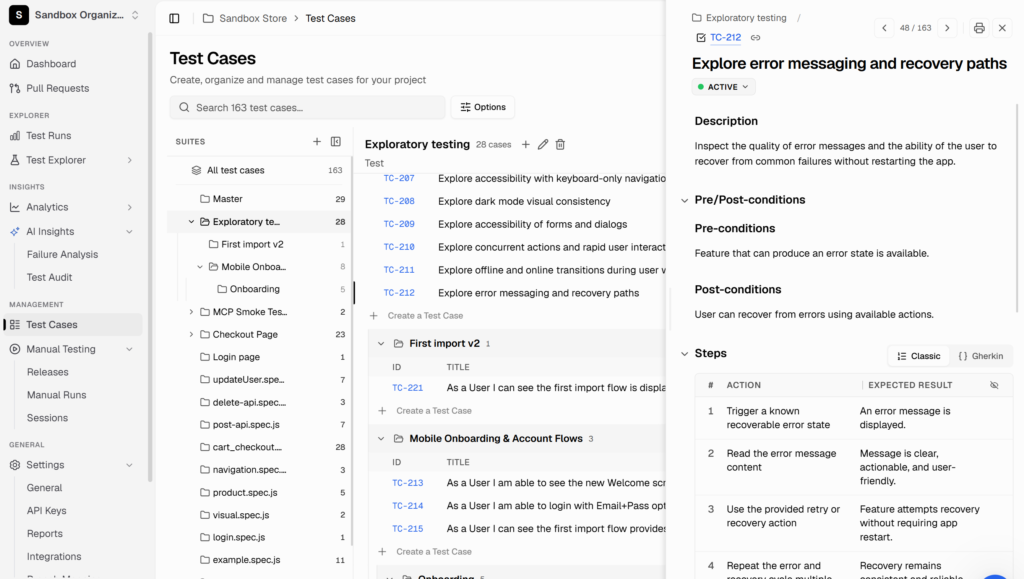
How to import test cases from TestRail into TestDino
Method 1: Direct CSV import (the 4-step wizard)
This is the built-in path and the right choice for almost everyone. Full reference in the Import & Export documentation.
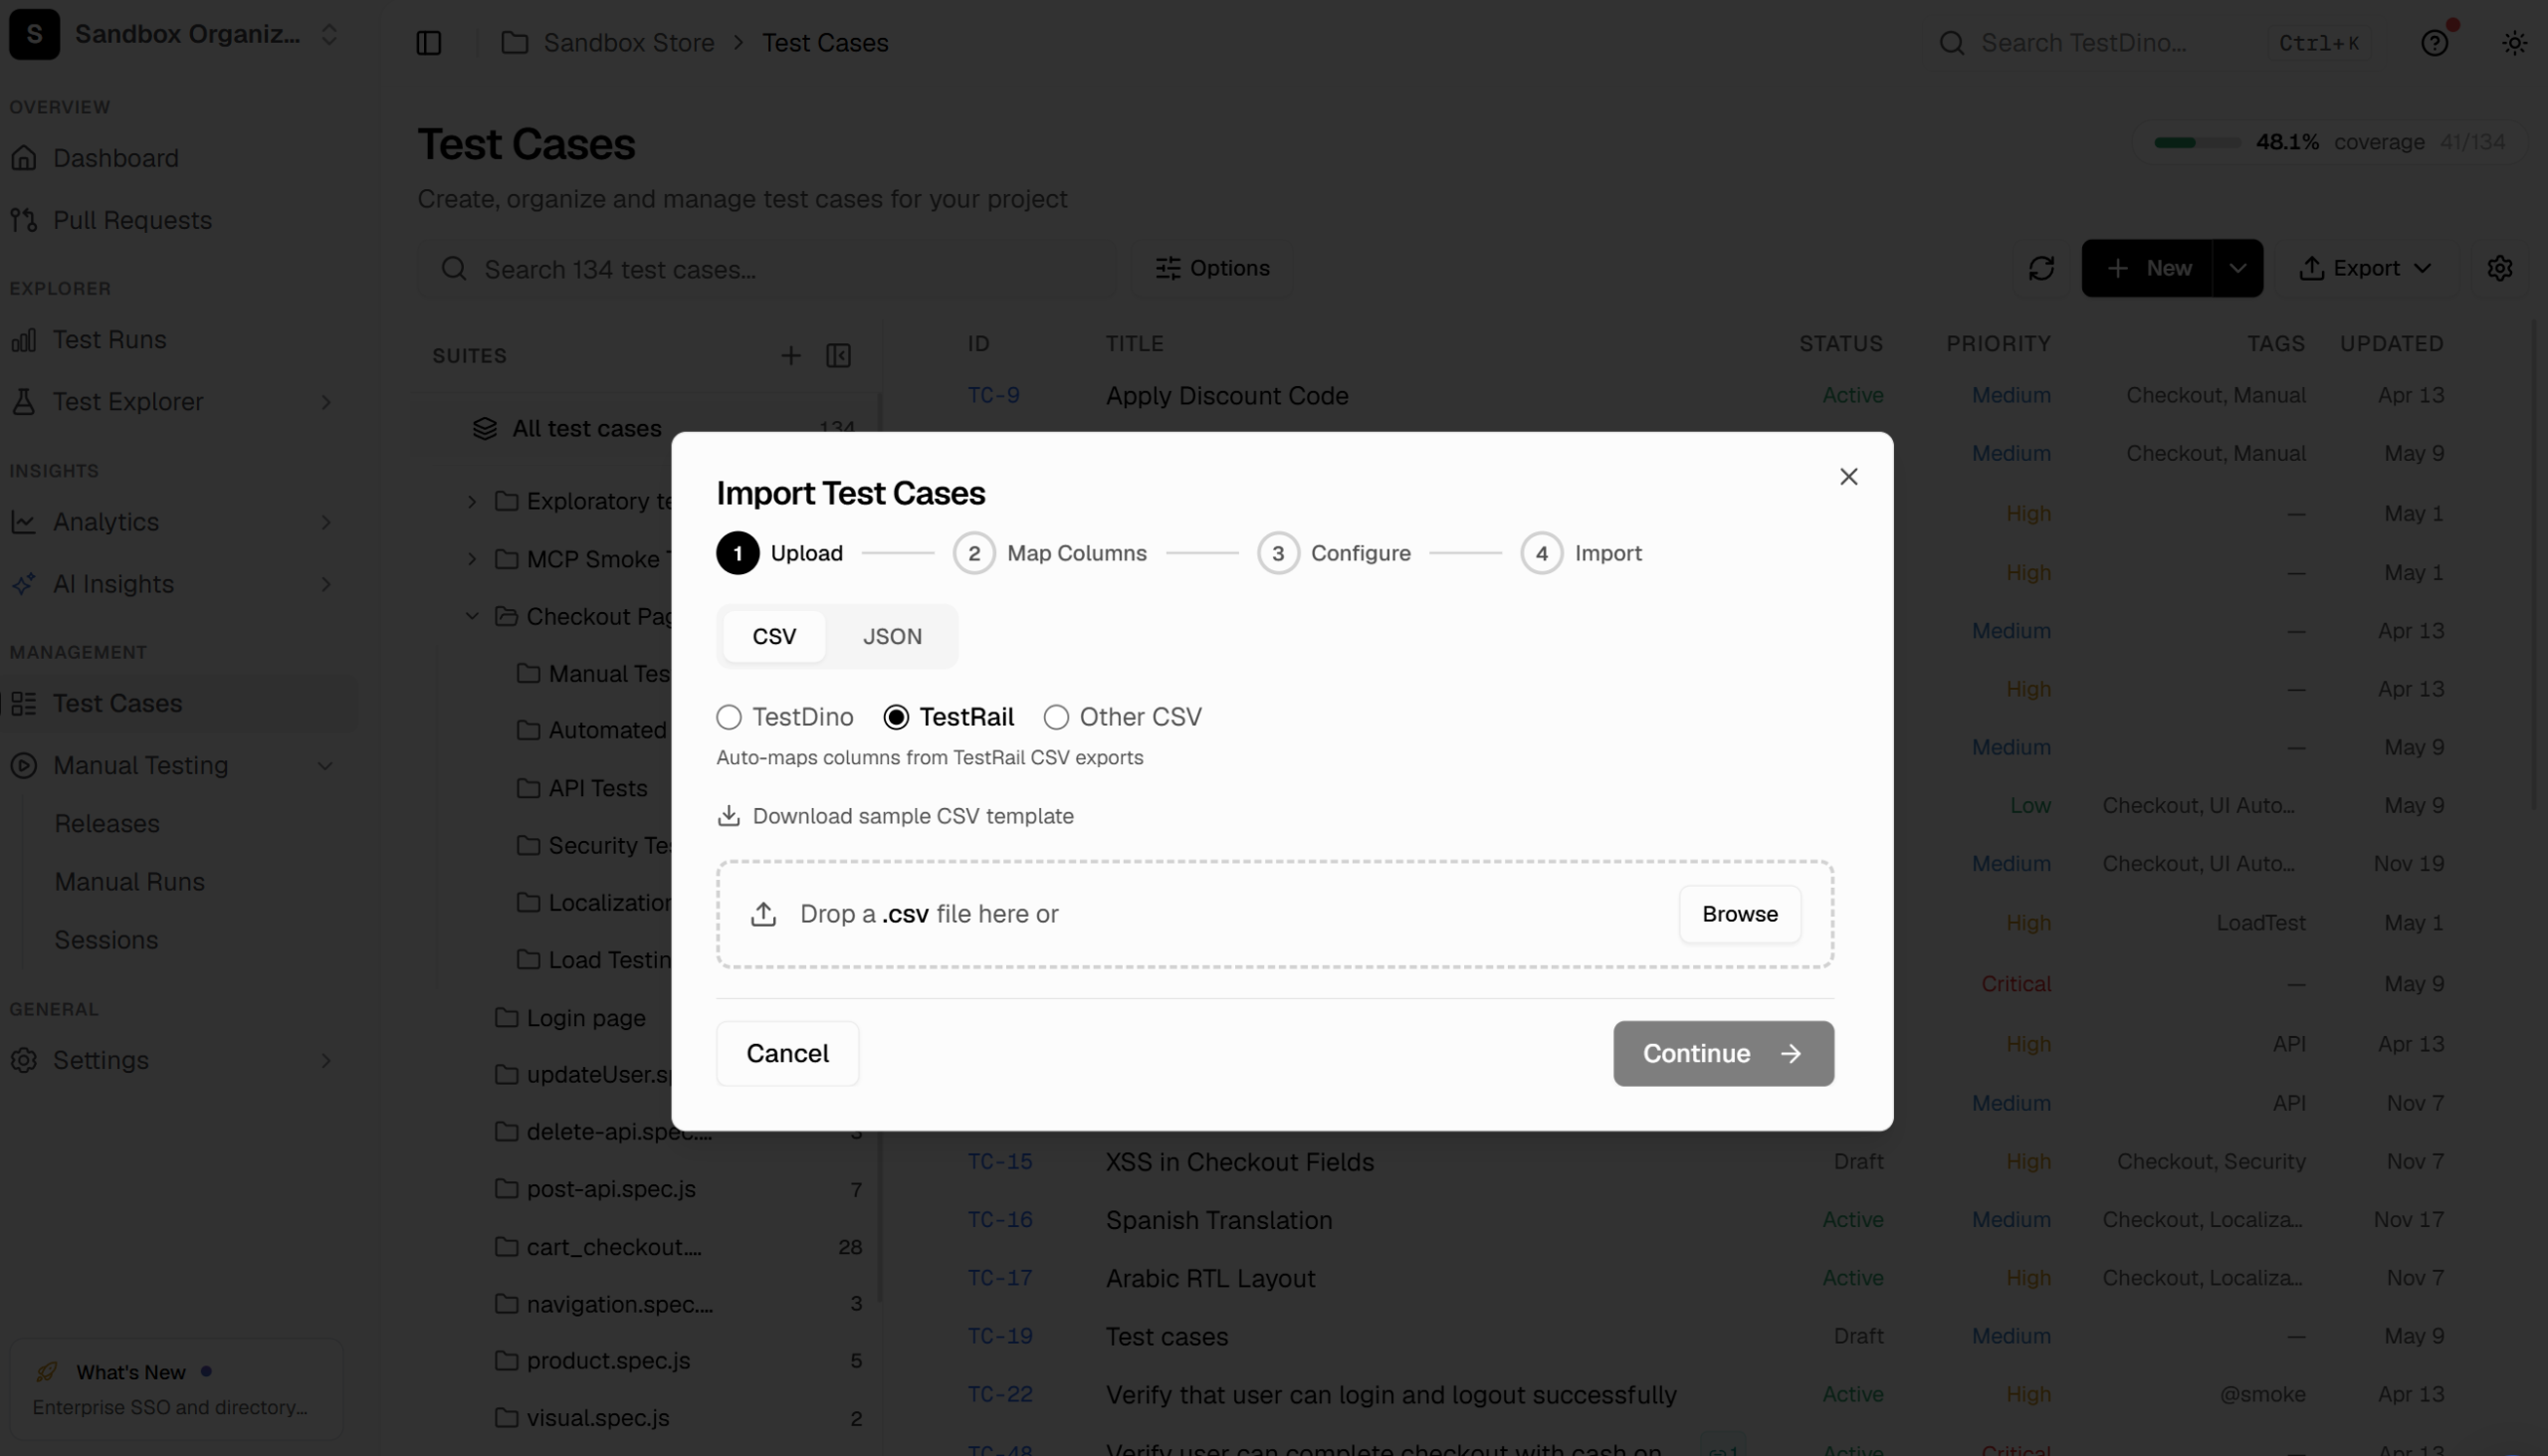
Step 1: Upload the CSV and select TestRail
-
Open Test Cases, click Import, choose CSV, and select TestRail as the source.
-
The dialog notes exactly what it does: auto-maps columns from TestRail CSV exports.
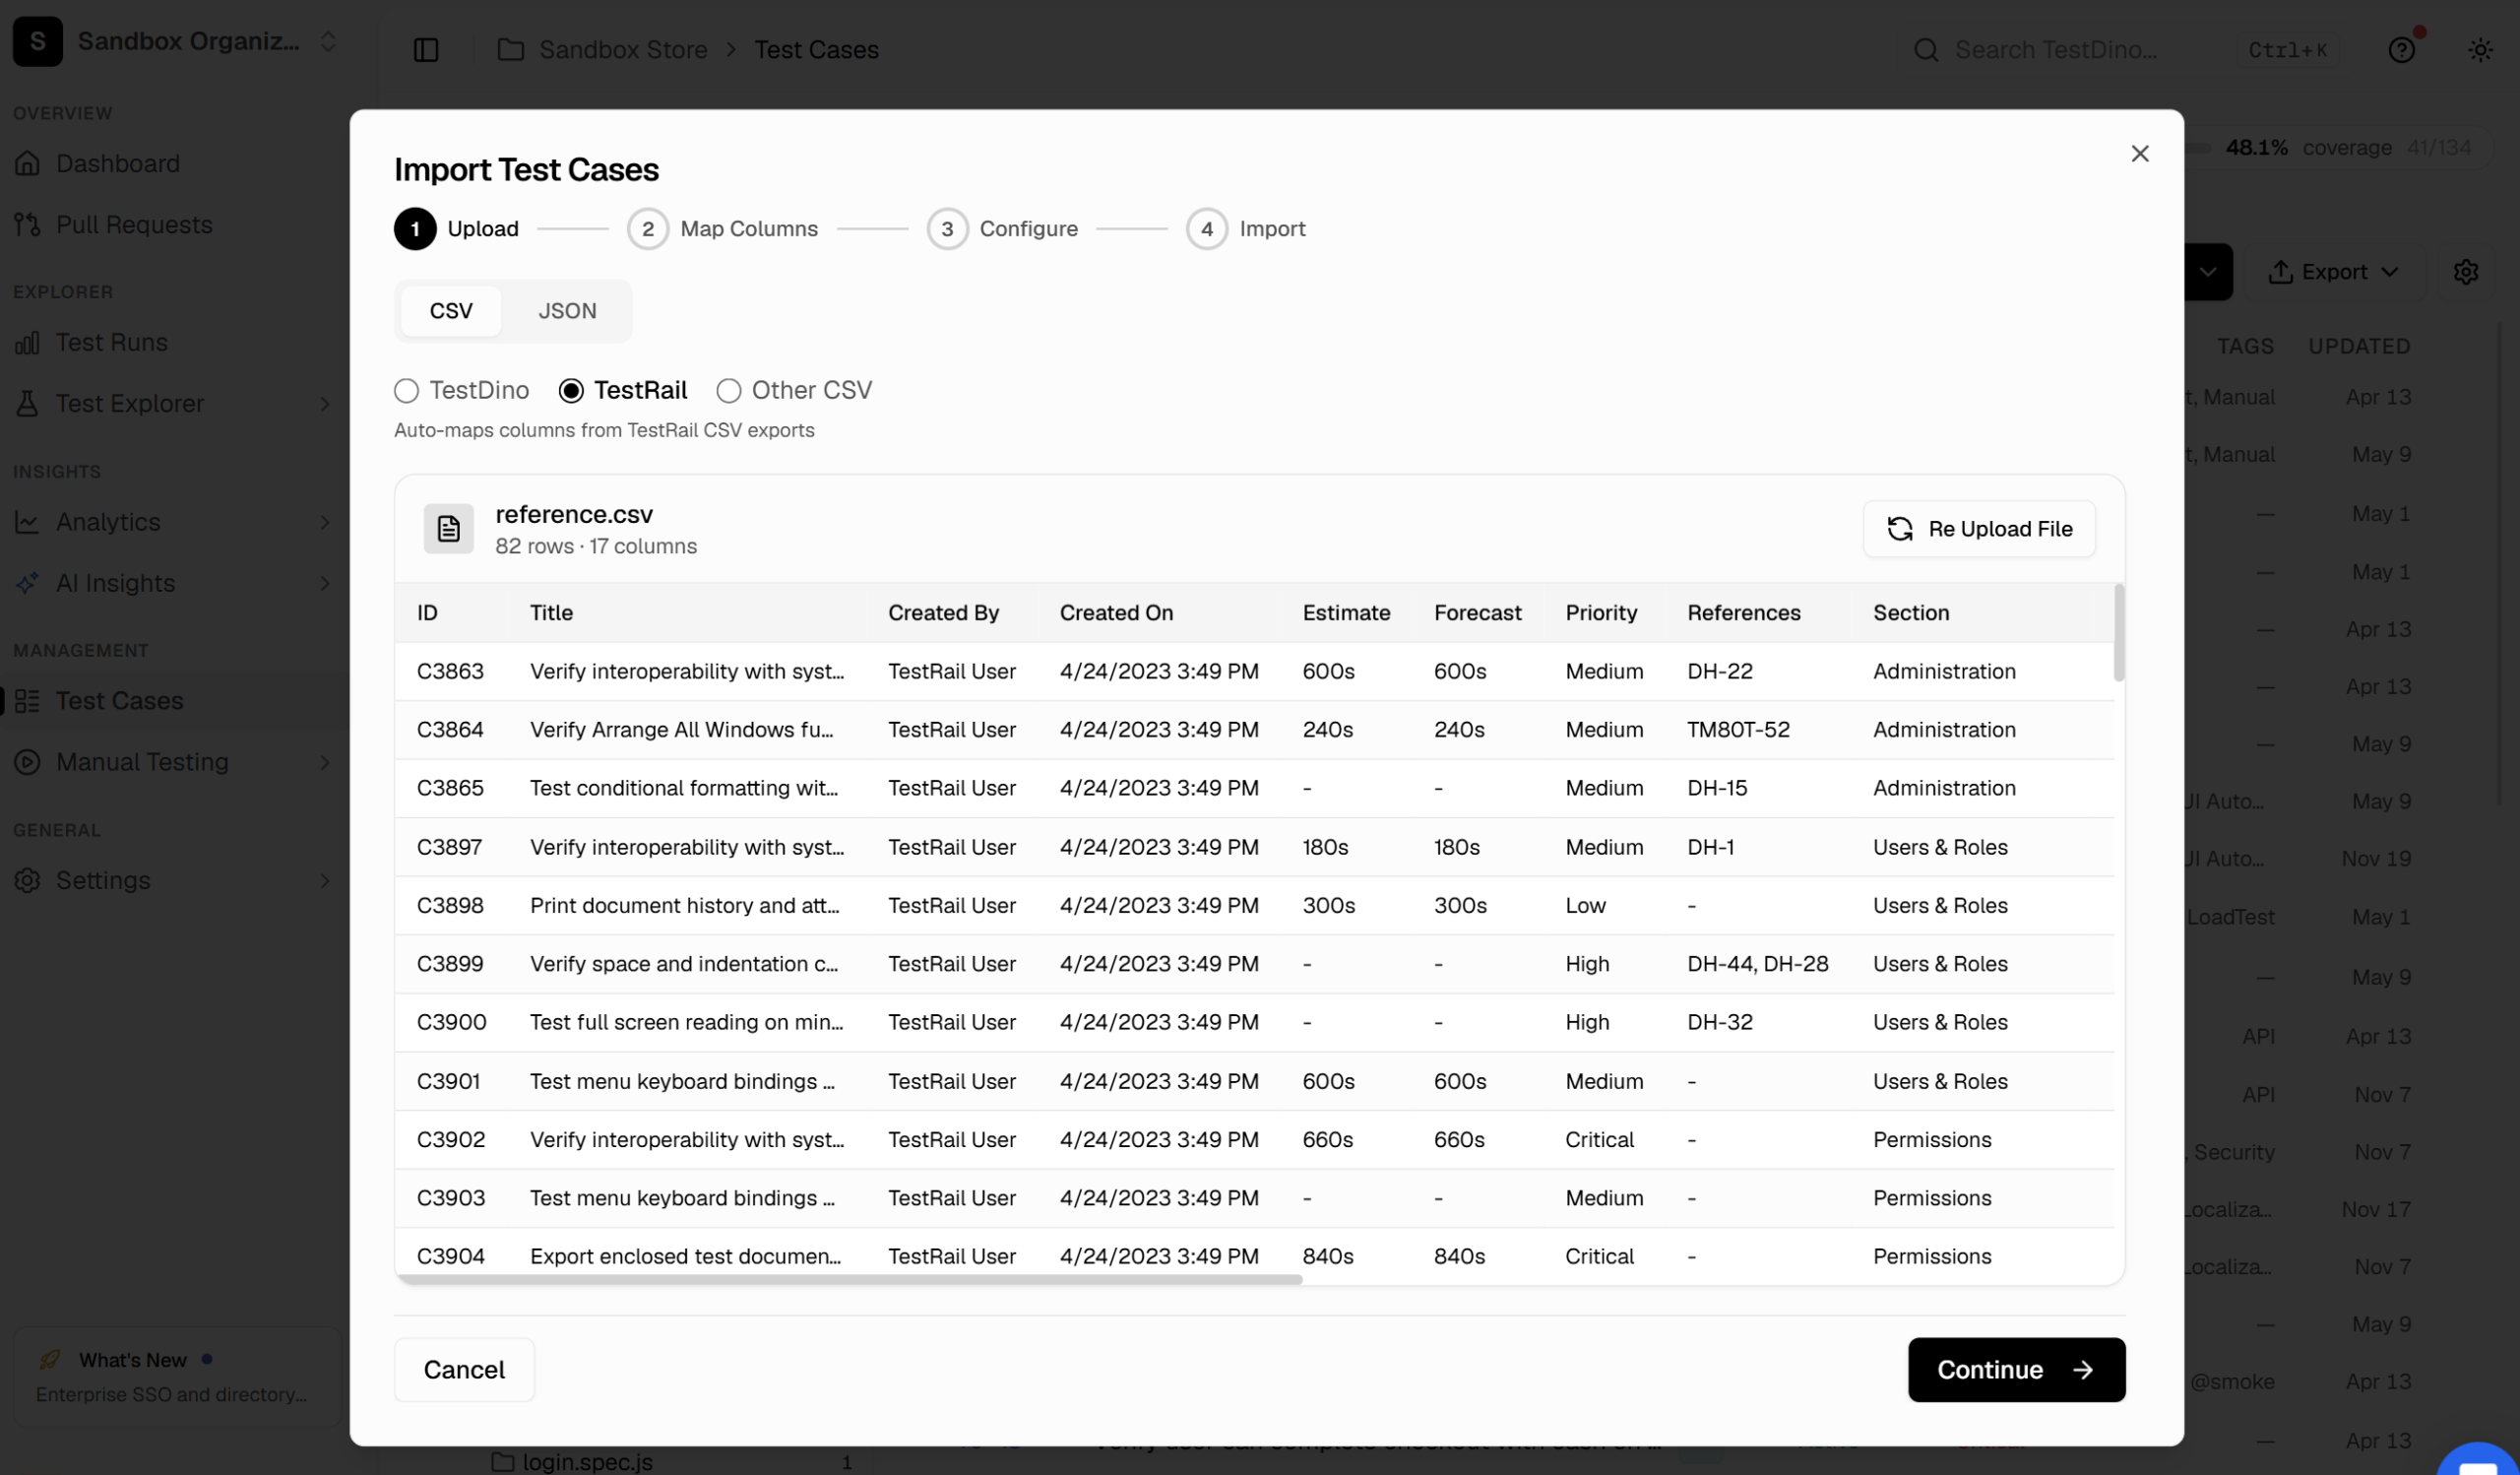
-
Drop in your exported file. TestDino reads it immediately and shows a preview: in this example, 82 rows across 17 columns, with the original TestRail IDs, priorities, references, and sections visible before anything is committed.
Step 2: Review the auto-mapped columns
This is where the TestRail option earns its name. TestDino recognizes the TestRail export format and maps the essential fields on its own:
| TestRail CSV column | TestDino field |
|---|---|
| Title | Title |
| Preconditions | Preconditions |
| Type | Type (classification) |
| Priority | Priority (classification) |
| Automation Type | Automation status |
| Suite | Suite name |
| Section Hierarchy | Suite hierarchy (nested folder path) |
| Labels | Tags |
Steps get special handling:
TestRail has 2 case templates, Text and Steps, and splits step data across several columns depending on which one a case uses.
The import handles both:
-
Steps and Steps (Step) map to the step action
-
Steps (Additional Info) to per-step test data
-
Expected Result / Steps (Expected Result) to the expected result
For each row, the importer selects the column that actually contains data. You do not have to normalize templates before exporting.
In our 17-column example, the wizard mapped 5 standard fields and, by default, skipped 12 housekeeping columns (ID, Created By, Created On, Estimate, Forecast, References, and so on). Title is the only required field.
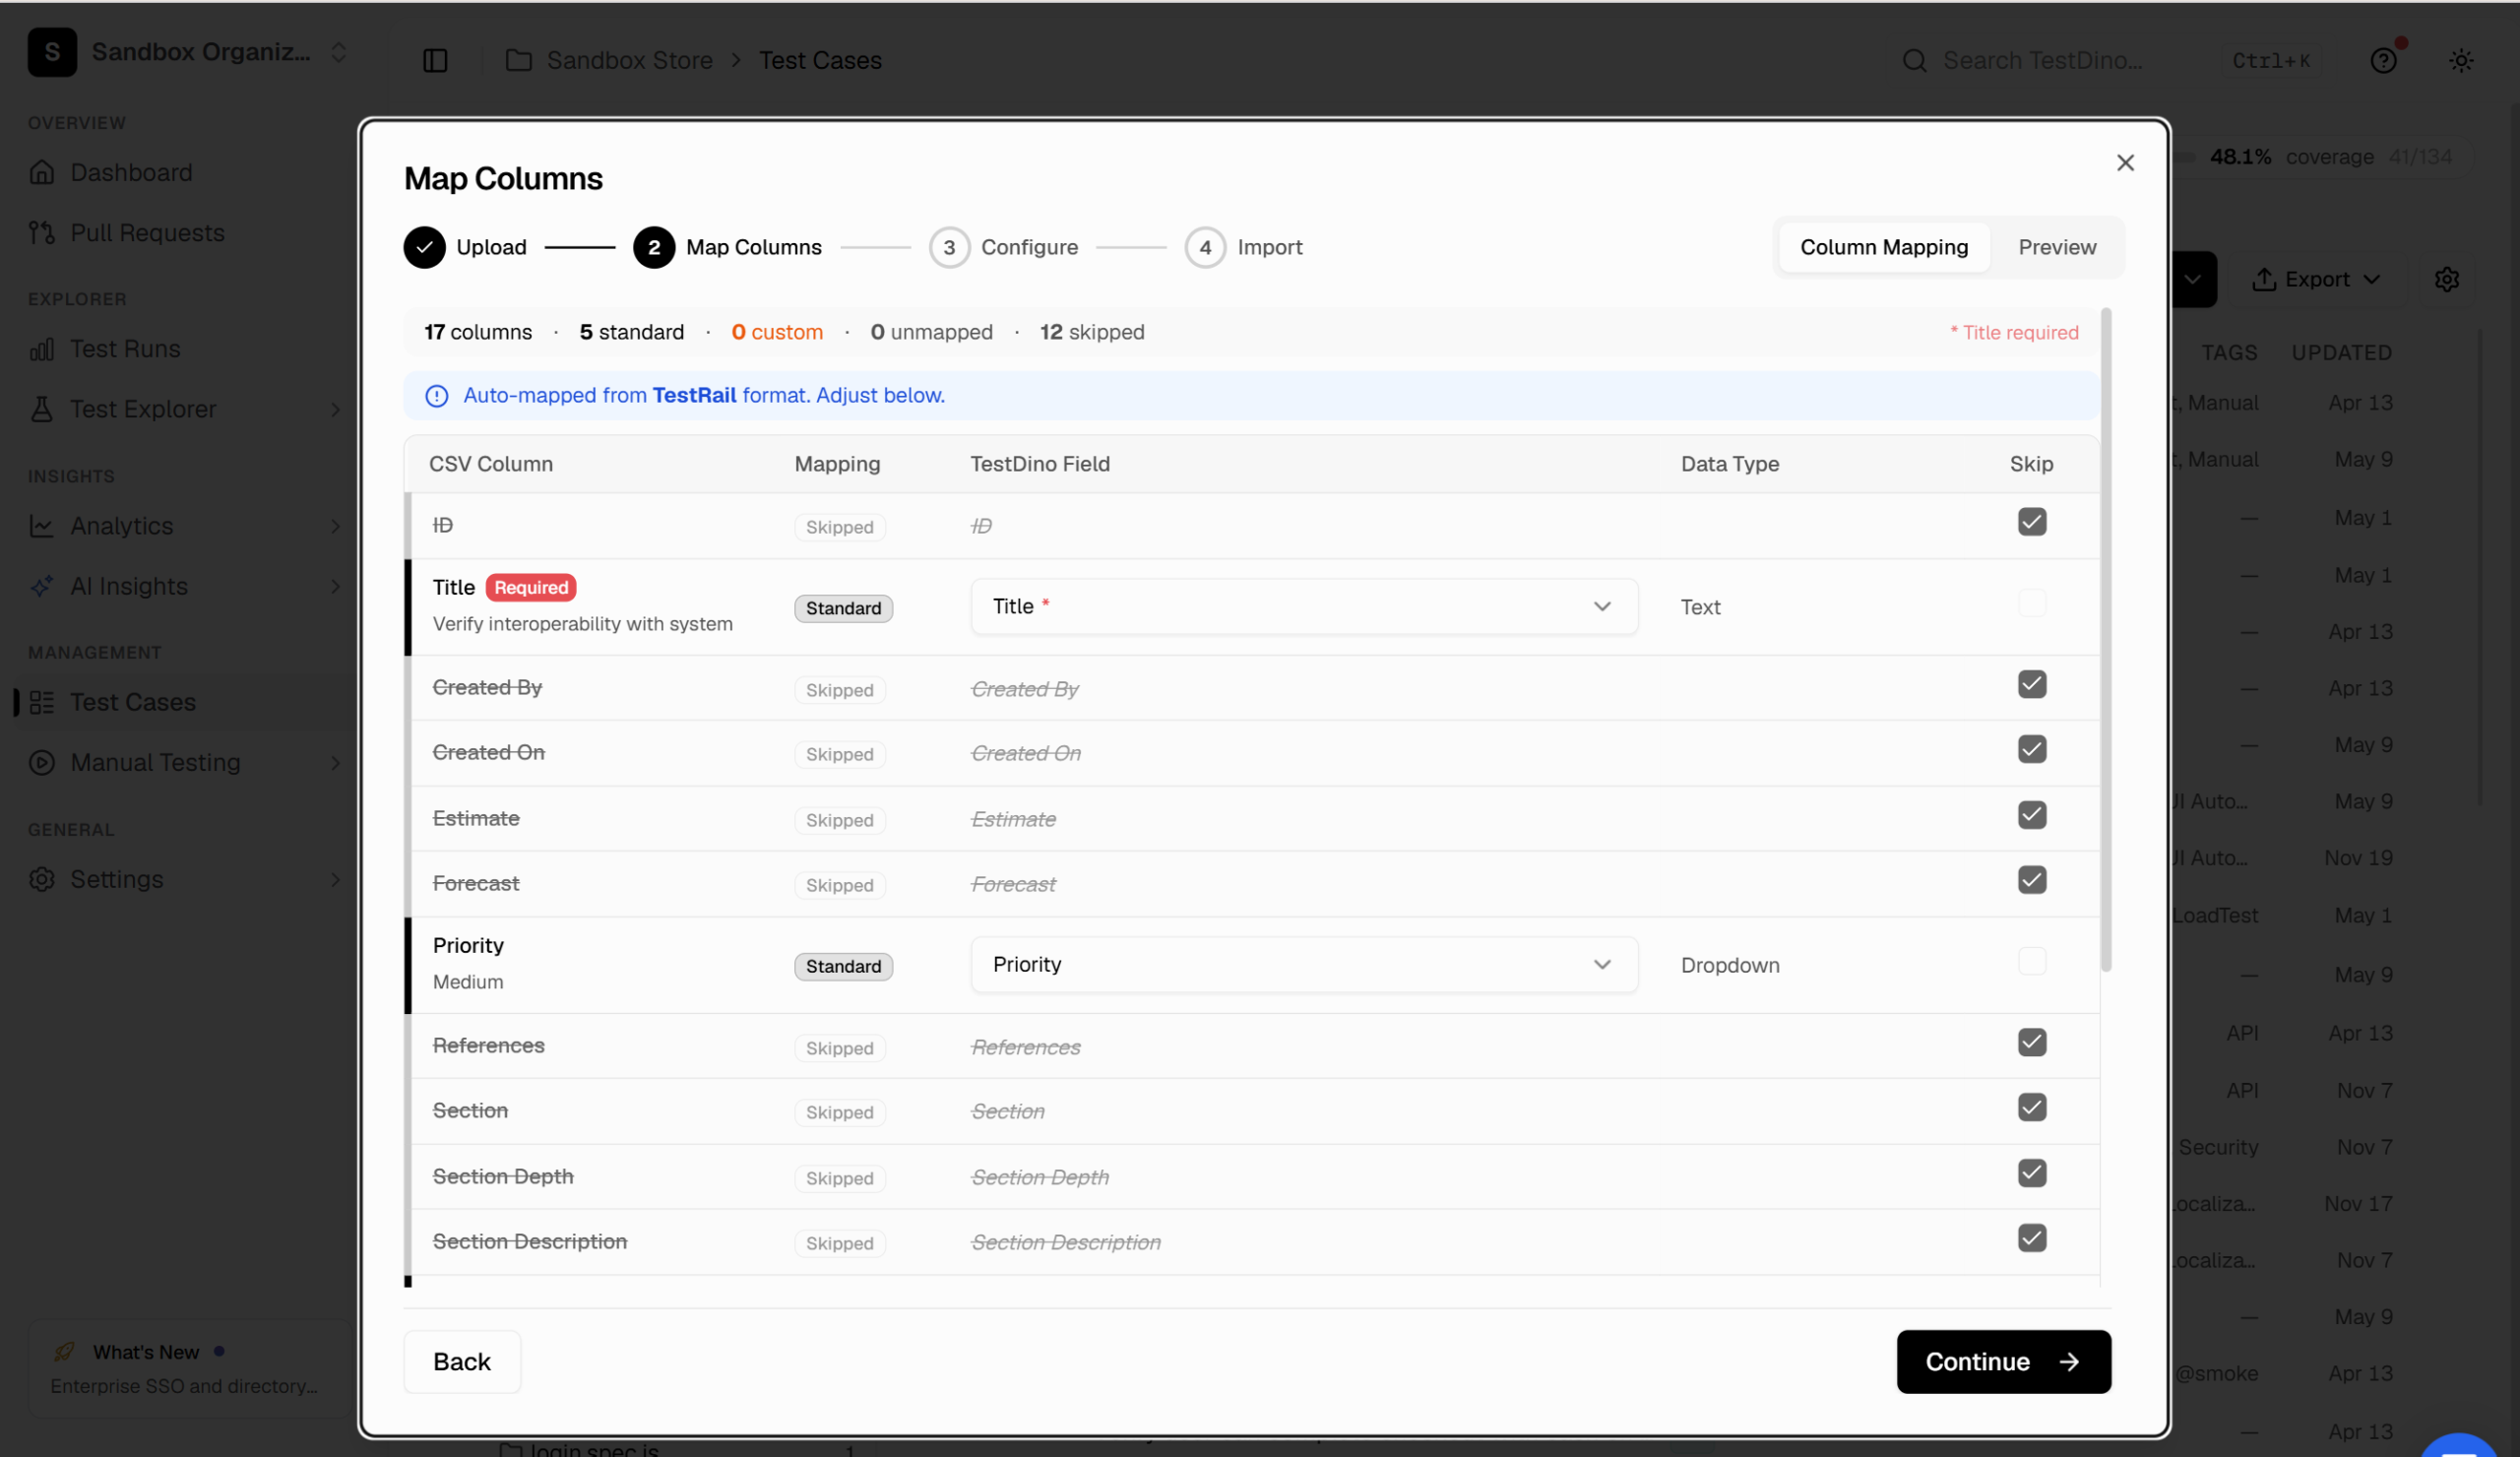
The key design decision:
-
TestDino maps the essential fields automatically and leaves everything else up to you.
-
If your team relies on Estimate or References, un-skip those columns and import them as custom fields, which you can configure in seconds.
-
If you do not need them, leave them skipped and keep the project clean.
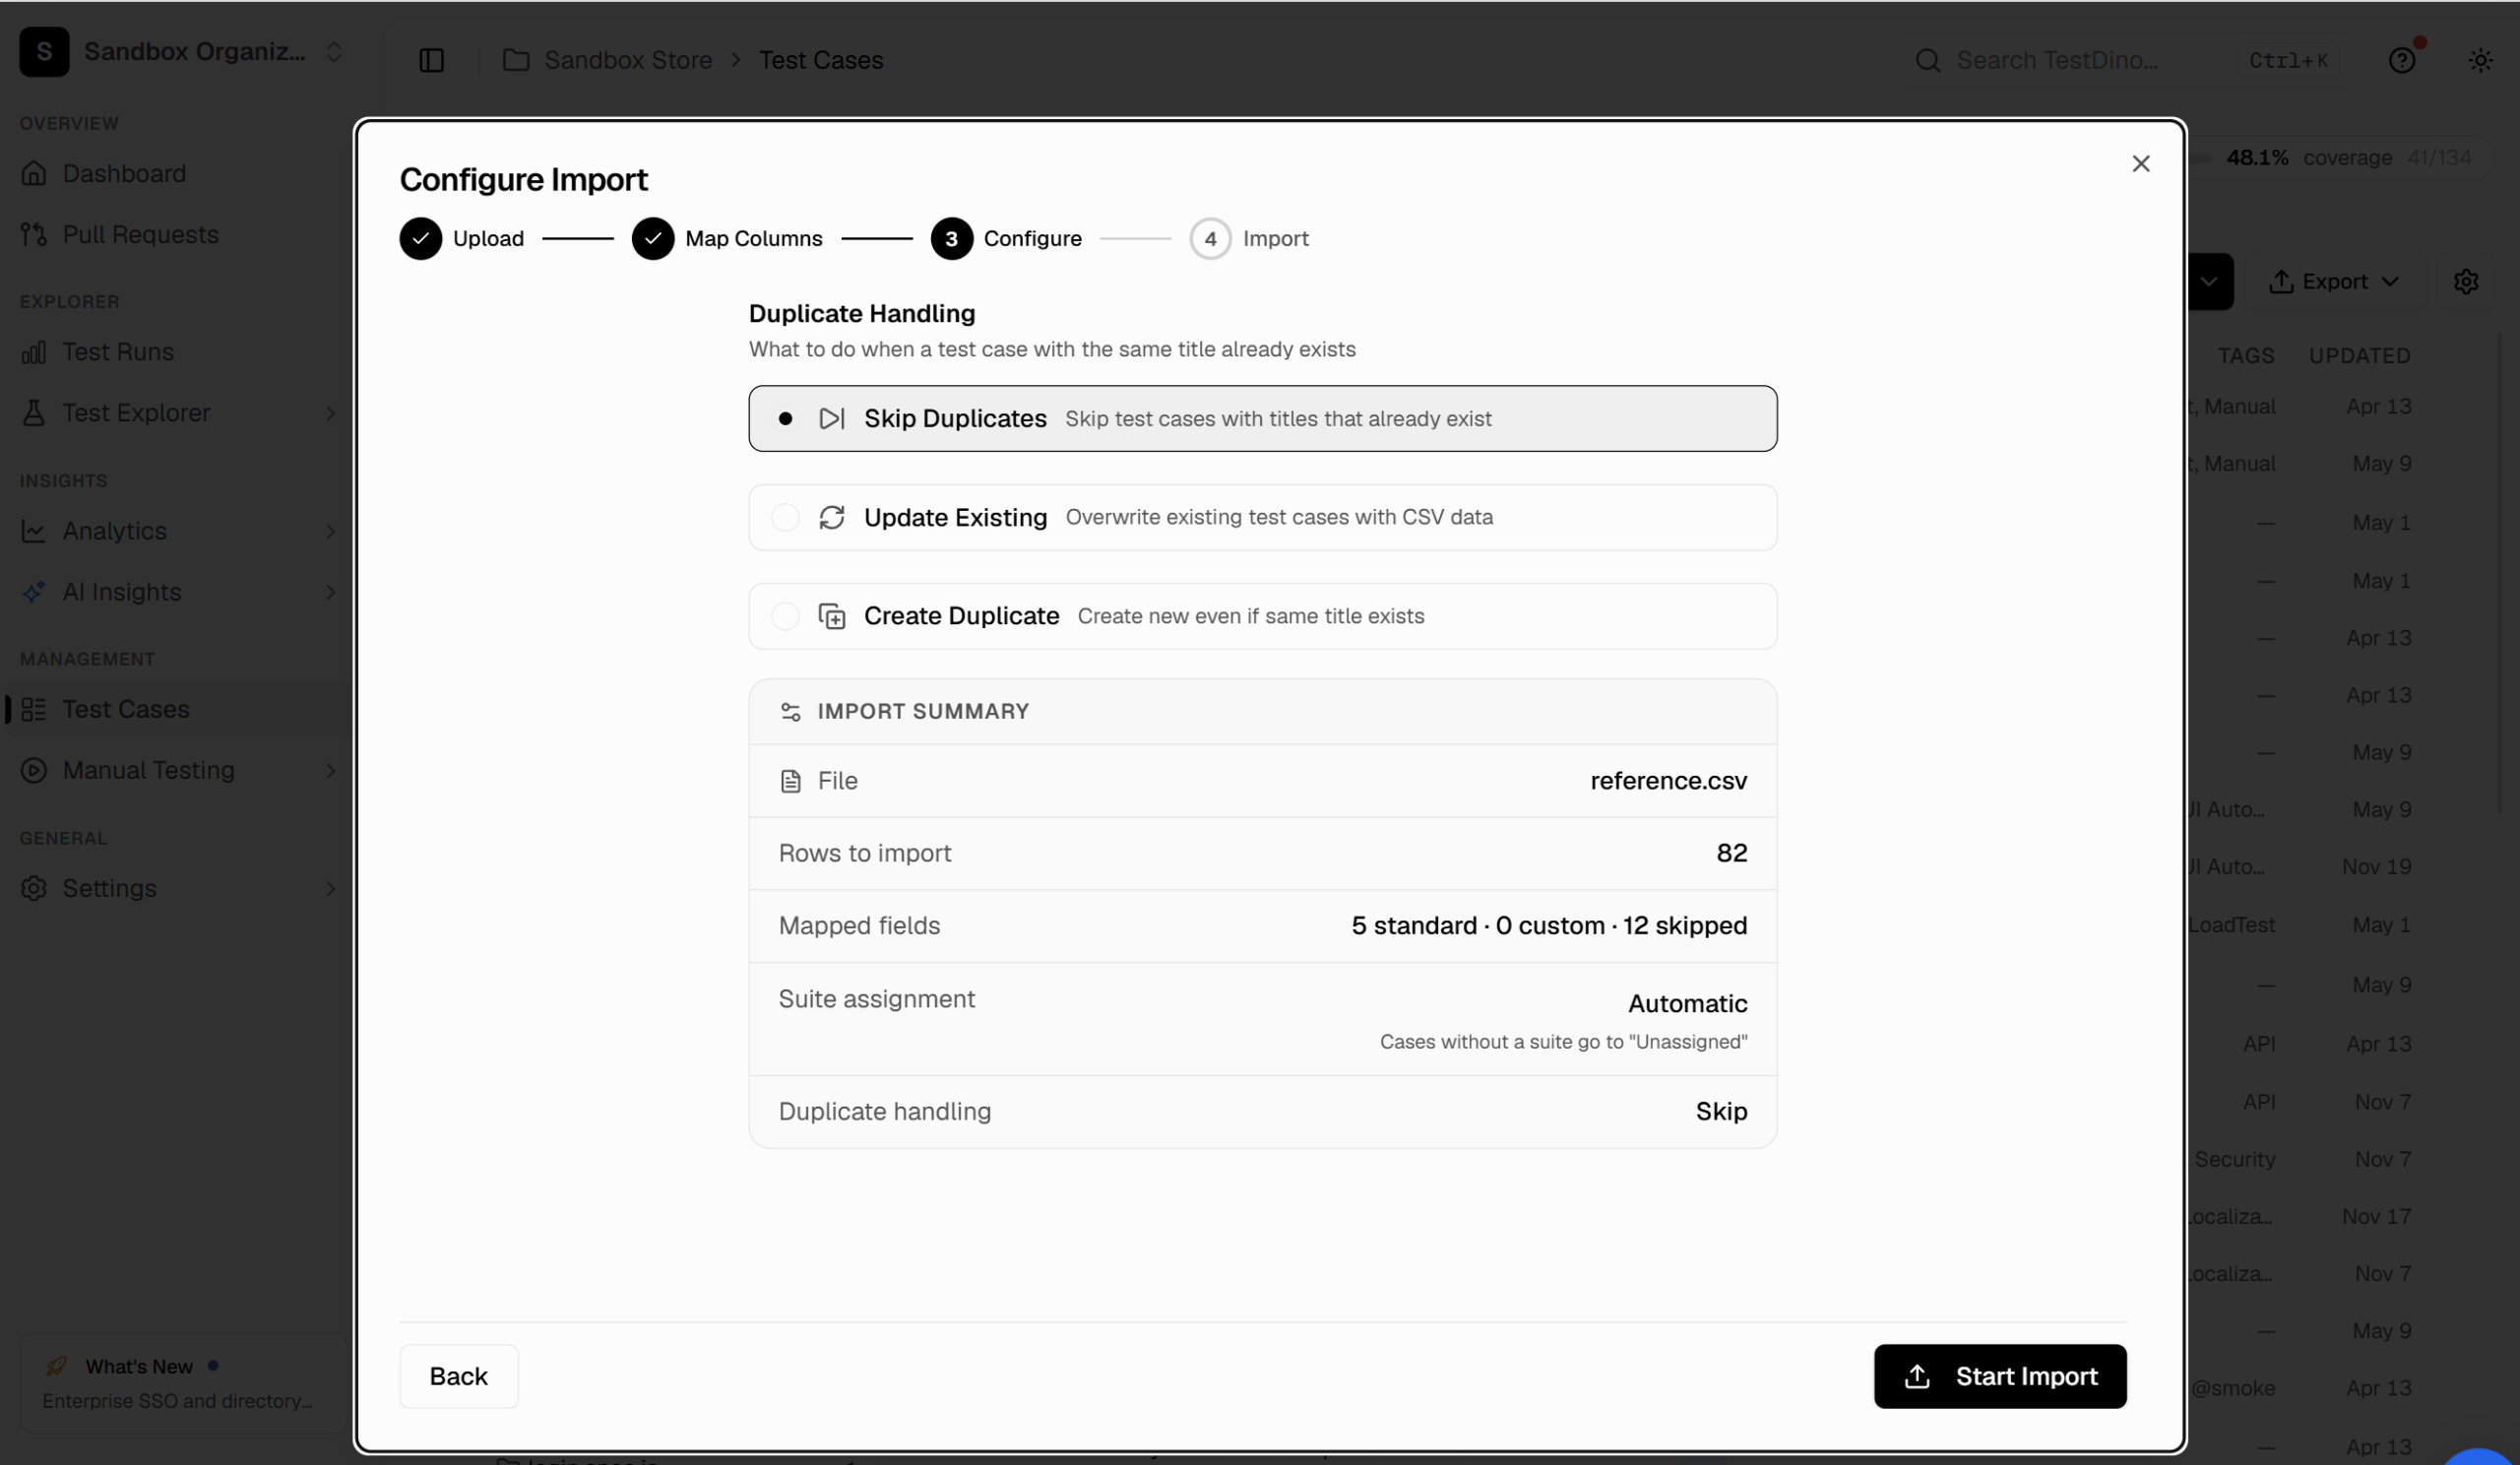
Step 3: Configure duplicate handling and defaults
Before the import runs, you choose what happens when an incoming case title already exists in the project:
-
Skip Duplicates (default): existing cases stay untouched. The safest choice, and what makes re-running imports harmless.
-
Update Existing: overwrite existing cases with the CSV data. Use this to refresh a previous import.
-
Create Duplicate: import everything regardless of what you want during a migration.
The summary screen shows the file, rows to import, the mapping breakdown, and the suite assignment. Suite assignment is automatic based on your CSV's suite and section data; any case without a suite goes to an "Unassigned" suite, so nothing gets lost.
Step 4: Start the import and review the result
Click Start Import.
Cases appear in your project within seconds, organized by suites, with new sequential TC IDs and their priorities, types, and tags carried over.
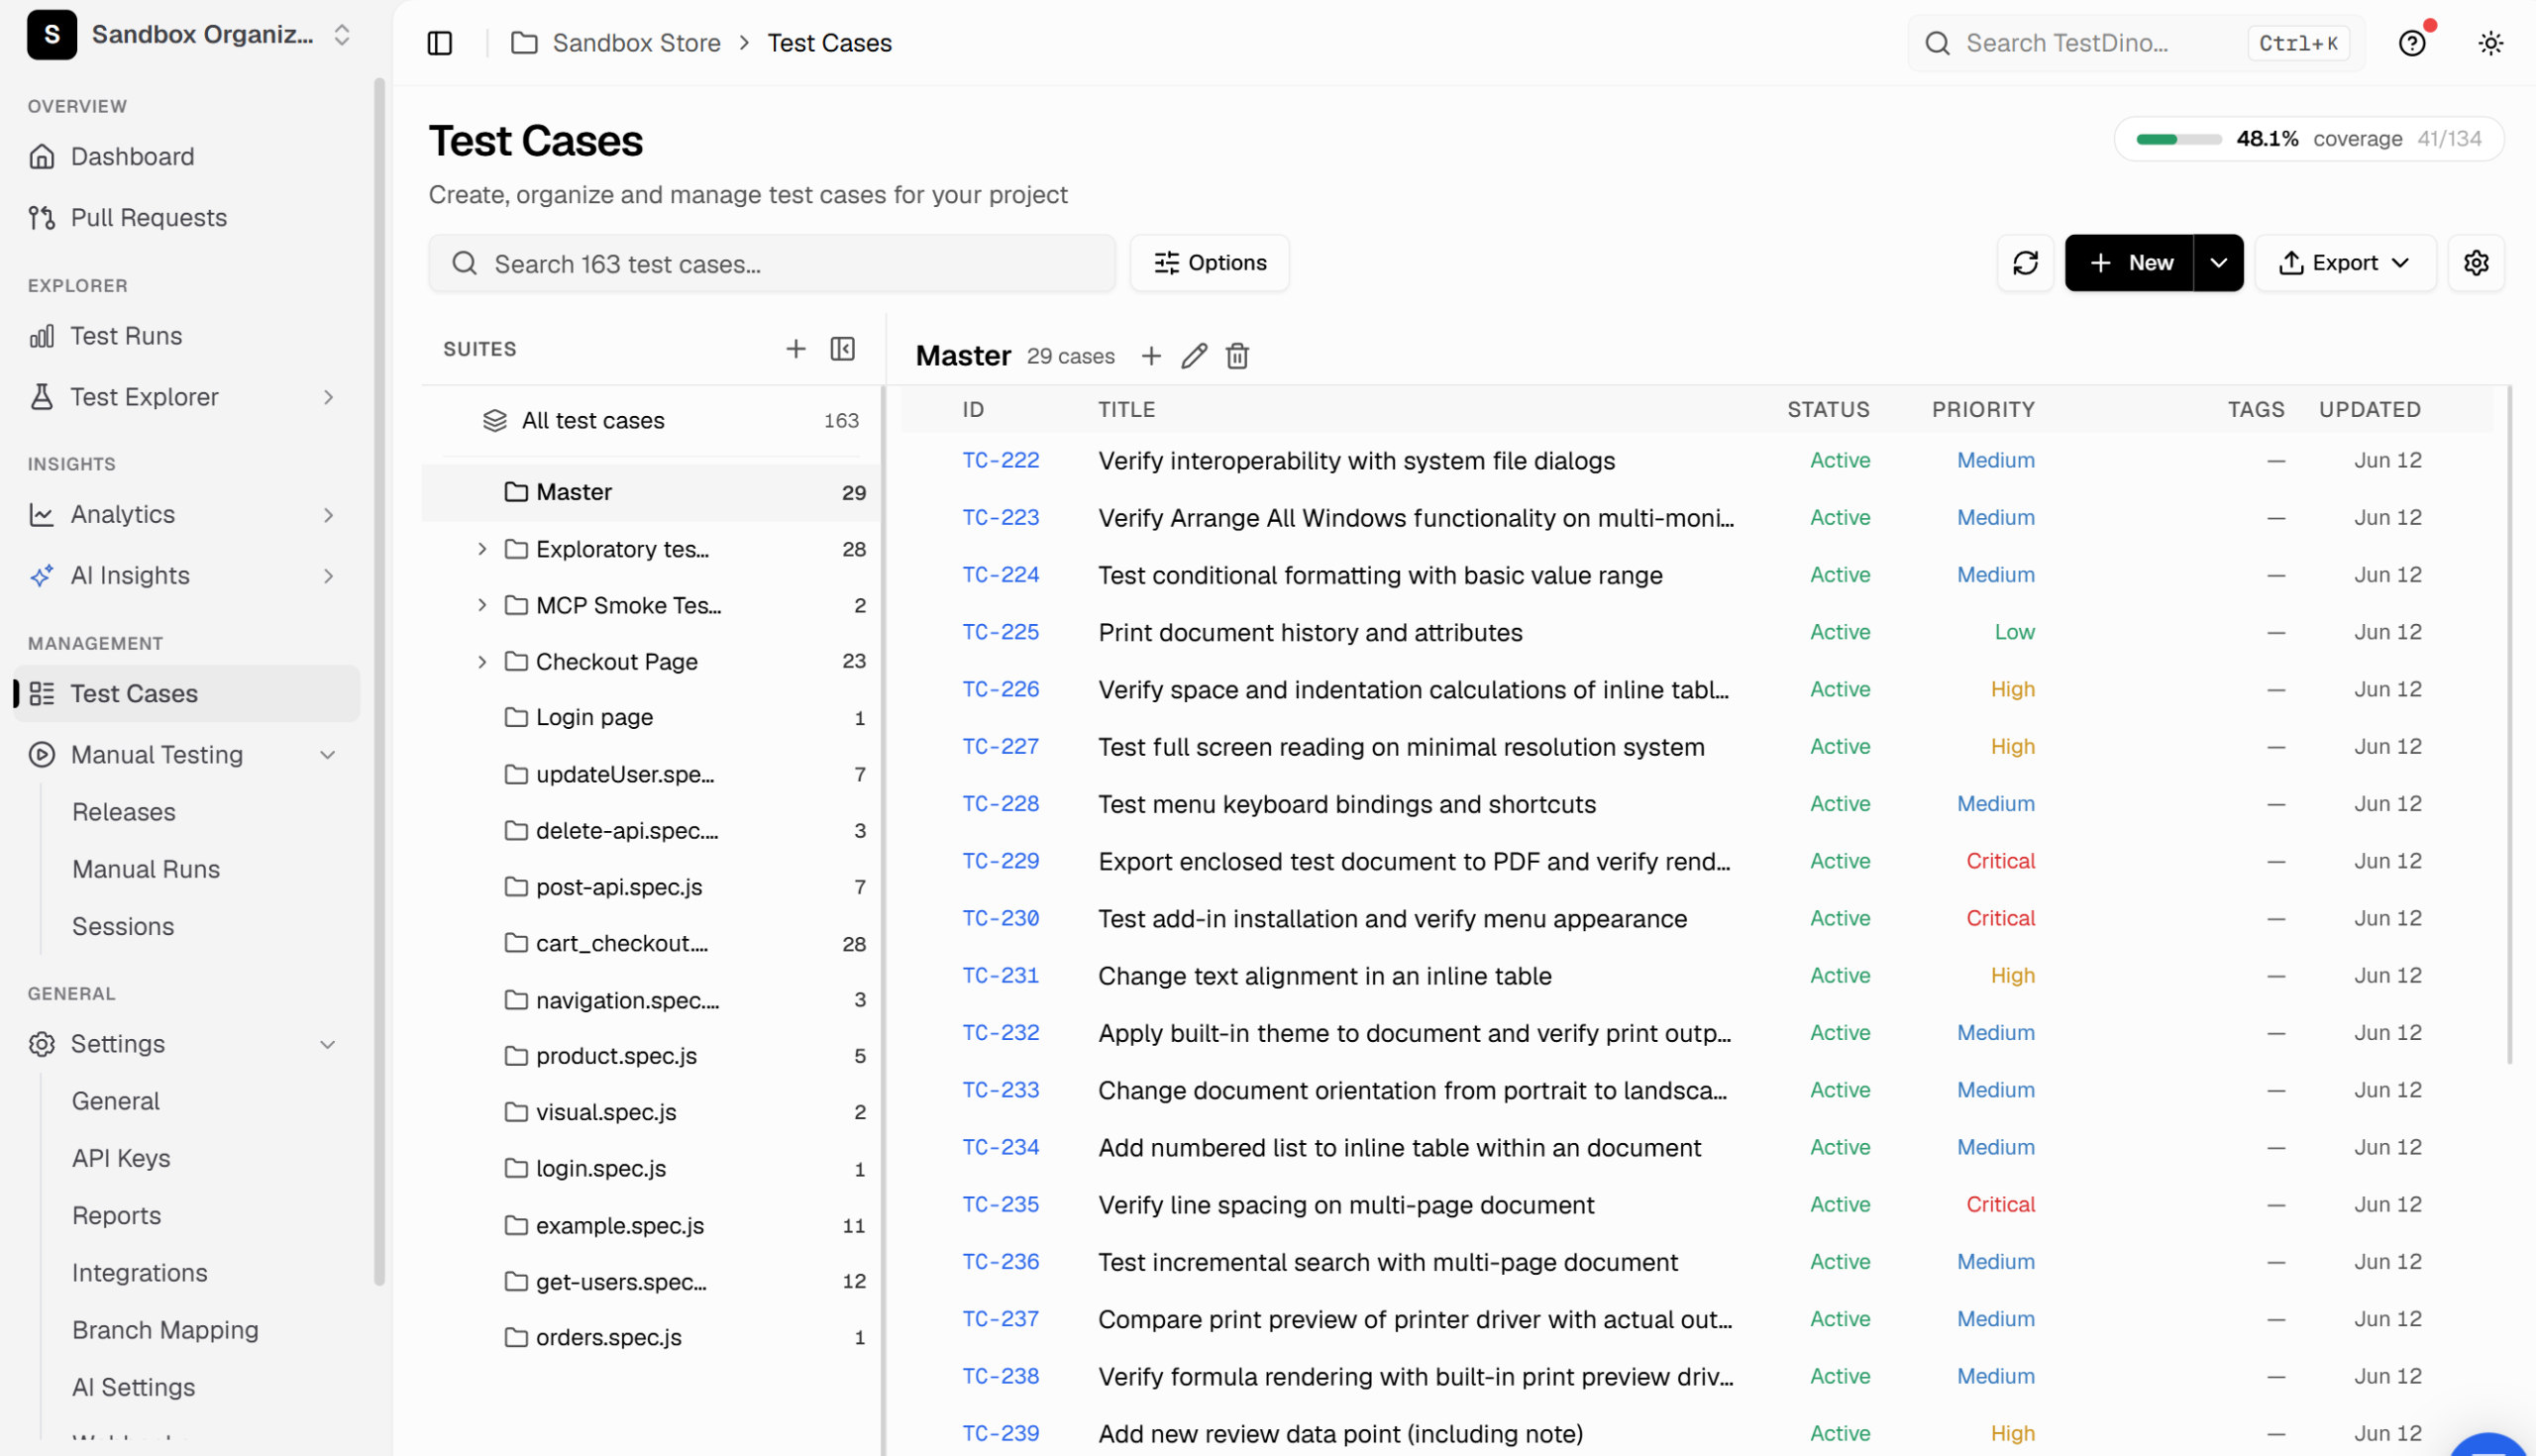
That is the entire flow. For a multi-suite TestRail project, repeat with each exported CSV; with Skip Duplicates on, re-running a file you already imported changes nothing.
Method 2: TestDino MCP (AI-assisted import)
If your team already works with an AI assistant, there is a second path: let the AI do the import through the TestDino MCP server. The MCP exposes test management tools directly to Claude Code, Claude Desktop, Cursor, and (via the remote server) ChatGPT and Claude on the web.
The flow:
-
Export your CSV from TestRail as usual.
-
Connect your AI assistant to the TestDino MCP (locally with a personal access token or remotely with OAuth; no installation required).
-
Give it the file and a plain-language instruction:
"Here's our TestRail export. Recreate the suite hierarchy in our TestDino project and upload all test cases with their steps, priorities, and tags."
The assistant uses the MCP's create_manual_test_suite and create_manual_test_case tools to build the structure and upload cases, and list_manual_test_cases to verify its own work.
When is this worth it over the wizard? When you want to transform while migrating:
-
Rewrite vague TestRail titles into a consistent naming convention.
-
Restructure a messy section tree into a cleaner hierarchy.
-
Convert classic steps into Gherkin format (TestDino cases support both).
-
Merge exports from multiple TestRail projects into a single organized repository.
The wizard moves data faithfully. The MCP moves data and applies judgment. Many teams use both: wizard for the clean suites, MCP for the messy ones.
After importing: Validate and organize
Do not skip this part. 15 minutes of validation makes the difference between "we migrated" and "we think we migrated."
-
Verify counts. Compare the imported case count per suite against your CSV row counts. The import summary gives you the numbers to check against.
-
Check the hierarchy. Confirm sections became nested suites the way you expect, and that the "Unassigned" suite is empty or intentional.
-
Spot-check steps. Open 5–10 cases of each TestRail template type (Text and Steps) and confirm actions, data, and expected results landed in the right fields.
-
Enrich classifications. TestDino has fields that TestRail did not: severity, layer, behavior. Use bulk actions to set them suite by suite; you do not need to do it on a case-by-case basis.
-
Link your automation. Run Auto-Match to connect imported manual cases to existing automated tests. This is the step that starts paying back the migration, because coverage becomes visible per suite.
-
Recreate active milestones as Releases and set up your first Manual Run. The manual testing docs cover the Releases, Manual Runs, and Sessions model.
Common migration challenges and solutions
| Challenge | Solution |
|---|---|
| TestRail exports one suite at a time | Export per suite and import each CSV; Skip Duplicates makes repeated imports safe |
| Custom TestRail fields with no standard equivalent | Un-skip those columns in Map Columns; they import as TestDino custom fields |
| Steps split across multiple CSV columns | Handled automatically; the importer supports both TestRail case templates per row |
| Attachments | Not in CSV import yet; pull them via a custom script, or keep TestRail read-only as the archive |
| Years of run history | Result history stays in TestRail; archive it read-only and build fresh metrics in TestDino |
| Migrating mid-sprint | Migrate per project between sprints; teams switch one project at a time, not all at once |
TestRail migration best practices
-
Pilot with one suite first: import your smallest active suite end-to-end, validate it, then do the rest. You will catch mapping decisions (which columns to un-skip) on 50 cases instead of 5,000.
-
Freeze TestRail edits at cutover: announce a date, make the migrated projectread-only in TestRail, and point the team to TestDino. Parallel editing in 2 tools is how cases get lost.
-
Migrate in batches, not all at once: per suite or per project. Skip Duplicates means a failed or repeated batch costs nothing.
-
Keep the TestRail archive until you genuinely no longer need it: Most teams stop within a month; cancel the subscription then, not before.
-
Train the team on what's new, not what's the same: Make sure test cases work as expected. Spend the onboarding hour on Releases, Sessions, and automation linking instead.
FAQs

Jashn Jain
Product & Growth Engineer