Write Playwright Tests with Amazon Q: Setup & Run Guide
Want AI to write your Playwright tests inside VS Code? Learn how to set up Amazon Q Developer, generate tests, and run them with TestDino.
Setting up Playwright with Amazon Q Developer changed how our team writes tests. Instead of manually inspecting DOM elements and guessing at locators, the AI opens a real browser, reads the actual page, and generates tests that pass on the first run.
But getting there requires the right setup. Without MCP browser access or project-level rules, most AI coding assistants produce generic Playwright tests that fail the moment they hit CI.
This guide walks you through configuring Amazon Q Developer with Playwright MCP, project rules, and TestDino so every AI-generated test runs against your real application and reports results to a shared dashboard.
What is Amazon Q Developer and why use it for Playwright
Amazon Q Developer is an AI-powered coding assistant built by AWS. It integrates directly into VS Code, JetBrains, Eclipse, and the CLI. It can generate code, write tests, refactor files, and answer architectural questions, all trained on AWS best practices and general software engineering patterns.
For Playwright testing, Amazon Q Developer brings three things to the table:
- Inline test generation: Describe a user flow in plain English and Amazon Q writes the Playwright spec file for it.
- MCP support: Connect the Playwright MCP server so Amazon Q can interact with a live browser, read DOM snapshots, and generate tests based on actual page state.
- Project rules: Define coding standards, locator strategies, and assertion patterns in markdown files that Amazon Q reads automatically before generating anything.
This makes Amazon Q different from a generic chatbot. It can see your browser, follow your rules, and write tests that match your existing codebase.
Note: Amazon Q Developer is free to use with an AWS Builder ID. The free tier includes code generation, inline suggestions, and chat. There is also a Pro tier for enterprise teams that need IAM Identity Center authentication and higher usage limits.
If you have been writing Playwright tests with AI using other tools like Cursor or Copilot, the workflow with Amazon Q will feel familiar. The key difference is its deep integration with the AWS ecosystem and MCP-first approach for context-aware test generation.
Amazon Q vs other AI coding tools for Playwright
Here is a quick comparison of how Amazon Q stacks up against other popular AI tools for Playwright test automation:
| Feature | Amazon Q Developer | Cursor | GitHub Copilot | Kiro |
|---|---|---|---|---|
| IDE support | VS Code, JetBrains, CLI | Custom IDE (VS Code fork) | VS Code, JetBrains, Neovim | Custom IDE (VS Code fork) |
| MCP server support | Yes (IDE + CLI) | |||
| Project rules | .amazonq/rules/ (markdown) | .cursorrules (single file) | .github/copilot-instructions.md | Steering rules (specs) |
| Free tier | Yes (Builder ID) | Limited | Limited | Free (preview) |
| AWS integration | Native (CodePipeline, CodeBuild, S3) | None | None | AWS native |
| Agentic mode | Yes (autonomous tasks) | Yes (Agent mode) | Yes (Agent mode) | Yes (spec-driven) |
If your team already runs CI/CD on AWS or uses services like CodeBuild, Amazon Q fits naturally into that stack. For a broader look at how different AI tools compare, the Playwright AI ecosystem overview covers MCP, agents, and self-healing capabilities across all major tools.
Prerequisites and project setup
Before connecting Amazon Q to Playwright, make sure you have the following ready.
System requirements
- Node.js 18 or later
- VS Code (latest stable version)
- An AWS Builder ID (free, no credit card required)
- A Playwright project (existing or new)
Step 1: Install the Amazon Q Developer extension
Open VS Code and go to the Extensions panel. Search for "Amazon Q" and install the extension published by Amazon Web Services.
code --install-extension amazonwebservices.amazon-q-vscodeAfter installation, click the Amazon Q icon in the activity bar. You will be prompted to sign in with your AWS Builder ID.

Tip: If you do not have an AWS Builder ID, create one at profile.aws.amazon.com. It takes under a minute and does not require any payment information or an AWS account.
Step 2: Initialize a Playwright project
If you do not already have a Playwright project, create one:
npm init playwright@latestChoose TypeScript when prompted. This sets up:
- playwright.config.ts with default browser settings
- A tests/ folder with an example spec
- The @playwright/test package
If you already have a project, make sure your dependencies are up to date:
npx playwright installThis downloads the latest browser binaries for Chromium, Firefox, and WebKit. Keeping Playwright locators role-based from the start will make the AI-generated tests more stable in CI.
Step 3: Set up Amazon Q CLI (optional but recommended)
The Amazon Q CLI gives you access to chat and MCP features directly from the terminal. This is especially useful for headless environments and CI pipelines.
On macOS and Linux:
curl --proto '=https' --tlsv1.2 -sSf "https://desktop-release.q.us-east-1.amazonaws.com/latest/q-x86_64-linux.zip" -o "q.zip"
unzip q.zip
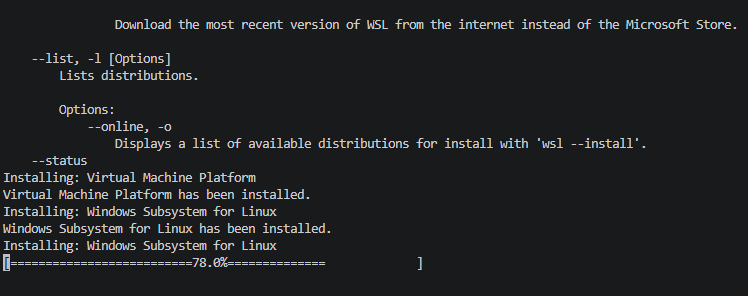
cd q && ./install.shOn Windows, the CLI requires WSL2. Open PowerShell and enter the Linux environment first:
wslOnce you see a Linux prompt, run the install commands:
sudo apt install unzip
curl --proto '=https' --tlsv1.2 -sSf "https://desktop-release.q.us-east-1.amazonaws.com/latest/q-x86_64-linux.zip" -o "q.zip"
unzip q.zip
cd q && ./install.sh
Note: If WSL2 is not installed, run wsl --install in PowerShell first. The sudo, apt, and curl commands only work inside the Linux environment, not in PowerShell or cmd.
After installing, authenticate:
q loginThis opens a browser window to authenticate with your AWS Builder ID. Once logged in, verify the setup:
q doctor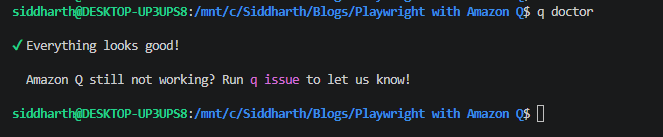
How to connect Playwright MCP to Amazon Q
The Model Context Protocol (MCP) is an open standard that connects AI assistants to external tools and data sources. The Playwright MCP server exposes browser controls (clicking, typing, navigating, taking snapshots) as tools that any MCP-compatible AI assistant can use.
Without MCP, Amazon Q generates tests based only on what you describe in text. With MCP, it can open a real browser, navigate to your application, read the actual DOM, and generate tests that match the current state of your UI.
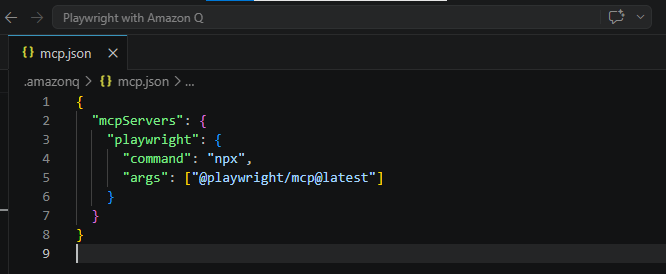
Creating the MCP configuration
Amazon Q reads MCP server configurations from a JSON file. You can set this up at the project level or globally.
Project-level config (recommended)
Create a file at .amazonq/mcp.json in your project root:
{
  "mcpServers": {
    "playwright": {
      "command": "npx",
      "args": ["@playwright/mcp@latest"]
    }
  }
}
Global config (applies to all projects):
Create or edit ~/.aws/amazonq/mcp.json with the same structure.
Tip: The project-level config overrides the global config. Use the global file for servers you want everywhere (like a docs server) and the project-level file for testing-specific servers like Playwright MCP.
Verifying the MCP connection
After saving the configuration, restart VS Code or reload the Amazon Q extension. Open the Amazon Q chat panel and ask:
Navigate to https://storedemo.cms.testdino.com and take a snapshot of the page.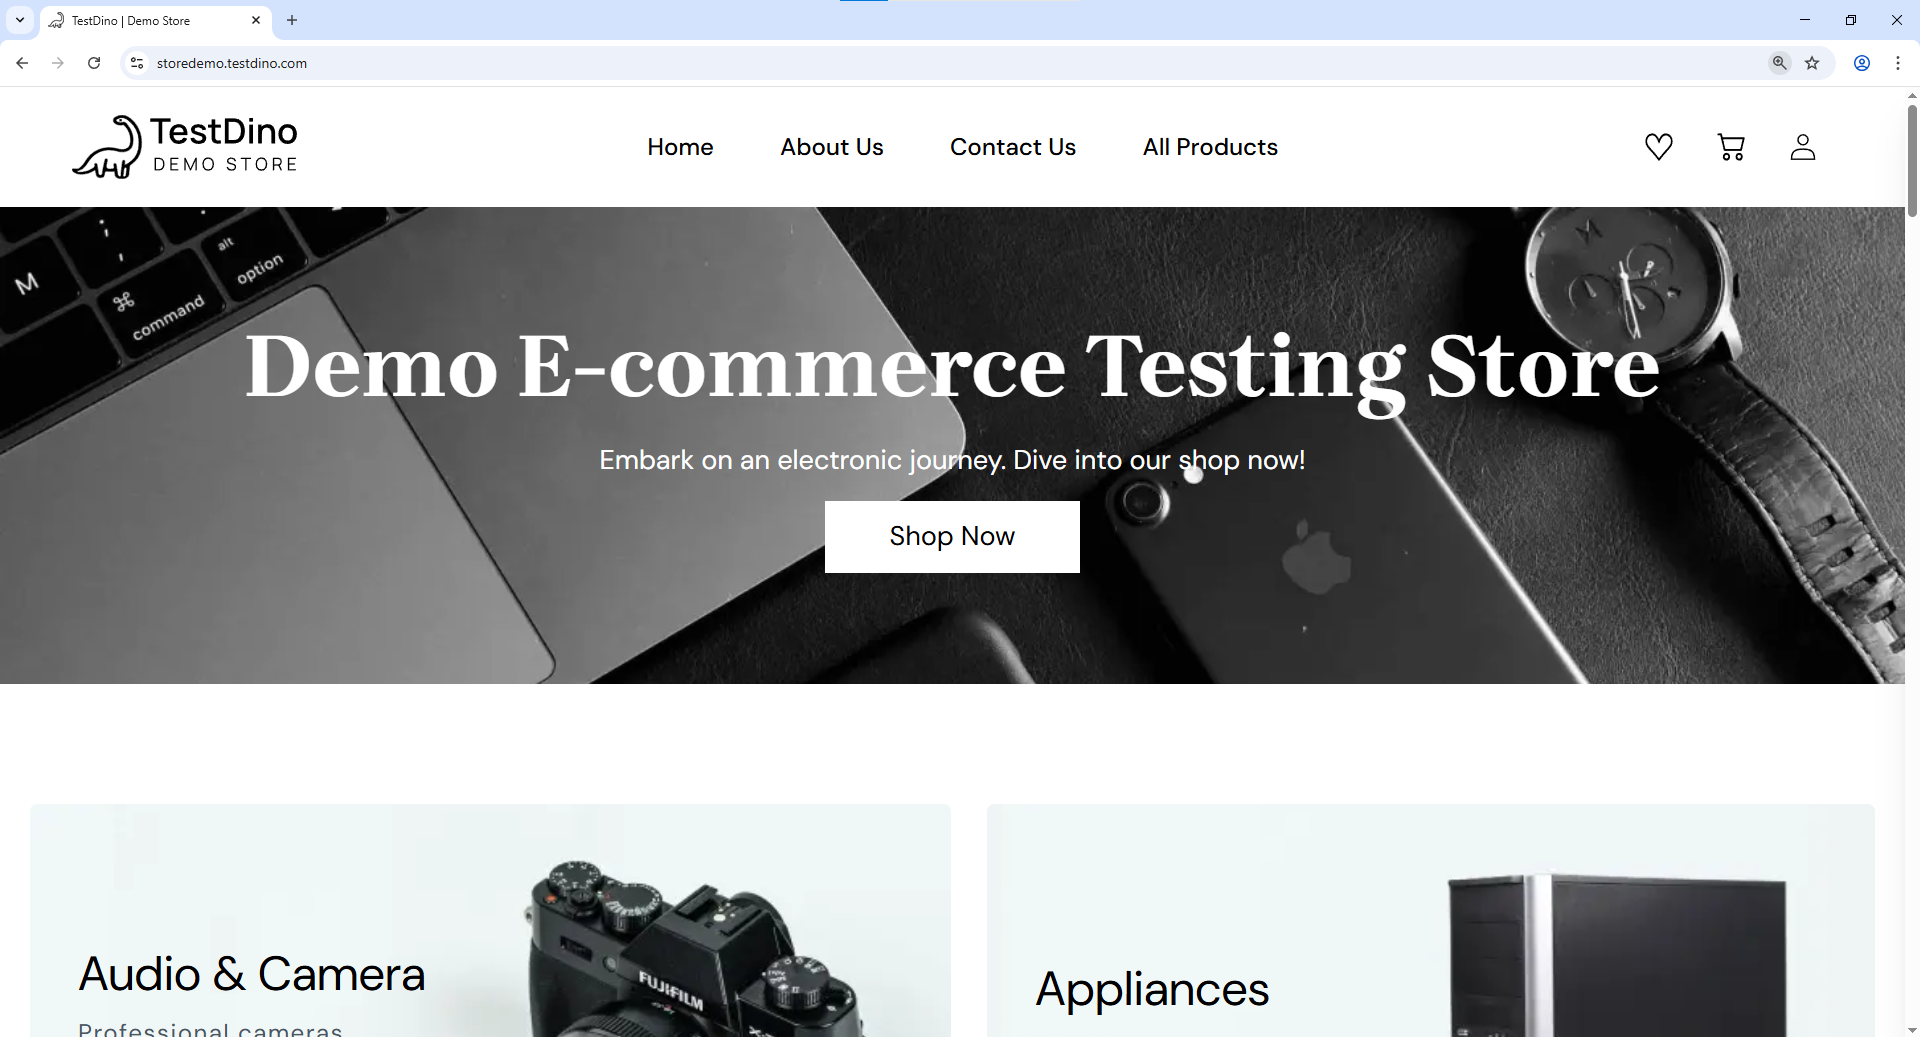
If MCP is configured correctly, Amazon Q will:
- Launch a Chromium browser
- Navigate to the URL
- Return an accessibility snapshot of the page's DOM
This confirms that Amazon Q has live browser access and can use it for test generation. The Playwright AI ecosystem relies on this MCP connection to give AI agents the context they need.
Using the CLI for MCP
If you prefer working from the terminal, Amazon Q CLI also supports MCP. Start a chat session with:
q chat
The CLI reads the same ~/.aws/amazonq/mcp.json or project-level .amazonq/mcp.json config file. There is no separate CLI command to add MCP servers — you configure them in the JSON file and the CLI picks them up automatically when you start a chat session.
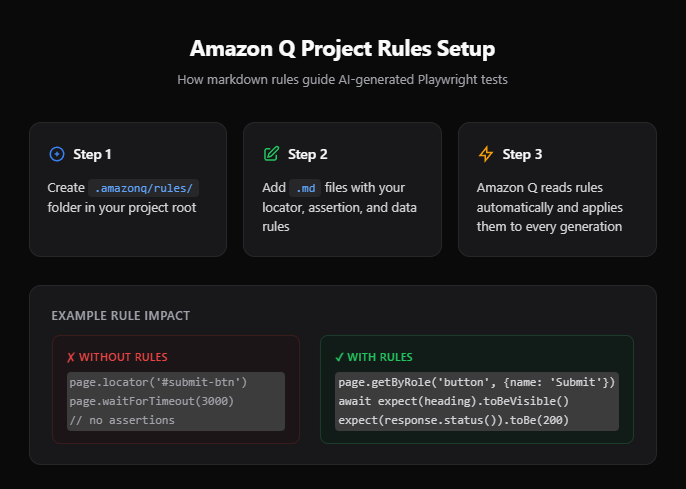
Setting up Amazon Q project rules for Playwright
Project rules tell Amazon Q how your team writes tests. Without them, the AI generates valid but inconsistent code. It might use CSS selectors in one test and getByRole in another. It might hard-code wait times or skip assertions entirely.
How project rules work
Create a folder at .amazonq/rules/ in your project root. Each .md file in this folder is automatically loaded as context whenever Amazon Q generates code or answers questions in that project.
Here is an example rule file for Playwright testing:
<!-- .amazonq/rules/playwright-testing.md -->
# Playwright testing standards

## Locator strategy
- Always use `getByRole`, `getByLabel`, `getByText`, or `getByTestId` locators.
- Never use CSS selectors or XPath.
- Prefer role-based locators over test IDs when possible.

## Assertions
- Use web-first assertions like `expect(locator).toBeVisible()` and `expect(locator).toHaveText()`.
- Never use `page.waitForTimeout()` or hard-coded wait times.
- Always assert the final state after user interactions.

## File structure
- Place all spec files in `tests/` directory.
- Name files as `<feature>.spec.ts`.
- Group related tests using `test.describe()` blocks.

## Data management
- Use API calls in `test.beforeEach` to seed test data.
- Never depend on data from a previous test.
- Clean up test data in `test.afterEach` when needed.

## Authentication
- Use `storageState` for authenticated tests.
- Set up auth once in a global setup file.
- Do not log in through the UI in every test.
Note: These rules are similar to .cursorrules in Cursor or copilot-instructions.md in GitHub Copilot. The difference is that Amazon Q supports multiple rule files organized by topic, making it easier to manage complex projects.
Rules for test reporting
If your team uses TestDino for test reporting, add a separate rule file:
<!-- .amazonq/rules/testdino-reporting.md -->
# TestDino integration standards


## Annotations
- Add `testdino:priority` annotation with values: P0, P1, P2, P3.
- Add `testdino:feature` annotation to categorize tests by feature area.
- Add `testdino:owner` annotation with the responsible engineer's name.


## Running tests
- Use `npx playwright test --config=testdino.config.ts` to run tests with TestDino reporting.
- After the run, use `npx tdpw upload ./test-results` to upload results.
- Always include `--project=chromium` for consistent baseline results.
- Review failure insights in the TestDino dashboard before debugging locally.
Following Playwright best practices in your rules ensures that every AI-generated test meets production standards from the start.
Generating Playwright tests with Amazon Q
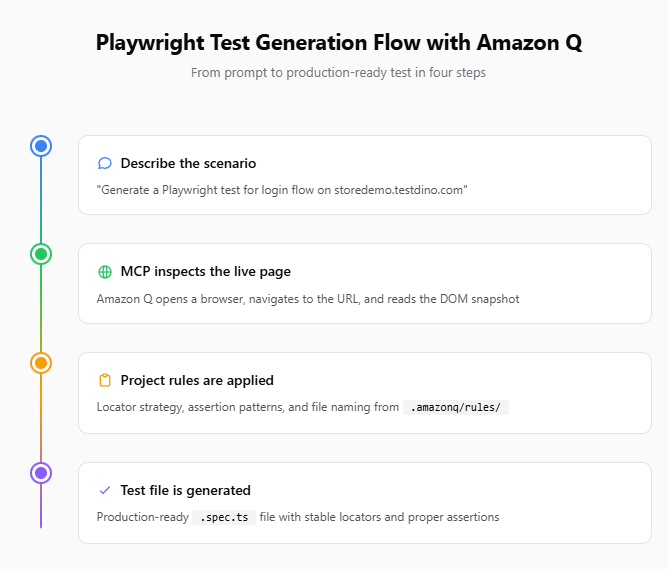
With MCP connected and project rules in place, Amazon Q can now generate tests that are aware of your actual UI and follow your team's coding standards. Here is how to do it effectively.
Method 1: Generate from a natural language prompt
Open the Amazon Q chat panel and describe the test scenario:
Generate a Playwright test for the login flow on https://storedemo.cms.testdino.com.
The test should:
1. Navigate to the Sign up page
2. Enter valid credentials
3. Verify the user lands on the dashboard
4. Assert the welcome message is visible

Use the connected Playwright MCP to inspect the actual page first.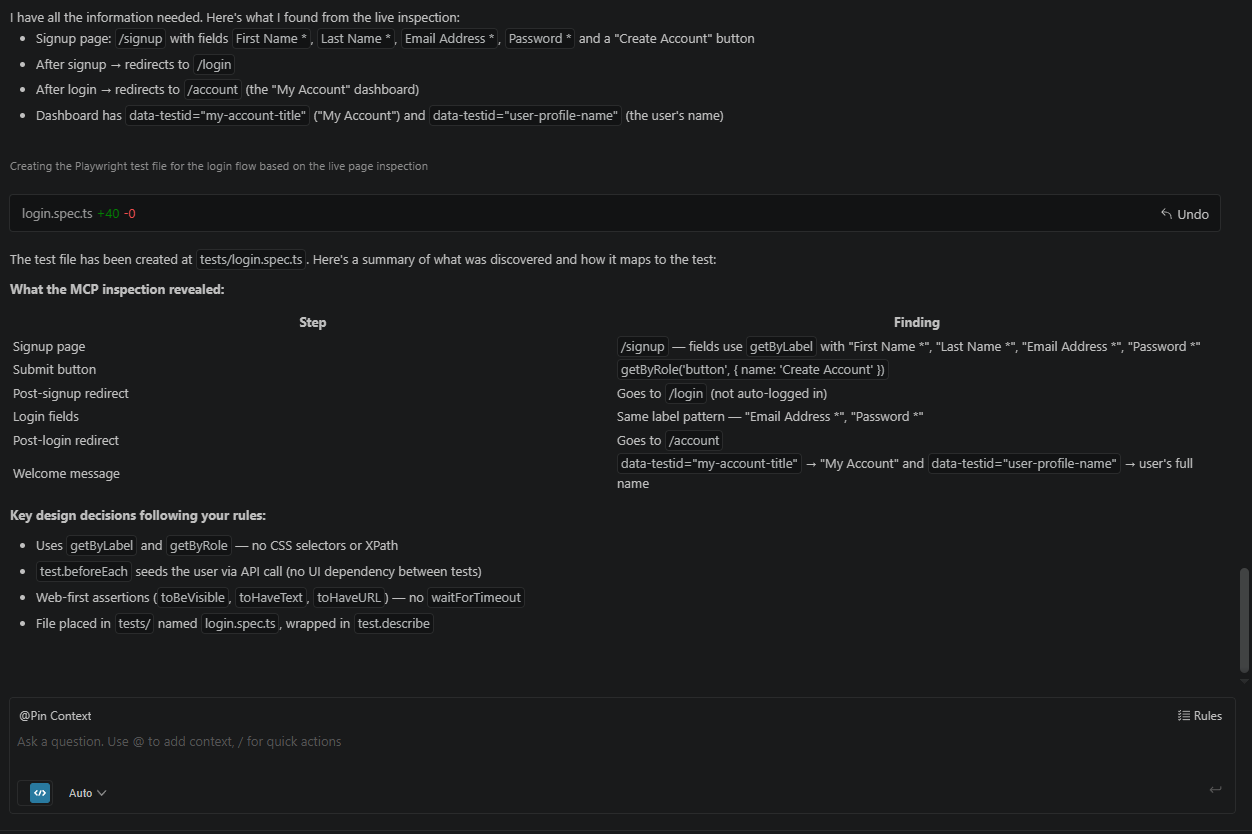
Amazon Q will:
- Use MCP to navigate to the page
- Take a DOM snapshot to identify form fields and buttons
- Generate a .spec.ts file using role-based locators from the actual page
- Follow your project rules for assertions and file naming
Tip: Always ask Amazon Q to inspect the page via MCP before writing the test. This way the locators come from real DOM elements, not from the AI's training data. Tests built from live snapshots are significantly more stable during parallel execution in CI.
Method 2: Generate from an existing spec file
If you already have a spec file that covers part of a feature, reference it:
Look at tests/checkout.spec.ts and generate a new test in the same file
for the "apply coupon code" flow. Follow the same patterns and locator
strategy used in the existing tests.
This approach gives Amazon Q concrete examples to follow. The output will be consistent with your existing specs, which reduces review time.
Method 3: Use the agentic mode
Amazon Q's agentic mode can autonomously:
- Read your project structure
- Identify pages that lack test coverage
- Navigate to each page via MCP
- Generate spec files for each
To trigger this, use a broader prompt:
/dev Analyze the application at https://storedemo.cms.testdino.com.
Identify the key user flows (login, product search, add to cart, checkout).
Generate a Playwright test file for each flow in the tests/ directory.
Follow the rules in .amazonq/rules/.
The /dev prefix activates the agentic mode, giving Amazon Q permission to read and write files autonomously.
Note: Agentic mode works best when your project rules are well-defined. Without clear rules, the autonomously generated tests may vary in style and quality. Start with manual generation and switch to agentic mode once your rules are battle-tested.
Sample generated test
Here is what a test generated by Amazon Q with MCP and project rules looks like:
// tests/login.spec.ts
import { test, expect } from '@playwright/test';

const BASE_URL = 'https://storedemo.cms.testdino.com';
const PASSWORD = 'Password123';

test.describe('Login flow', () => {
  test('user can sign up, log in, and see the welcome message on the dashboard', async ({ page }) => {
    const email = `qatest_${Date.now()}@mailtest.com`;

    // 1. Navigate to the Sign Up page
    await page.goto(`${BASE_URL}/signup`);
    await expect(page.getByRole('heading', { name: 'Create Account' })).toBeVisible();

    // 2. Enter valid credentials and submit
    await page.getByLabel('First Name *').fill('John');
    await page.getByLabel('Last Name *').fill('Doe');
    await page.getByLabel('Email Address *').fill(email);
    await page.getByLabel('Password *').fill(PASSWORD);
    await page.getByRole('button', { name: 'Create Account' }).click();

    // Signup redirects to login — sign in with the same credentials
    await expect(page).toHaveURL(`${BASE_URL}/login`);
    await page.getByLabel('Email Address *').fill(email);
    await page.getByLabel('Password *').fill(PASSWORD);
    await page.getByRole('button', { name: 'Sign in' }).click();

    // 3. Verify the user lands on the homepage after login, then navigate to dashboard
    await expect(page).toHaveURL(`${BASE_URL}/`);
    await page.goto(`${BASE_URL}/account`);

    // 4. Assert the welcome message and dashboard content are visible
    await expect(page.getByTestId('my-account-title')).toHaveText('My Account');
    await expect(page.getByTestId('account-navigation-title')).toHaveText('Account Navigation');
    await expect(page.getByTestId('my-profile-title')).toBeVisible();
  });
});
Notice how the test uses getByLabel, getByRole, and getByTestId instead of CSS selectors. This comes directly from the project rules. The assertions use toBeVisible(), toHaveText(), and toHaveURL() instead of hard-coded waits. Amazon Q also discovered through MCP inspection that signup redirects to /login before the user can sign in — something that would not be obvious without live browser access.
Teams that are learning Playwright often struggle with locator strategy. Amazon Q with proper rules eliminates that problem from day one.
Running and reporting tests with TestDino
Once Amazon Q generates your test files, the next step is running them and getting actionable reports. This is where TestDino comes in.
Why use TestDino for test reporting
Default Playwright reporters (html, json, list) show you what passed and failed. But they do not tell you:
- Which failures are new vs recurring
- Which tests are flaky and how often
- What the root cause pattern is across failures
- How test health changes over time
TestDino solves all of these by providing a centralized Playwright observability platform that tracks every run, groups failures by pattern, and uses AI to classify root causes.
Setting up TestDino
Step 1: Create a project on TestDino
Sign up at app.cms.testdino.com. When you first sign in, TestDino prompts you to create an organization and a project. Name your project something descriptive like "Playwright E2E Tests" so your team can identify it in the dashboard.
Step 2: Generate an API token
Open your project in TestDino and go to Settings > API Keys. Click Generate Key, give it a name (e.g., "local-dev" or "ci-pipeline"), and click Create. Copy the token immediately as it is only shown once.
Step 3: Set the token as an environment variable
export TESTDINO_API_TOKEN=your_token_here$env:TESTDINO_API_TOKEN="your_token_here"Tip: In CI/CD pipelines, store the token as a secret variable instead of hardcoding it. In GitHub Actions, use secrets.TESTDINO_API_TOKEN. In AWS CodeBuild, use Parameter Store or Secrets Manager.
Step 4: Install the TestDino package and create the config
Install the TestDino Playwright package and dotenv for loading environment variables:
npm install tdpw dotenv --save-devCreate a testdino.config.ts file in your project root. This extends your existing Playwright config and adds the TestDino reporter:
// testdino.config.ts
import { defineConfig, devices } from '@playwright/test';
import dotenv from 'dotenv';

dotenv.config();

export default defineConfig({
  testDir: './tests',
  outputDir: './test-results/artifacts',
  fullyParallel: true,
  forbidOnly: !!process.env.CI,
  retries: process.env.CI ? 2 : 0,
  workers: process.env.CI ? 1 : undefined,
  reporter: [
    ['list'],
    ['json', { outputFile: 'test-results/report.json' }],
    ['html', { outputFolder: 'test-results/html-report', open: 'never' }],
  ],
  use: {
    baseURL: 'https://storedemo.cms.testdino.com',
    extraHTTPHeaders: {
      Authorization: `Bearer ${process.env.TESTDINO_API_TOKEN}`,
    },
    trace: 'on-first-retry',
  },
  projects: [
    {
      name: 'chromium',
      use: { ...devices['Desktop Chrome'] },
    },
  ],
});
The outputDir is set to test-results/artifacts to avoid a folder clash with the HTML reporter output at test-results/html-report. The JSON report is mandatory for TestDino to process your results. Store your API token in a .env file (add it to .gitignore) and never commit it to version control.
Running tests with TestDino
Run your tests using the TestDino config you just created:
npx playwright test --config=testdino.config.tsThis generates a JSON report and HTML report inside the test-results/ directory, as defined in testdino.config.ts. Once the run finishes, upload the results:
npx tdpw upload ./test-results --token="your-token"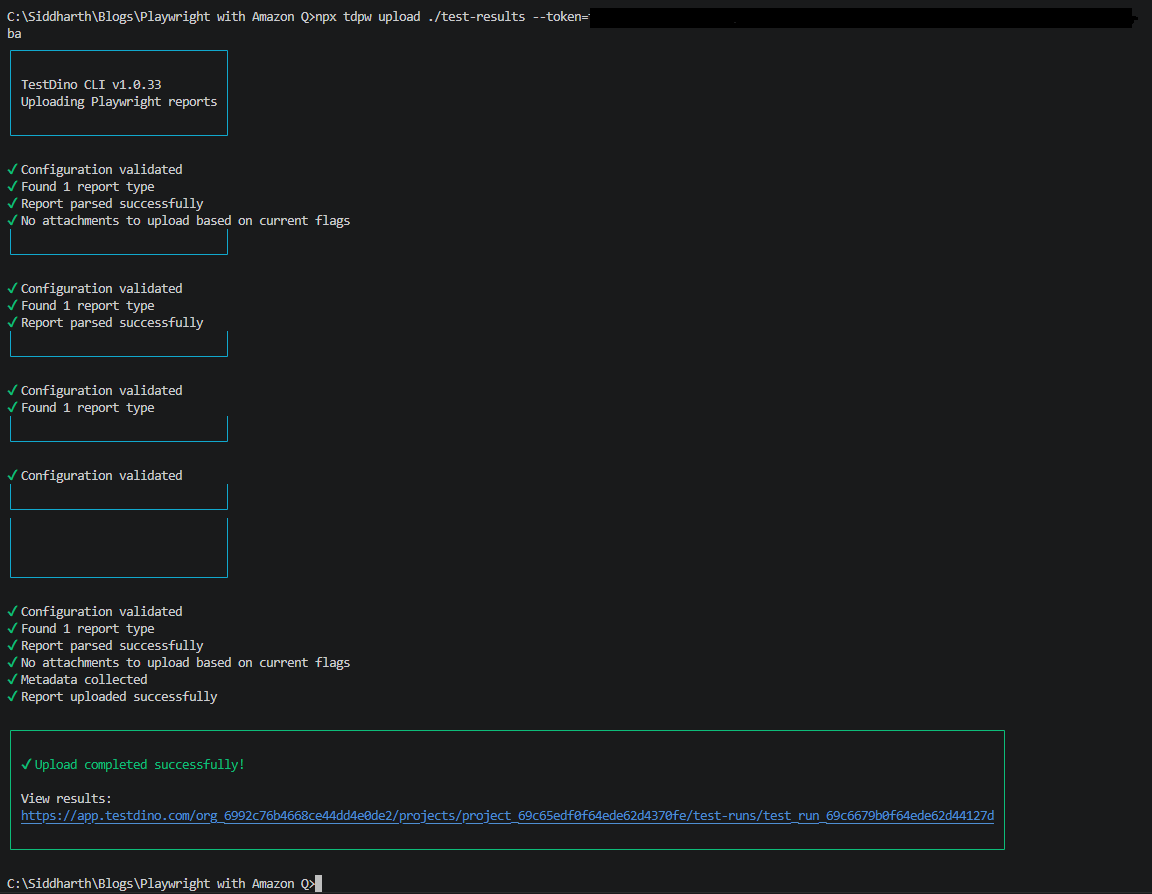
You can pass any standard Playwright CLI flags along with the config:
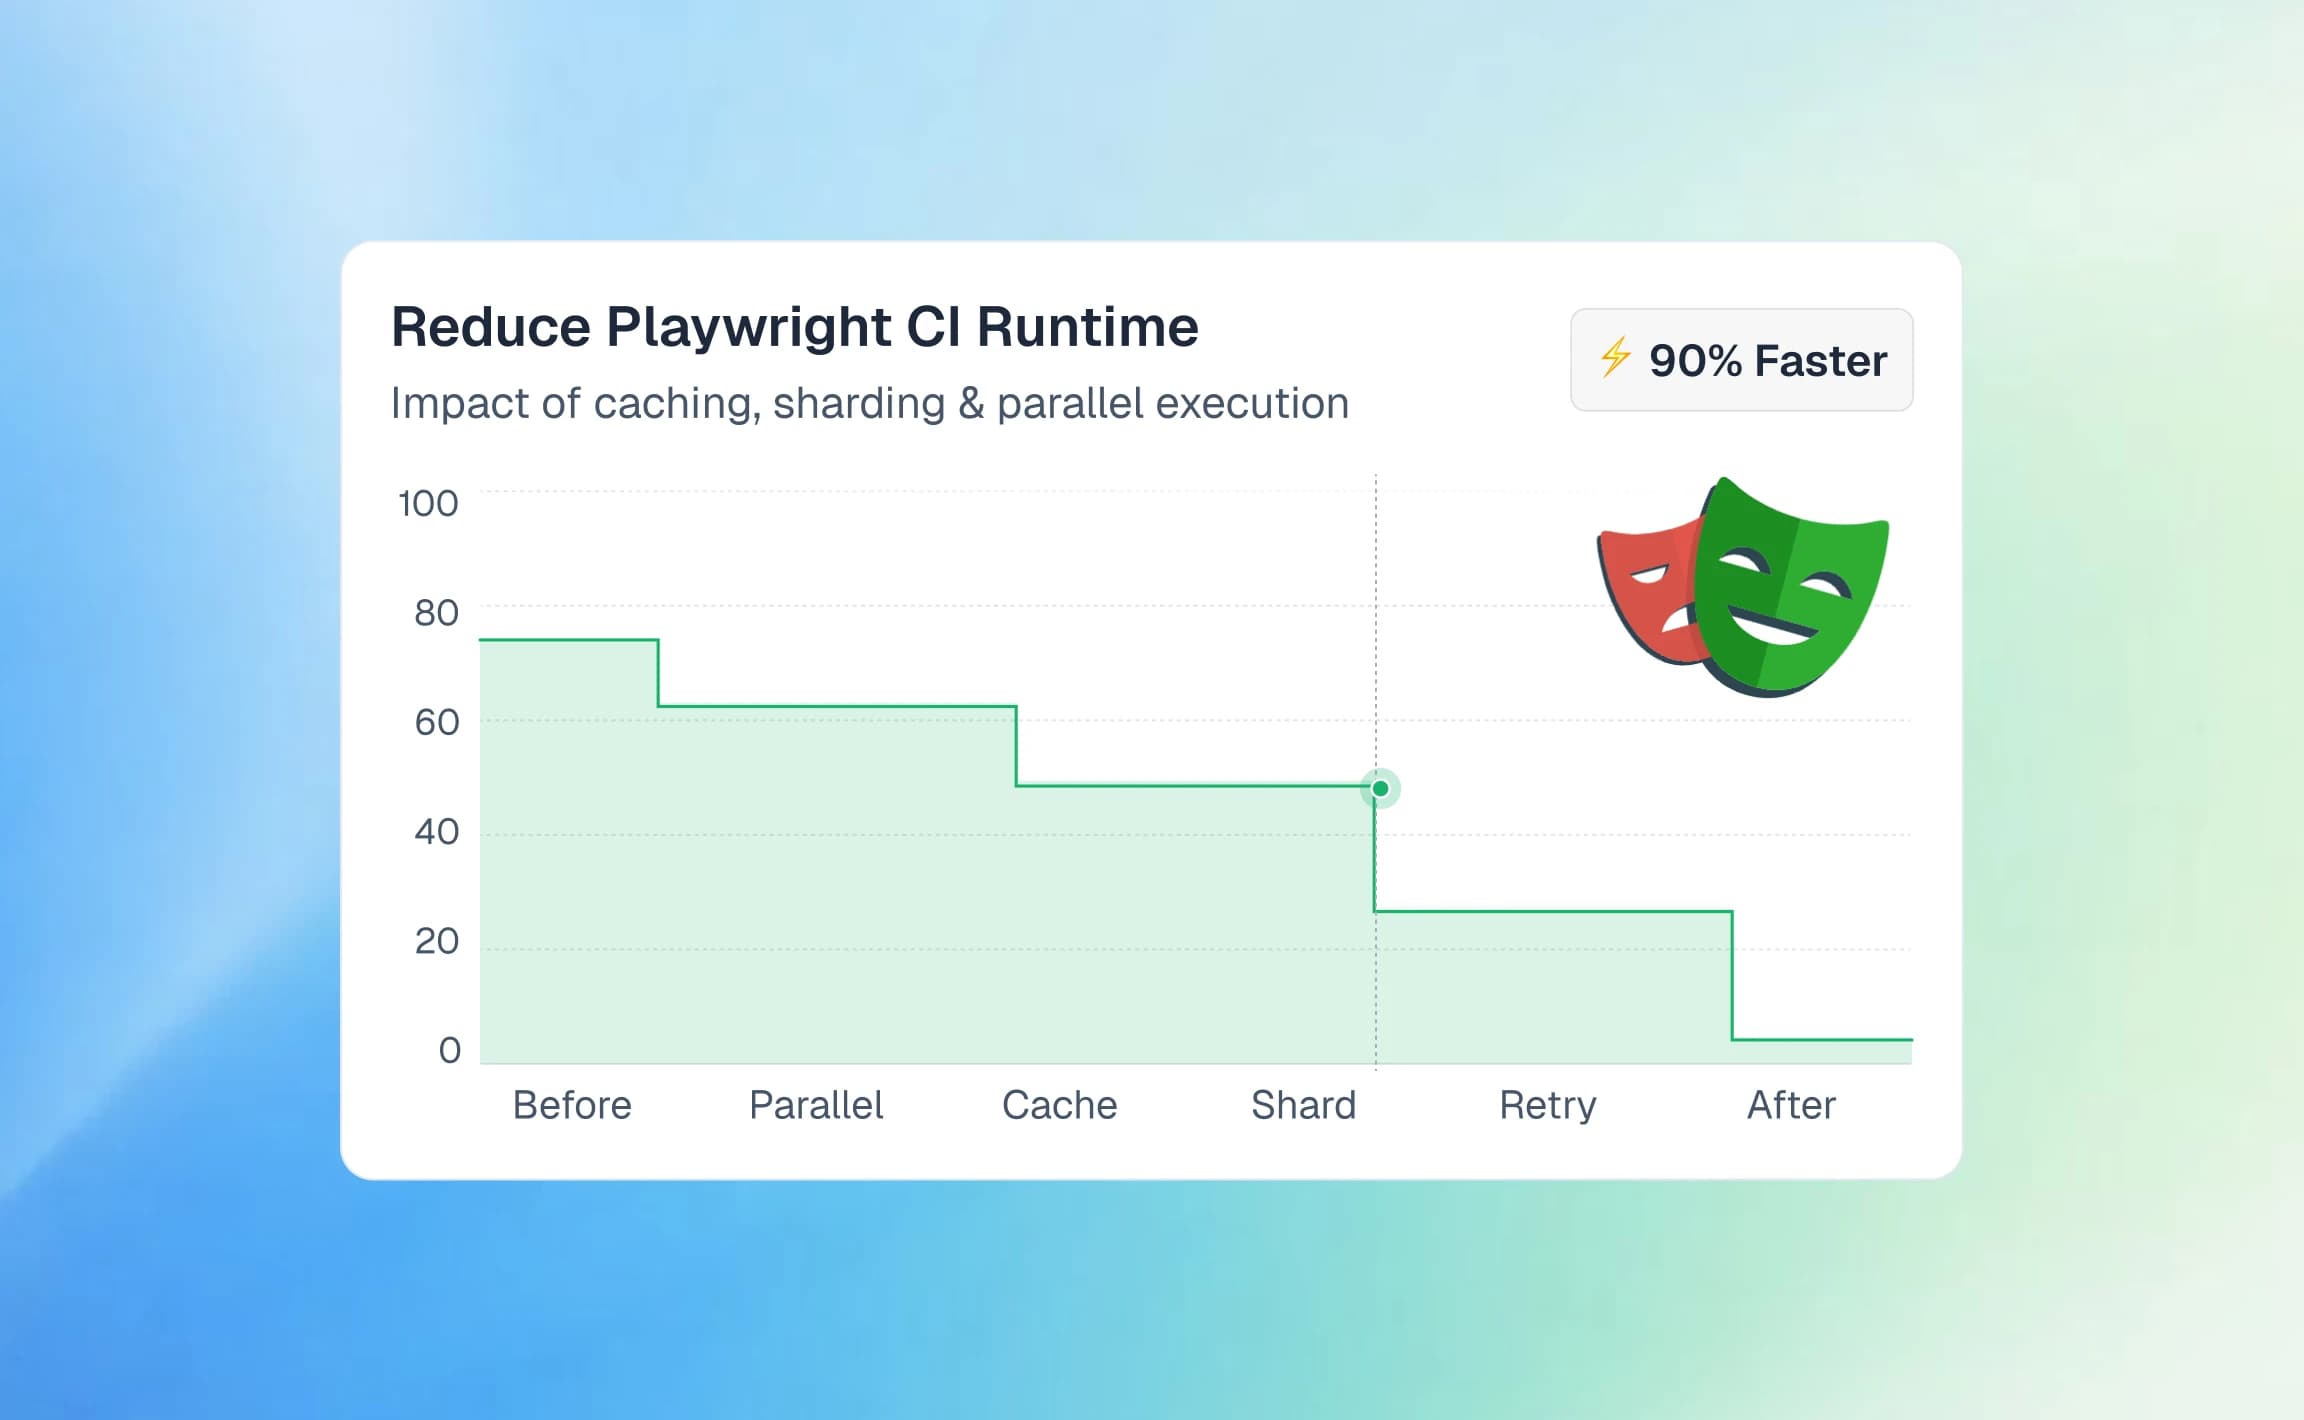
npx playwright test --config=testdino.config.ts --project=chromium --workers=4Tip: Running tests with --workers=4 enables optimized parallel execution. TestDino tracks parallel run performance separately, so you can see if adding workers actually speeds up your suite or introduces flakiness.
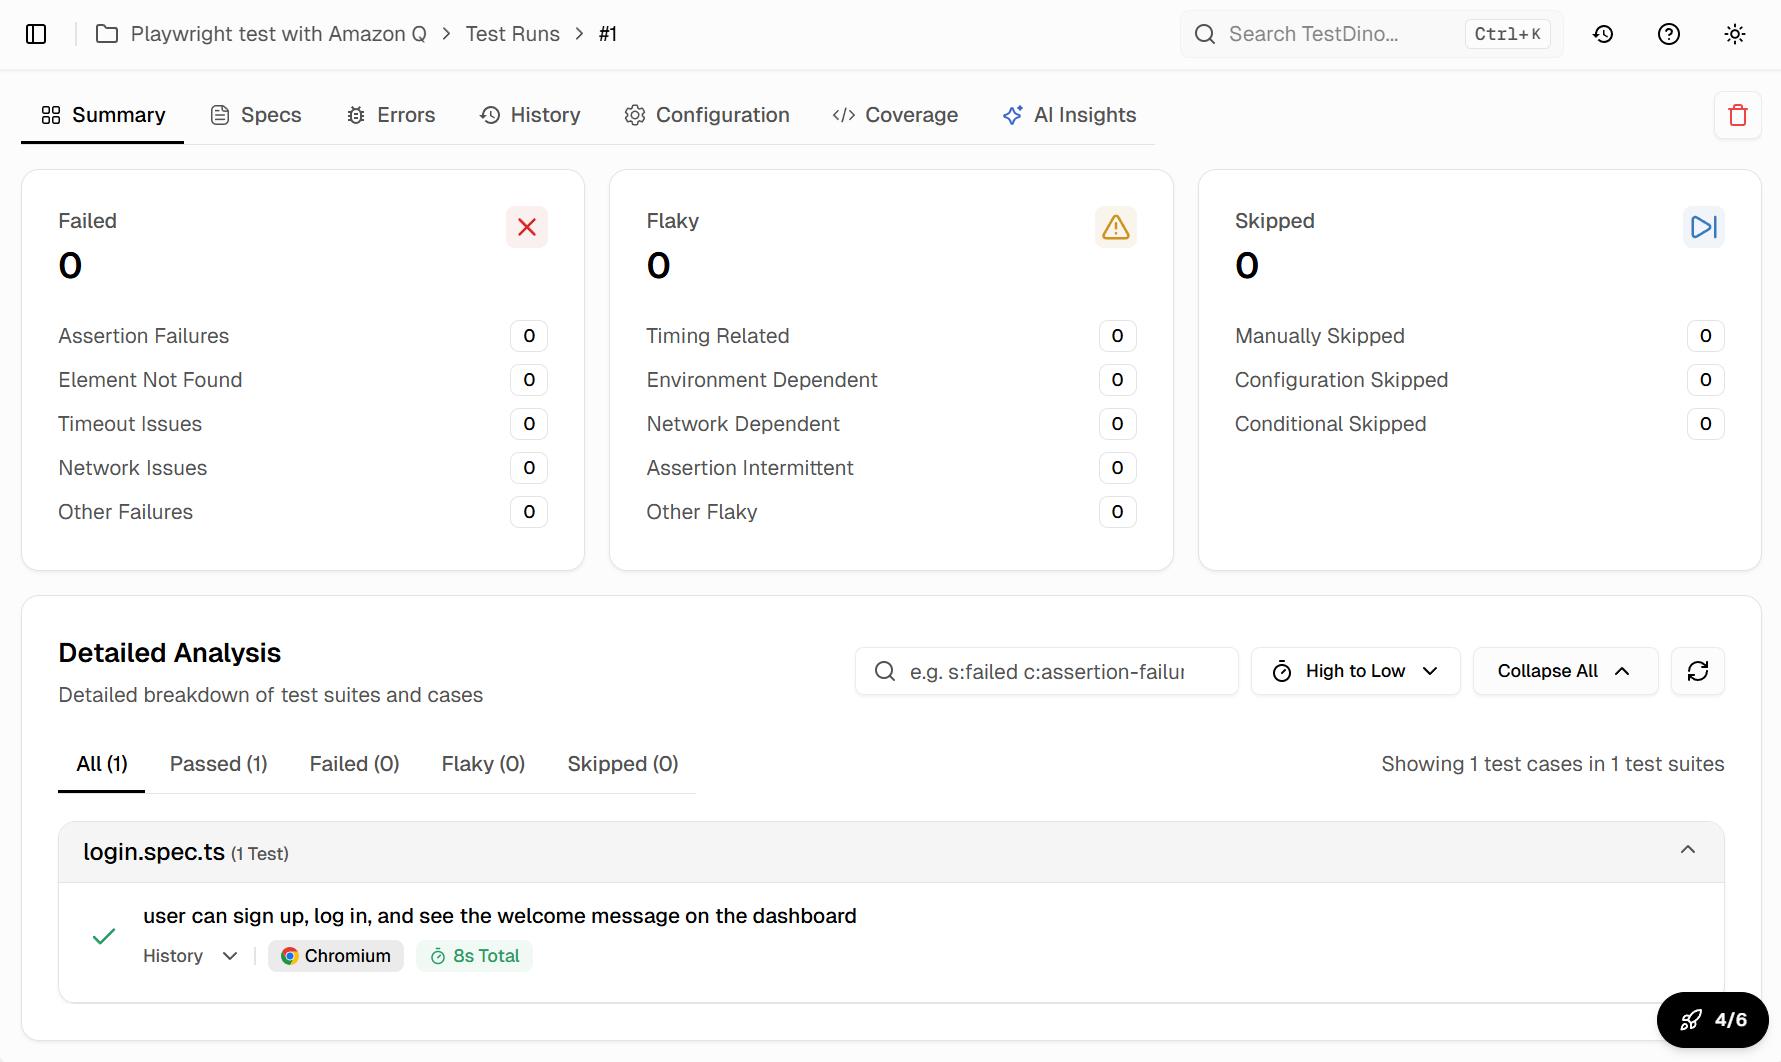
Reading the TestDino dashboard
After a run completes, the TestDino dashboard shows:
- Pass/fail summary: Total tests, passed, failed, skipped, flaky
- Failure groups: Tests that fail for the same reason are grouped together
- AI insights: Each failure group gets an AI-generated root cause analysis
- Trend charts: Pass rates and flake rates over time
- Trace viewer: Full Playwright trace for each failed test
This level of test reporting goes far beyond what the built-in HTML reporter provides.
Adding TestDino annotations to tests
You can enrich your test metadata with Playwright annotations that TestDino processes:
// tests/checkout.spec.ts
import { test, expect } from '@playwright/test';

test('complete checkout flow', async ({ page }) => {
  test.info().annotations.push(
    { type: 'testdino:priority', description: 'P0' },
    { type: 'testdino:feature', description: 'checkout' },
    { type: 'testdino:owner', description: 'qa-team' }
  );

  await page.goto('/products');
  await page.getByRole('button', { name: 'Add to Cart' }).first().click();
  await page.getByRole('link', { name: 'Cart' }).click();
  await page.getByRole('button', { name: 'Checkout' }).click();

  await expect(page.getByText('Order confirmed')).toBeVisible();
});
These annotations appear in the TestDino UI, enabling filtering by priority, feature, or owner.
Fixing failing and flaky tests with Amazon Q
When tests fail, the natural instinct is to open the spec file and start debugging manually. Amazon Q offers a faster path when combined with the right context.
Using Amazon Q to diagnose failures
After running tests with npx playwright test --config=testdino.config.ts, copy the error output from the terminal or the TestDino dashboard. Paste it into the Amazon Q chat:
This Playwright test is failing:

Error: Timed out 5000ms waiting for expect(locator).toBeVisible()
Locator: getByRole('heading', { name: 'Dashboard' })

The page currently shows a loading spinner. What could be wrong
and how should I fix the test?
Amazon Q will analyze the error and suggest fixes like:
- Adding a waitFor for a network request to complete
- Adjusting the locator to match the actual page structure
- Using expect(locator).toBeVisible({{ timeout: 10000 }}) for slow pages
Fixing flaky tests with MCP context
Flaky tests are tests that pass sometimes and fail other times. They are one of the most frustrating problems in test automation.
When you spot a flaky test in the TestDino dashboard, ask Amazon Q to investigate with MCP:
The test "checkout flow" in tests/checkout.spec.ts is flaky.
It fails about 30% of the time with a timeout on the order confirmation page.

Use Playwright MCP to:
1. Navigate to the checkout page on https://storedemo.cms.testdino.com
2. Complete the checkout flow
3. Observe the page behavior after clicking "Place Order"
4. Suggest a fix for the timing issue
Amazon Q will:
- Run through the flow in a real browser
- Observe the actual page transitions and timings
- Identify where the delay happens
- Suggest a targeted fix, like waiting for a specific API response
Avoiding common Playwright mistakes like hard-coded waits and non-deterministic selectors is the first step. Amazon Q with MCP catches these issues before they make it to your codebase.
Using the TestDino MCP server for deeper context
TestDino also provides an MCP server that Amazon Q can connect to. This gives the AI access to:
- Historical test results
- Failure patterns across runs
- Flake rate trends
- AI-generated fix suggestions from past failures
Add it to your MCP configuration:
{
  "mcpServers": {
    "playwright": {
      "command": "npx",
      "args": ["@playwright/mcp@latest"]
    },
    "testdino": {
      "command": "npx",
      "args": ["@testdino/mcp@latest"],
      "env": {
        "TESTDINO_API_TOKEN": "${TESTDINO_API_TOKEN}"
      }
    }
  }
}
Now Amazon Q can pull failure history from TestDino and combine it with live browser context from Playwright MCP. This is the most effective way to fix tests that have been failing intermittently.
Teams using tools like Cursor for Playwright testing or Codex for Playwright test generation follow a similar MCP-first approach. The concept works across all MCP-compatible tools.

Conclusion
Amazon Q Developer brings AI-powered test generation directly into your existing VS Code workflow. By connecting Playwright MCP, it writes tests from actual browser state instead of imagination. By adding project rules, it follows your team's coding standards automatically.
The setup takes about 15 minutes. Install the extension, create the MCP config, add your rules, and start generating. The tests come out with stable locators and proper assertions from the first pass.
Running those tests through TestDino adds the reporting layer that default Playwright reporters lack. You get flaky test detection, failure grouping, AI-driven root cause analysis, and historical trend tracking.
When tests break, Amazon Q with dual MCP connections (Playwright + TestDino) gives you the fastest path to a fix. The AI sees what the page looks like now and what the failure pattern has been over time.
Whether you are an SDET building a test suite from scratch or a developer adding tests to an existing project, Amazon Q Developer paired with TestDino provides a practical, AI-assisted workflow that scales with your test coverage needs.
FAQs

Dhruv Rai
Product & Growth Engineer